The baseboard uses for decorating lower part of the interior wall of the house. It covers where wall and floor joints. It gives you a luxury look in your room. It is usually made of wood, but now PVC baseboards are also available in the market. Although wooden baseboard is the most popular and convenient to use. People are always asking how to nail the baseboard with a hammer?
To nail the baseboard with a hammer, the wooden baseboard is perfect for it. Otherwise, hammer can damage the baseboard. Today we are talking about wooden baseboards. It is available in many designs and helps to create an eye-catching look for your interior wall. Here we will tell you all the tips and tricks that will help you get amazing results from your work.
Major Issues:
Table of Contents
To install baseboard, people face some significant issues. The major issues we found about baseboard installation are-
· Can I do baseboard installation by myself
· How to pick right baseboard
· How much it cost to install
· What should be the proper measurement
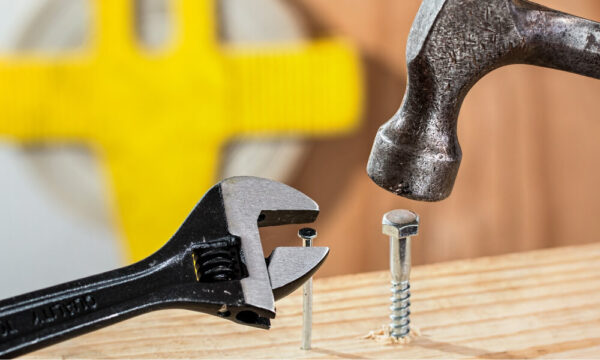
· Why hammer is better to do this job
· What equipment is needed
· How to color it
If you are also thinking about these issues, then congratulation, you are in the right place. We will explain all steps, major concerns, and additional tips and tricks to take your work at a premium level. We help you to solve your major obstacles. The solutions are in the steps so that It clears your doubts and understands the facts easily.

Steps to Install Baseboard:
It will be easy if we divided our total installation work into three sections such as section A, section B and Section C. All the preparations that need to be done before installing the baseboard will be in section A, the tasks that need to be done in install the baseboard will be in section B and tasks that need to be done after install will be Section C.
Section A
Step 1. Have a mindset to work: This part is the first step where you need to have a thorough knowledge of this subject. We give you an overview idea of this topic.
- What kind of material to take and their prices: Different types of baseboards are available in the market. Its price depends on product design and the material from which it is made. We will share product names and prices for your convenience. For 8 feet, PVC baseboard trim price is around USD10, and a similar size and design wooden baseboard price is around USD 25 to USD 35. For 4 feet, PVC cap and shoe molding price is around USD 6, and a similar size and design wooden cap and shoe molding price is around USD 10 and more. Based on world date, most of the homeowner spend USD 676 to USD 1,758. If you do it by yourself, then you may need safe some.
- Which will be better for you: Basically, it varies on your budget and taste. In the wooden section, pinewood is the most affordable and suitable for the decoration of your wall. You can use it another interior design also. It is also flexible to paint, stain, and resisting moisture. If you don’t have any budget issues, you must go to Oakwood. It is the most popular and famous for a luxurious look. It is very hardwood compare to pinewood, and it lasts for a long time.
Now you may think, can you do baseboard installation by yourself? The answer is yes. You can install the whole by your-self to follow these steps. Any task becomes difficult due to a lack of proper guidelines. So, we will provide you the instructions sequentially. You just follow these steps and enjoy your work.
Step 2. The wall’s condition needs to be checked: After the first step now, you have to check the condition of the wall. To install the baseboard, the wall must be dry. Dam wall hampers the board, and the nails do not stick well on dam walls. If you have dam wall issues, then repair the walls first.
Step 3. Need to pick right baseboard size: It is available in many sizes. To get the right baseboard size, you have to measure the room wall length and height and write it down in a paper. Then try to match the height with the following guidelines. It is the most useable guideline to find the right size.
Measurement guidelines:
| No. | Wall height | Baseboard height |
| 1 | 8 Feet | 3-5 Inches |
| 2 | 9 Feet | 4-6 inches |
| 3 | 10 Feet | 5-7 inches |
| 4 | 12 Feet | 6-8 inches |
| 5 | 14 Feet | 7-9 inches |
If you have a higher wall than this chart, you have to follow the pattern and find the right size.
Step 4. Take the necessary equipment for work: The right tools make your job a lot easier and save your time. Using the right tools at the right time will free you from many complications and give you the gift of error-less finishing. For that, you must be aware of the use of your tools.
The list of tools:
| 1) Tape measure-25 foot 2) Compass 3) Miter saw 4) Coping Saw 5) Level- 4 foot 6) Circular saw | 7) Chalk line 8) Hammer and Nail Gun 9) Nailset and 1.5-inch nails 10) Wood Putty and Glue 11) Tape and sandpaper 12) Color and brush |
Some additional tools you may buy, such as biscuit joiner, Block plane, etc.
Section B
Step 5. Measure the wall and mark: First use the tape to measure the wall length and corners. Then mark on the wall and baseboard with pencil or chalk. Give a specific number for both walls and baseboards. So, the baseboard will not change with another wall.
Step 6. Check the floor level: Set the 4-foot level on the floor and wall joint and check whether the floor is level or not? Find the lowest point of your floor and measure the gap with a compass to make it level. You can fill it with the scrap piece of baseboard.
Step 7. Cut board trims and prepare corners: Now use the circular saw to cut the baseboard. You will need to cut the Baseboards according to the size of the walls. For making corners, you need to use the miter saw. The angel of the wall is usually 90 degrees. So, cut each piece in 45 degrees. For the inner corner, we have to cut the opposite side.
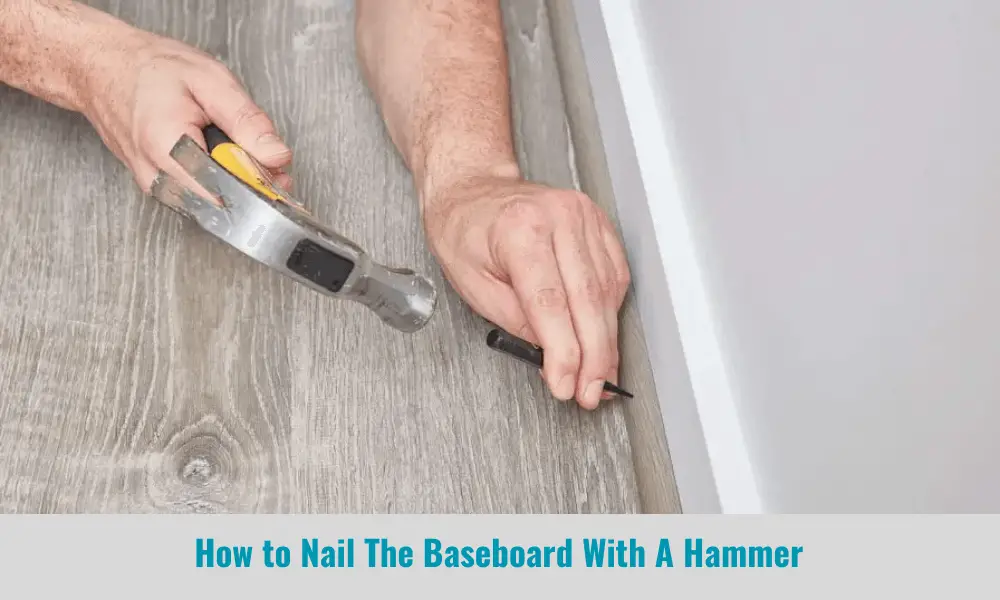
Step 8. Nail the baseboard and moldings with a hammer: Set the right board and moldings in the right wall and nail it with a nail gun or hammer. Use 8d finish nails to nail the board. It is very important to know how to nail the board with a hammer.
First, chose the point where you nail the nails, then you can use a nail gun or use a hammer to nail the board and joint the corners. Remember, do not nail the middle on the board, use both sides.
After that, you have to do an additional task for better results. Use the nail set and again hit on the nail head. The nailhead will go below the board surface.
Section C
Step 9. Fill the nail head: Now use the wood putty on the nails head to hide the nail heads. It will give you a smooth look. To fill the nails head, you can use spackle, patch plus or min wax wood putty.
Step 10. Sand and glue all install parts properly: After installing the baseboard and moldings now, the sand time. Before the color sand, the nails dry fillers and make it the same level of baseboard surface so that no one can find the nails position. Then use glue on the cap moldings and shoe moldings.
Step 12. Use tap for both wall and floor: After the sand now clean the boards with a cloth and tape the wall and the floor, this will help you paint easily and don’t spoil your wall and floor.
Step 13. Paint the baseboard, cap, and shoe molding: the final task to color the baseboard with your favorite color. Use an excellent kneeling pad and paint the baseboard and moldings gently. Try to paint two coats for a perfect look.
How to install a baseboard Using A Hammer and Nails
Can you hammer in nails for a trim?
Yes, you can use a brad nailer to attach the trim. A brad nailer is a tool that drives small nails (brads) into thin pieces of wood. It can be used for a variety of tasks, such as attaching trim, molding, or paneling.
The advantage of using a brad nailer is that it’s easy to control the depth and placement of the nails. This makes it less likely that you’ll damage the surrounding surface when you’re nailing in trim. Additionally, because brads are smaller than regular nails, they’re less likely to split the wood when they’re driven in.
What angle do you Miter baseboard corners?
When installing baseboards, the mitered corner is the most common and easiest type of corner to install. To create a mitered corner, you need to cut both pieces of the baseboard at a 45-degree angle.
Once you have cut the two pieces of baseboard at a 45-degree angle, you will need to fit them together like a puzzle piece. The key to fitting them together is making sure that the bevels on each piece of baseboard are facing in the same direction. Once they are fitted together correctly, use wood glue and finish nails to attach them to the wall.
Should you glue baseboards before nailing?
It is best to first glue the baseboards and then nail them in place. This will help hide the nail hole and give your baseboard a clean, professional look.
When nailing baseboards, you should always angle the nails in at a 45-degree angle. This will help secure the baseboard to the wall and prevent it from falling off. Also, make sure that you drive the nails all the way in so that they are flush with the surface of the baseboard.
Conclusion:
For many years, people are using baseboards to decorate their home interior. It will change the look of your room. We mention all the steps sequentially for them, who want to install the baseboard themselves. I hope that these steps keep them on the right track at work.

- 12 Inch Wood Planer: Smooth Your Woodworking Projects Like a Pro - 01/10/2023
- Table Saw Blade: Unleash the Cutting Power - 22/09/2023
- Vintage Table Saw: Uncover the Unparalleled Power - 22/09/2023
