Loading a brad nailer is a simple 3-step process. First, ensure the device is unplugged or disconnected from the air supply.
Then, open the magazine and insert the nails, ensuring they are aligned correctly. Brad nailers are handy devices ideal for fastening trim and molding. They are lightweight and easy to operate. Unlike some other pneumatic tools, they don’t require a high level of skill to operate, making them perfect for diy enthusiasts. You must always, however, take safety measures seriously when using any power tool.
Before loading the brads, ensure the gun is switched off and disconnected from the air (if pneumatic). Open the magazine and insert the brads, ensuring the heads are positioned correctly. Close the magazine and reattach to the power source before firing the tool.
:max_bytes(150000):strip_icc()/nail-gun-on-a-wood-background-470331940-59644ba6747b45c39f3f3544e27a9a95.jpg)
Credit: www.thespruce.com
Why It’S Important To Learn How To Load A Brad Nailer
Table of Contents
Loading a brad nailer is an essential skill that every diyer and professional woodworker should master. The brad nailer is a powerful tool that can help you save time and produce high-quality work. However, it can also be dangerous if not used correctly.
That’s why it’s important to learn how to load a brad nailer properly.
Prevents Accidents And Injuries
Loading a brad nailer incorrectly can lead to accidents and injuries.
- The nails can jam in the gun, causing the user to apply more force, which can result in the tool accidentally firing.
- The brad nailer can accidentally discharge if the nail is not loaded correctly.
- Improper handling of the tool can result in a user shooting themselves or another person.
- A nail that is too long for the gun can result in the nail tip protruding from the other side of the wood, causing injury.
Prevents Damage To The Tool
Loading a brad nailer incorrectly can cause damage to the tool.
- Too much force during loading can cause the nose piece of the brad nailer to bend, making it difficult to drive nails straight.
- Nails that are too large can damage the mechanism that drives them.
- Nails that are not held securely in their magazine can cause the driver to push two nails down into the material at once.
Ensures Proper Function Of The Tool
Learning how to properly load a brad nailer ensures that the tool functions as intended.
- Proper loading helps to avoid jams, which can save time and money on repairs.
- Correctly sizing the nails will help to ensure that the project is completed to a high-quality standard.
- Proper loading can also help to extend the lifespan of the tool by avoiding damage.
Learning how to load a brad nailer properly is crucial to ensuring personal safety, preserving the tool’s longevity, and delivering high-quality work. Follow the manufacturer’s guidelines carefully and practice loading repeatedly to make sure you have a good grasp of the skill before tackling your first project.
With these tips in mind, you’ll be able to use your brad nailer efficiently and effectively.
Understand The Parts Of A Brad Nailer
Body
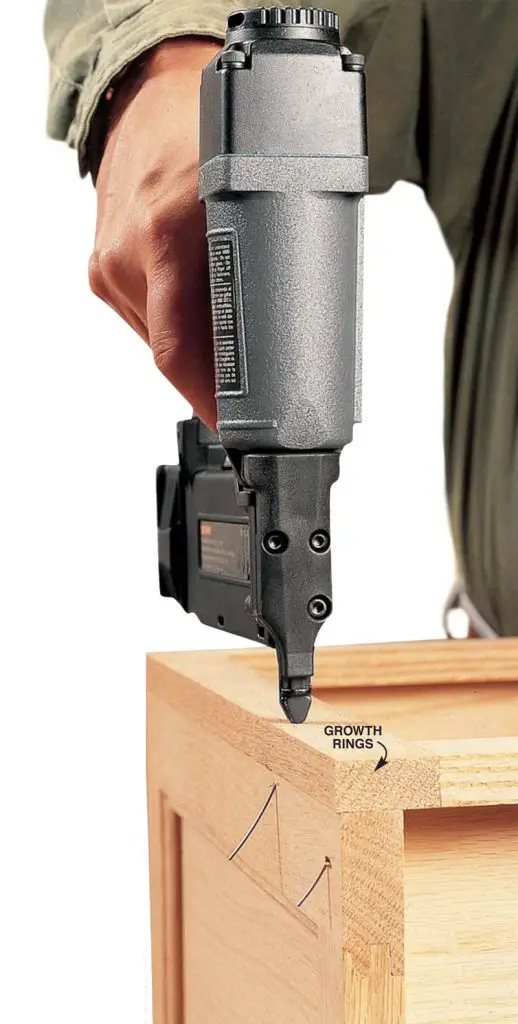
A brad nailer is a type of tool that drives thin brad nails into wood without leaving marks. They are lightweight, easy to use, and ideal for a range of diy tasks. The body of a brad nailer comprises several parts that work in tandem to ensure perfect performance.
- Handle: the location where the user holds the tool.
- Nosepiece: this part of the tool contacts the workpiece, allowing the brad nailer to deliver the brad nails accurately.
- Depth adjustment: allows you to set the depth of the brad nailer drive.
- Trigger: it is part of the body of a brad nailer, and this helps control the discharge of the brad nail.
Magazine
The magazine of a brad nailer is responsible for storing the brad nails before they get fired. The loading process requires precision and accuracy to ensure proper alignment and avoid jamming.
Here are a few points to guide you:
- First, ensure that the brad nailer is not connected to any power source.
- Open the magazine door or slide to expose the brad nail chamber.
- Keep the chamber clean from any debris or nails.
- Line up the nose contact of the brad nailer with the nail chamber.
- Make sure the nails are aligned in the magazine and not sticking out.
- Once you have placed the nails, close the magazine door or slide securely.
Loading Mechanism
After you have placed the brad nails in the magazine, you must ensure that the loading mechanism is working correctly. A proper loading mechanism is essential for the effective delivery of brad nails.
- Close and lock the magazine after loading the brad nails.
- Rack the slide or follow the instructions to ensure the brad nails are in place.
- Check that the loading mechanism is working smoothly every time you load nails.
Trigger
The trigger of a brad nailer controls when the tool discharges the nail.
- Single sequential trigger: requires the user to press the tip of the nailer against the workpiece before they press down on the trigger.
- Contact or bump trigger: allows the user to keep the trigger depressed, and as long as the nailer makes contact with the workpiece, it will drive the nail.
Ensure that you are using the right trigger function for the job at hand. Also, remember to keep your fingers off the trigger until the tool is in position and ready to use.
By understanding the different parts of a brad nailer, you can get the most out of your tool and ensure safe, effective use.
6 Nail Gun Mistakes You Should Avoid | Brad Nailer Tips
Identify The Type Of Brad Nailer
Pneumatic
A pneumatic brad nailer is the most widely used type of brad nailer, and it is powered by compressed air.
- Disconnect the air hose from the nailer.
- Open the magazine by sliding the latch or pressing the release button.
- Load the brads with the heads facing up and the points facing down.
- Close the magazine and snap the latch back into place.
- Reconnect the air hose and test the tool.
Electric
Electric brad nailers, as the name implies, are powered by electricity.
- Unplug the nailer from the power source.
- Slide the magazine button to release the magazine.
- Load the brads with the heads pointing upward and push them into the magazine.
- Push the magazine back into place until it clicks.
Cordless
A cordless brad nailer is battery-powered, making it more powerful and easier to handle.
- Remove the battery from the nailer.
- Find the release lever or button and press it to open the magazine.
- Load the brads with the heads facing up and the points facing down.
- Close the magazine and snap the release lever back into place.
- Reinsert the battery and test the tool.
Remember to check the manufacturer’s instructions for your specific model before attempting to load a brad nailer. Follow these guidelines and load your brad nailer properly to ensure successful and safe outcomes for your projects.
Steps To Load A Pneumatic Brad Nailer
A pneumatic brad nailer is a tool used to fasten thin wood materials together. It is a popular choice due to its precision and efficiency. However, using a brad nailer requires proper handling and maintenance. Loading the nailer with brads is one of the basic steps to ensure it functions correctly.
Step 1: Prepare The Brad Nailer
Before loading the brads, ensure that the brad nailer is turned off, disconnected from the air compressor and disengaged from the trigger. This way, you can prevent accidents and injury from the nailer firing randomly.
Step 2: Identify The Loaded Brad Type And Size
Pneumatic brad nailers work with different sizes of brads. Take a look at the owner’s manual or the manufacturer’s website to determine the compatible brads.
Step 3: Open The Brad Magazine
Most brad nailers have a magazine, which holds the brads. Press the magazine release button or latch (depending on the model) to open it. Carefully read the owner’s manual to know how to access the magazine.
Step 4: Load The Brads
Insert the brads into the magazine, with the sharp end facing down. Make sure the brads fit correctly in the slot and do not tilt. Fill the magazine to capacity, but do not overfill to avoid jamming. Finally, close the magazine and secure it with the magazine release button or latch.
Step 5: Re-Engage The Trigger
After loading the brads, re-engage the trigger to reactivate the brad nailer. Attach the tool to the air compressor, and turn it on. You are ready to start using your pneumatic brad nailer.
Takeaways
Loading a pneumatic brad nailer should be approached with care and caution.
- Prepare the brad nailer by turning it off and disconnecting it from the air compressor.
- Identify the compatible brads by checking the owner’s manual or the manufacturer’s website.
- Open the brad magazine, following the instructions in the owner’s manual.
- Load the brads into the magazine, ensuring they fit correctly and do not tilt.
- Re-engage the trigger and attach the tool to the air compressor.
By following these simple steps, you can functionally use your pneumatic brad nailer.
Steps To Load An Electric Brad Nailer
If you’re working on a diy project, a brad nailer is an essential tool that can make your job much easier. Electric brad nailers are more powerful than their manual counterparts, and they’re much easier to use. But like any tool, they can be dangerous, so it’s essential to take proper precautions and learn how to use them correctly.
Here are the steps you need to follow to load an electric brad nailer correctly.
Step 1: Read The Manual
Before you begin, make sure you read your brad nailer’s user manual carefully. The manual will tell you everything you need to know about your tool, including how to load it correctly. It will also help you understand how to use your tool safely and efficiently.
Step 2: Choose The Right Size Of Brad Nails
Brad nailers typically take brad nails that are between 5/8 and 2 inches long. Choose the right size of brad nails for your project, so they fit snugly without damaging the surface of the material you’re nailing.
Step 3: Turn Off The Power
Before you load your brad nailer, turn off the power to the tool. This will help prevent accidental discharge while you’re loading the brads.
Step 4: Open The Magazine
Next, open the magazine on your brad nailer. The magazine is the part of the tool that holds the brads. To open it, push the magazine release button and pull down the magazine cover.
Step 5: Load The Brads
Once the magazine is open, you can begin to load the brads. Insert them into the magazine’s slot one at a time, with the pointy end of the brad facing downwards. Make sure not to overload the magazine, as this can cause the tool to jam.
Step 6: Close The Magazine
Once you’ve loaded the brads into the magazine, close the magazine cover and lock it into place. Make sure it’s secure and in place to avoid any accidents.
Step 7: Test The Brad Nailer
Finally, it’s time to test your brad nailer. Point the tool at the material you’re nailing and press the trigger. If the brad nailer fires a brad correctly, you’re good to go. If not, double-check that the magazine is loaded correctly, and the tool is securely locked in place.
Following these simple steps will ensure that you load your electric brad nailer correctly and safely. Always remember to wear the necessary protective equipment, such as safety glasses and earplugs, while using power tools.
Tips For Loading A Brad Nailer Safely And Efficiently
Brad nailers are a versatile and reliable tool that can help you make quick work of nailing tasks around your home or work site. However, loading a brad nail gun is a crucial step that needs to be done properly to ensure both your safety and the efficiency of the tool.
In this section, we will discuss some tips for loading a brad nailer safely and efficiently.
Wear Protective Gear
Wearing protective gear is crucial when working with any power tools.
- Safety glasses
- Gloves
- Earplugs (if necessary)
Keep Your Fingers Away From The Trigger
It’s essential to keep your fingers away from the trigger when loading a brad nailer. Accidentally pulling the trigger can result in an accidental discharge of the brad nailer.
- Keep your fingers behind the trigger guard.
- Always assume the nailer is loaded.
- Keep your finger off the trigger until you’re ready to fire.
Use The Right Type And Size Of Brads
Using the right type and size of brads is essential for proper brad nailer operation. The size of brads will depend on the job, but always make sure you are using a brad size that your nailer is rated for.
- Check the brad size requirements specified in the brad nailer manufacturer’s manual.
- Choose brads that are suitable for the material you’re nailing.
- Avoid using damaged or corroded brads.
Keep The Tool Clean And Lubricated
Maintaining your brad nailer is essential for its longevity and efficient operation. A clean and lubricated tool will help you avoid malfunctions and other issues.
- Use an air compressor or a brush to remove any dust, debris or dirt in and around the nailer.
- Keep the nailer lubricated to reduce wear and tear while ensuring smooth operation.
By following the tips mentioned above, you can load your brad nailer safely and efficiently, reducing the risk of injury and enhancing your output. With the proper setup, you can confidently tackle any job, whether it’s diy projects or professional work.
Remember to prioritize your safety and follow manufacturer’s directions at all times when operating a brad nailer.
Frequently Asked Questions On How To Load A Brad Nailer
How Do I Know When To Load A Nailer?
To load a brad nailer, first check the user manual to identify the appropriate nail size. Then, remove any existing nails from the nailer and insert the new nails into the magazine. Finally, close the magazine and test fire a few nails to ensure proper loading.
How Do I Load A Brad Nailer Safely?
To load a brad nailer safely, always disconnect the air supply and avoid positioning your hand near the area where the nail will be fired. Additionally, be sure to wear appropriate safety equipment, such as goggles or ear plugs, to protect against flying debris and loud noises.
What Are The Different Types Of Nails I Can Use With A Brad Nailer?
Brads are thin, 18-gauge nails that can be used for delicate woodworking projects and finishing work. Brad nailers typically accept nail lengths between 5/8″ and 2-1/8″, but be sure to consult your user manual to determine the appropriate nail size for your project.
Can I Use Other Types Of Nails With A Brad Nailer?
It is not recommended to use other types of nails with a brad nailer, as they may not fit properly or could cause the nailer to malfunction. Always consult your user manual and use only the recommended nail types and sizes.
Conclusion
Loading a brad nailer may seem like a daunting task, but with the right knowledge and technique, it can be a quick and easy process. Make sure to always consult your user manual for specific instructions and safety precautions. Additionally, keep in mind the type and size of brad nails you are using to ensure proper loading.
Remember to always disconnect the power source and release any remaining nails before attempting to load a new strip. A properly loaded brad nailer will ensure clean and efficient nail placement in your woodworking projects. With practice, loading your brad nailer will become second nature and you’ll be able to focus on your project with ease knowing you have done it correctly.