If you’re a woodworker, you know that a wood planer is an essential tool for creating smooth, flat surfaces on rough lumber. But using a planer can be intimidating, especially if you’re new to woodworking. In this guide, we’ll walk you through everything you need to know to use a wood planer like a pro.
Definition of a Wood Planer
Table of Contents
A wood planer is a machine that shaves off small amounts of wood from the surface of a board, making it smooth and even. Planers come in all shapes and sizes, from handheld models to large industrial machines.
Overview of Benefits of Using a Wood Planer
Using a wood planer offers several benefits for woodworkers:
- It saves time compared to sanding by hand.
- It creates a smooth, flat surface that’s perfect for joining pieces of wood together.
- It can be used to thickness boards to a specific size.
Step-by-Step Instructions
Step 1: Choose the Right Type of Wood Planer
There are three main types of wood planers:
Handheld Planer
A handheld planer is a small, handheld tool that’s perfect for small jobs or for working on site. It’s easy to use and relatively inexpensive, but it’s not as precise as other types of planers.
Benchtop Planer
A benchtop planer is a larger, stationary machine that’s perfect for small to medium-sized woodworking projects. It offers better precision than a handheld planer and can handle larger pieces of wood.
Jointer Planer
A jointer planer is a large, industrial machine that’s designed for heavy-duty use. It can handle large pieces of wood and offers the best precision of any type of planer. However, it’s also the most expensive and takes up the most space.
Step 2: Understand the Different Parts of Your Planer
Before you start using your planer, it’s important to understand how it works and what each part does:
Cutterhead
The cutterhead is the part of the planer that spins and shaves off wood from the surface of the board. It’s important to keep the blades sharp and properly aligned for optimal performance.
Infeed and Outfeed Tables
The infeed table is the part of the planer where you place the board to be planed, while the outfeed table supports the board as it exits the planer. It’s important to keep both tables level to ensure consistent results.
Dust Collection System
Most planers come with a dust collection system that helps to keep sawdust and debris from building up inside the machine. Make sure to empty the dust collection bag regularly to prevent clogs and maintain optimal performance.
Step 3: Prepare Your Wood
Before you start planing, it’s important to prepare your wood:
Check for Nails or Other Debris
Make sure your board is free of any nails or other debris that could damage the blades or cause a safety hazard.
Secure the Wood
Use clamps or other methods to secure the board firmly to the infeed table to prevent it from shifting during planing.
Set the Depth of Cut
Adjust the depth of cut according to the thickness of your board and the amount of material you want to remove with each pass.
Step 4: Use the Planer
Now it’s time to start planing:
Start with the Infeed Table
Turn on the planer and slowly feed the board into the infeed table. Keep your hands clear of the blades and use a push stick if necessary.
Move the Wood Slowly and Smoothly
As the board moves through the planer, use steady pressure to guide it through. Keep your eyes on the board to make sure it stays level and doesn’t wobble or twist.
Finish with the Outfeed Table
As the board exits the planer, make sure to support it on the outfeed table to prevent it from sagging or dropping.
Step 5: Clean Up After Planing
After you’re finished planing, it’s important to clean up:
Dispose of Sawdust
Empty the dust collection bag and dispose of the sawdust in a safe and appropriate manner.
Maintain Blades and Other Parts
Clean and lubricate the threaded columns, level the tables with the bed, and wax the bed for friction-free feeding. Check out planer maintenance videos for a more in-depth look at tuning up your planer.
Store Your Planer Properly
When you’re finished using your planer, make sure to store it in a clean, dry place where it won’t be damaged or exposed to moisture or dust.
Conclusion
Using a wood planer can seem intimidating at first, but with the right tools and techniques, anyone can achieve professional-level results. By following these step-by-step instructions and taking good care of your planer, you’ll be able to create smooth, flat surfaces on rough lumber and take your woodworking projects to the next level.
Expert Assistance
If you have any questions that aren’t answered here, don’t hesitate to reach out to expert staff in our stores, online and available by phone to help out.
Stand tall with infeed and outfeed stands
One way to make your planning experience even better is to invest in infeed and outfeed stands. These sturdy supports will help you to keep your boards level and reduce the risk of snipe. They’re also great for working with longer boards that might otherwise sag or droop during planning.
Protect Your Hearing and Hands
When using a planer, it’s important to protect your hearing and hands. Planers are loud machines, so always wear ear protection when operating them. Additionally, use gloves to fend off splinters and eye protection to prevent sawdust from getting in your eyes.
Planer Tip
For a simple, fast solution that’s great for jobsite work, you can bolt the planer to a piece of 3/4″ plywood, and then clamp the plywood to a pair of sturdy sawhorses on site. You can use this trick in your shop, too, by clamping the plywood to your workbench, provided the bench is on casters and can be positioned properly.
Lower the Cutterhead Beyond Your Desired Depth of Cut
Lower the cutterhead beyond your desired depth of cut, and then raise it into position. This step helps to reduce snipe—a slight gouge on the ends of boards—by taking up the slack in the cutterhead adjustment threads.
Maintain Your Blades for Best Results
Your planer blades are critical to achievingsmooth, even results. Make sure to keep them sharp and properly aligned for optimal performance. It’s also important to periodically replace the blades as they wear down over time. Sharp blades not only provide better results but can also help to reduce the amount of effort required to push the wood through the planer.
Planer Maintenance is Key
Just like any power tool, your planer will run better with a little tender loving care. Regularly clean and lubricate the threaded columns, level the tables with the bed, and wax the bed for friction-free feeding. By performing regular maintenance, you’ll ensure that your planer operates smoothly and efficiently, giving you the best results every time.
Practice Makes Perfect
As with any woodworking skill, practice is key to mastering the use of a wood planer. Start with smaller, less critical projects to develop your technique and gain confidence in your planer skills. As you gain experience, you’ll find that using a wood planer becomes second nature and an essential part of your woodworking process.
Additional Accessories Can Enhance Your Planing Experience
There are a variety of accessories available that can make your planing experience even better. For example, consider investing in a digital readout for your planer, which can provide precise measurements for your depth of cut. Additionally, some planers offer optional helical cutterheads, which can provide a smoother cut and longer-lasting blade life.
Know When to Plane and When Not To
While wood planers can work wonders on rough lumber, it’s important to know when to use them and when not to. In some cases, it may be more efficient or appropriate to use a hand plane or a sander instead of a machine planer. Understanding the limitations of your planer and when to use alternative methods will make you a more versatile woodworker.
Remember Safety First
Woodworking can be a fun and rewarding hobby, but it’s also important to remember that safety comes first. Always wear appropriate personal protective equipment (PPE) like ear protection, gloves, and eye protection when using your wood planer. Additionally, make sure to follow all manufacturer guidelines for proper use and maintenance of your planer to prevent accidents and injuries.
Join a Woodworking Community
One great way to learn more about using a wood planer and other woodworking techniques is to join a local woodworking club or online community. These groups can provide valuable advice, support, and inspiration as you work on your projects. Plus, you’ll have the opportunity to share your own experiences and knowledge with fellow woodworkers.
Conclusion
Using a wood planer can help you create smooth, even surfaces on rough lumber and take your woodworking projects to new heights. By understanding the different types of planers, their components, and how to use them safely and effectively, you can become a planing pro in no time. Don’t forget to reach out to expert staff if you have any questions, and always practice safe woodworking habits. Happy planing!
5 Quick Thickness Planer Hacks – Woodworking Tips and Tricks
How Do You Use a Planer Step by Step?
Assuming you would like tips on how to use a hand planer: A hand planer can be a great tool for quickly removing small amounts of wood from a piece. Here are some tips on how to use one:
1. Start by ensuring that the blade on your planer is sharp. A dull blade will tear the wood instead of cutting it cleanly and can also be dangerous. 2. Set the depth of cut for your planer by adjusting the knob at the top of the tool.
For most projects, a depth of 1/16 inch is sufficient. 3. Place your workpiece against the fence (the flat surface on one side of the blade) and hold it firmly in place with one hand. 4. With your other hand, slowly push the planer forward, letting the blade do its work.
Keep your hands close to the body of the tool so that they don’t get caught in front of the blade if it kicks back suddenly.
5a). As you’re working, periodically check both sides of your piece to make sure that you’re achieving an even thickness throughout.
If one side is thinner than the other, adjust accordingly by either holding down that side more firmly or making more passes over it with the planer..
5b) Also check occasionally to see if there are any chips or pieces of wood coming off- if there are, stop and clear them away before continuing.
6) When you’re finished with your passes, turn off the tool and let the blade come to a complete stop before setting it down..
What Three Safety Precautions Should Be Taken When Using Planers?
When using a planer, always wear safety goggles or glasses to protect your eyes from flying debris. In addition, use hearing protection to avoid damage to your ears from the loud noise generated by the tool. Finally, be sure to keep your hands clear of the blades while the machine is running.
How Much Should You Take off With a Planer?
Planers are one of the most versatile tools in a woodworker’s arsenal. They can be used to quickly and easily remove stock from a workpiece, or to create smooth, finished surfaces on both rough and already-planed lumber. But because planers are such powerful machines, it’s important to know how much material to remove when using one.
So, how much should you take off with a planer?In general, you should only remove as much material as necessary to achieve the desired results. If you’re just trying to even out some rough spots on a piece of lumber, for example, you might only need to take off a few thousandths of an inch.
On the other hand, if you’re looking to create a completely smooth surface, you might need to take off more like 1/8” or even 1/4”.Of course, there are no hard-and-fast rules when it comes to how much material to remove with a planer – it all depends on the project at hand and your personal preferences. With that said, here are a few general tips that will help you get the best results:
Start by taking off small amounts of material. It’s always easier (and safer) to remove more material than less, so err on the side of caution when starting out. You can always take off more later if needed; but if you take off too much at once, you could ruin your workpiece entirely.
Pay attention to your blades. The sharper your blades are, the cleaner your cuts will be – which means you won’t have to remove as much material overall. Be sure to keep them sharpened regularly for best results.
How Do You Prevent Tears from a Planer?
If you’re working with a planer, there are a few things you can do to prevent tears. First, make sure the blades are sharp. Second, use a feed rate that’s appropriate for the material you’re working with.
Third, use support blocks to keep the workpiece from bowing or warping. Finally, take care not to overload the planer by feeding it too much material at once. By following these tips, you can help prevent tears when using a planer.
Credit: www.popularwoodworking.com
Planer Safety Rules
Planer Safety Rules Operating a planer can be dangerous if the proper safety precautions are not followed. Here are some basic safety rules to keep in mind when using a planer:
1. Always wear ear protection when operating a planer. The noise level is very high and can damage your hearing over time.
2. Always wear eye protection when operating a planer.
There is a lot of dust and debris generated by the machine and it can cause serious eye injuries if you’re not careful.
3. Keep your hands away from the cutting blades at all times. The blades are extremely sharp and can cause serious cuts or amputations if they come into contact with your skin.
4 . Never try to remove material that is jammed in the planer’s cutting blades. This can be very dangerous and should only be done by trained professionals.
Wood Planer Manual
As anyone who’s worked with wood knows, one of the most important tools in the workshop is the wood planer. A manual wood planer is a tool that’s used to create smooth, level surfaces on rough lumber. The blades on a manual wood planer are adjustable, so you can customize the amount of material you remove from each piece of wood.
There are a few things to keep in mind when using a manual wood planer. First, always make sure that the blades are sharp and properly adjusted before starting to plane any lumber. Second, when feeding lumber into the machine, be sure to do so evenly and smoothly – jerky movements can damage both the blades and the lumber itself.
Finally, take care not to over-plane any single piece of lumber – too much material removed can make it difficult (or even impossible) to achieve a completely level surface.With these tips in mind, operating a manual wood planer is relatively straightforward. And with practice, you’ll be able to produce stunningly smooth finishes on even the roughest pieces of lumber!
How to Plane Wood With Electric Planer
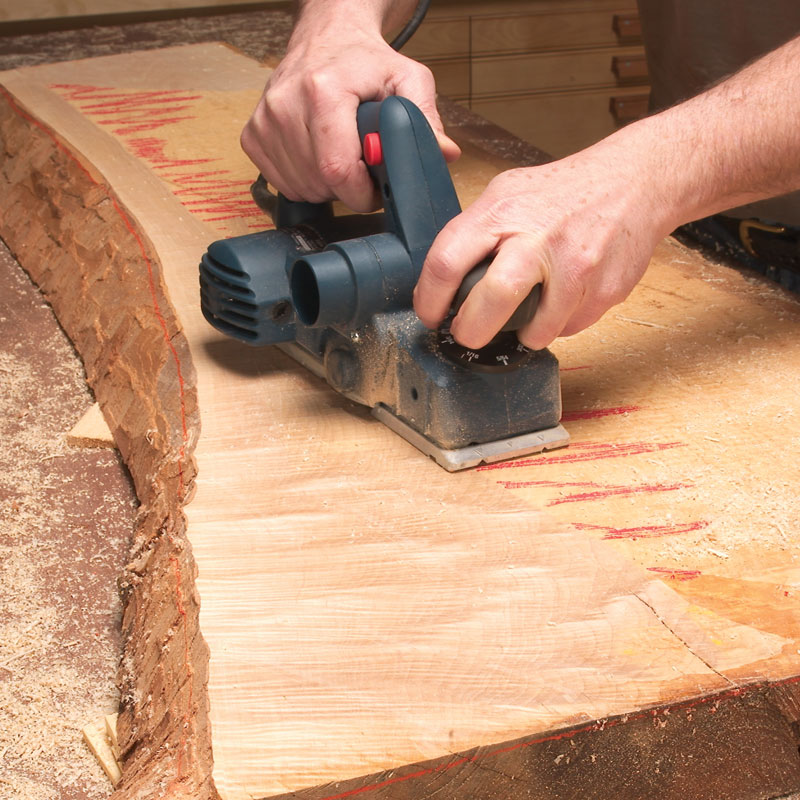
Assuming you would like a blog post discussing how to use an electric planer:An electric hand planer is a tool that can be used to quickly and easily remove small amounts of wood from a piece of lumber. This is done by holding the planer against the wood and moving it back and forth in a motion similar to that of using a hand saw.
There are two main types of electric hand planers: those with blades that rotate in a circle (circular blade planers) and those with blades that move up and down (reciprocating blade planers). Both types of electric hand planers can be effective at removing small amounts of wood, but each has its own advantages and disadvantages.Circular Blade Planers:
Advantages:
-The circular blade on this type of electric hand plane can make for quick work when removing small amounts of wood.
-This type of plane also does a good job at leaving behind a smooth surface.
Disadvantages:
-Because the blades on this type of plane are always spinning, there is a greater risk of kickback if the user accidentally hits a knot or other hard object in the piece of lumber being worked on.
-Circular blade planes also tend to be more expensive than reciprocating blade planes.
Reciprocating Blade Planers: Advantages: -This type of plane is less likely to cause kickback than a circular blade plane because the blades only move up and down, not spin around in circles. -Reciprocating blade planes are typically less expensive than circular blade planes. Disadvantages: -The reciprocating motion of the blades on this type can sometimes leave behind waves or “corn rows” in the surface of the wood being worked on.
-It can also be easy to accidentally remove too much wood with this type of plane if you are not careful.
Conclusion
A wood planer can be a great tool for any woodworker, whether you’re a beginner or a pro. In this blog post, we’ll give you 14 tips for using a wood planer, so you can get the most out of your machine.
1. Always use fresh blades. Dull blades will tear the wood and leave behind uneven surfaces.
2. When setting up your workpiece, make sure that the surface is flat and level. Otherwise, you may end up with an uneven surface after running it through the planer.
3. Be aware of the direction of the grain when feeding your workpiece into the machine. You should always feed it against the grain in order to avoid tearing or damage to the wood.
4. Don’t try to remove too much material at once.
Take multiple passes with shallower cuts in order to avoid damaging your workpiece or leaving behind an uneven surface.