Building a wooden garden bench is a project that can be fun and practical. Here are some tips on how to build a wooden garden bench:1. Choose the right wood for your project.
If you want your bench to last, choose a durable hardwood like teak or cedar. Avoid using softwoods like pine as they will not last as long outdoors.2. Cut the lumber to size according to your plans.
Be sure to use sharp saw blades to get clean, straight cuts.3. Assemble the pieces of your bench using screws or nails and glue or brackets for added stability. Use weather-resistant fasteners if you plan on keeping your bench outdoors all year round.
4 .
- Assuming you have all the necessary tools and materials, building a wooden garden bench is a relatively straightforward process
- Cut your lumber to size
- You will need three pieces of lumber cut to 2’6” lengths, and four pieces cut to 1’10” lengths
- Assemble the sides of the bench by nailing the 2’6” pieces of lumber between the 1’10” pieces, flush with the ends of the shorter boards
- Make sure the boards are level with each other before nailing them together
- Create the seat of the bench by nailing two more 2’6” boards across the open ends of the side assemblies from Step 2
- Again, make sure these boards are level before affixing them in place
- To add stability to your bench, nail a 1′ x 4″ board across the back of both side assemblies and across the back edge of your seat board from Step 3 using 3″ nails or screws driven through pre-drilled holes at regular intervals
$100.00 Outdoor Garden Bench, Build yours on a Saturday Morning #1044
Table of Contents
How Do You Make a Simple Outdoor Wooden Bench?
Assuming you would like a detailed tutorial on how to build a basic wooden bench:Building a Wooden Bench
Tools and Materials Needed:
-Tape measure
-Circular saw or hand saw
-Power drill
-1 1/2 inch hole saw (if not using dowel joinery)
-Paint or wood sealer (optional)
-Outdoor wood glue
-(6) 2x4s, 8 feet long (pressure treated lumber is best for outdoors)
-(2) 2x6s, 8 feet long (pressure treated lumber is best for outdoors)
-(3) 1x4s, 6 feet long (pressure treated lumber is best for outdoors)
First, cut all of your pieces to the appropriate size. For this project you will need two 8 foot 2x4s for the legs, six 6 foot 1x4s for the slats, and two 8 foot 2x6s for the supports. If you are using dowel joinery instead of screws and nails then you will also need a 1 1/2 inch hole saw.
Outdoor wood glue and either screws or nails will be used to assemble the bench. Begin by attaching the legs to the supports with either screws or nails placed about every 12 inches apart. Then attach your slats evenly spaced across the top of the bench using outdoor wood glue and either screws or nails placed about every 6 inches apart.
If desired, finish off your bench with paint or a clear wood sealer applied according to manufacturer’s instructions.
What Kind of Wood Should I Use for a Garden Bench?
When it comes to garden benches, there are a variety of materials that can be used. However, wood is often the best option as it is durable and looks great in any outdoor space. But what kind of wood should you use for your garden bench?
Here are a few options to consider:-Hardwoods such as oak or teak are ideal for garden benches as they are very strong and resistant to rot. They will also last for many years with proper care.
-Softwoods such as cedar or redwood are also good choices for garden benches. They are not as strong as hardwoods but they are still durable and look great in an outdoor setting. Softwoods will also last longer if they are treated with a weatherproofing agent.
-Composite woods such as Trex or TimberTech are made from recycled wood fibers and plastic polymers. These materials are very strong and resistant to rot, making them ideal for garden benches. Composite woods also have the added benefit of being easy to maintain – just wipe them down with soap and water when they get dirty!
How Do I Make a Weatherproof Wooden Bench?
Assuming you would like tips on how to weatherproof a wooden bench, here are a few suggestions.1. Apply a sealant: A clear sealant or polyurethane will help protect the wood from water damage, UV rays, and scratches. Be sure to apply it evenly and according to the manufacturer’s instructions.
2. Choose the right type of wood: Some woods are more durable than others and can stand up better to the elements. Teak, cedar, and redwood are all good choices for outdoor furniture.
3. Bring it inside during bad weather: If you know that a storm is coming or it’s going to be very cold out, it’s best to bring your bench inside so that it doesn’t get damaged.
4. Cover it when you can: A tarp or furniture cover can go a long way in protecting your bench from the elements when you can’t bring it inside. Just be sure to secure the cover so that it doesn’t blow away in high winds.
5. Regularly check for signs of wear and tear: Inspect your bench regularly for any cracking, splitting, or other damage that might occur over time.
What is the Best Wood to Make a Bench?
When it comes to picking the best wood for a bench, there are a few things to consider. The first is the purpose of the bench. If you’re looking for a bench that will be used primarily for sitting, then a softer wood like cedar or redwood would be a good choice.
These woods are also more affordable than harder woods like maple or oak.If you need a sturdier bench that can also be used for storage, then one of the harder woods would be your best bet. Maple and oak are both very strong and durable, making them ideal for benches that will see a lot of use.
They’re also more expensive than softer woods, so keep that in mind when making your decision.No matter what type of wood you choose, make sure it’s properly sealed and treated before use. This will help extend its life and keep it looking good for years to come.
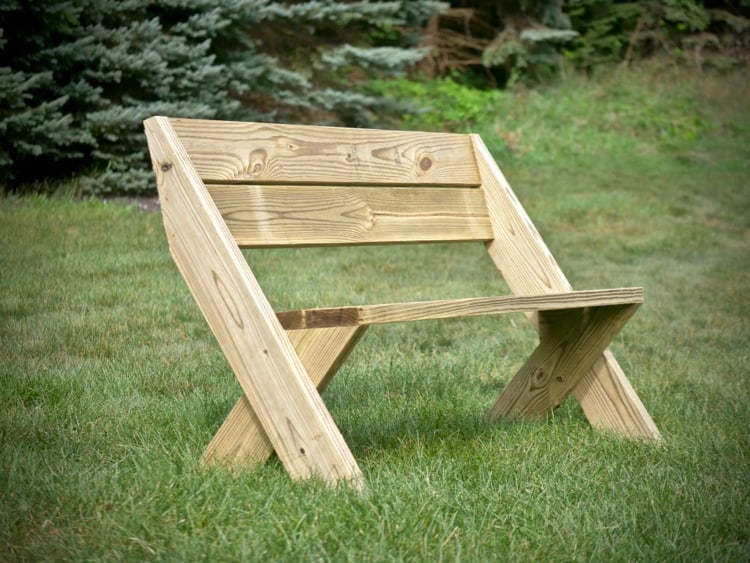
Credit: rogueengineer.com
How to Build an Outdoor Bench With Back
Building an outdoor bench with a back is a great way to add additional seating to your patio or deck. Benches are relatively easy to build and can be constructed using a variety of materials. When choosing the material for your bench, consider durability, maintenance, and aesthetics.
Once you have selected the material, determine the size and shape of your bench. Next, cut the lumber to size and assemble the frame using screws or nails. If you are using plywood or composite decking, attach the boards to the frame with screws.
Finally, add any trim or details as desired.
How to Build an Outdoor Bench Seat
One of the easiest ways to add extra seating to your outdoor living space is to build an outdoor bench seat. You can find plans for benches of all shapes and sizes, but a basic bench is easy to build and doesn’t require any special tools or skills. Here’s how you can do it:
1. Choose the location for your bench. It should be in a spot that gets good sunlight and has a nice view. If you have a deck or patio, that would be a great place for it.
Otherwise, find a level spot in your yard that’s not too close to any trees or bushes.2. mark out the dimensions of your bench on the ground with some chalk or spray paint. A basic bench seat is about 2 feet wide and 4 feet long, but you can make yours any size you want.
Just make sure all four sides are equal so your bench is symmetrical.3. Cut four pieces of 2×4 lumber to those dimensions (or have them cut at the hardware store). These will be the legs of your bench seat . . . unless you want to get fancy and add arm rests!
4 Screw or nail those legs into place at each corner of your chalk outline . 5 Cut two more pieces of 2×4 lumber that are 3 feet long each these will be the supports that run underneath the seat part of the bench 6 Nail or screw those supports into place beneath each end of the seat 7 Finally, cut a piece o plywood or othe r material )to use as yo ur actual seat 8 Place it on top o f t he supports an d you ‘r e done! 9 Add cushions , pillows , blankets , or whatever else you want to make yo ur new outdoor bench seat comfy and inviting 10 Sit back , relax, an d enjoy yo ur handiwork !
How to Build a Bench Seat With Back
If you’re looking for a way to add seating to your outdoor space, why not try your hand at building a bench seat with back? This project is relatively simple and can be completed in just a few hours. Plus, it’s a great way to show off your DIY skills!
To get started, you’ll need:-2x4s (enough to build the frame of the bench)
-1x6s (enough to create the slats for the seat and back)
-Outdoor furniture cushions
-Paint or stain (optional)
– screws
– drillFirst, use the 2x4s to build the frame of the bench. Cut them to size and then screw them together using deck screws.
If you want, you can paint or stain the wood at this point.Next, it’s time to add the 1×6 slats for the seat and back. Start by attaching them along the back of the bench frame.
Then, add more slats across the seat area until it’s covered. Make sure they’re evenly spaced so that there are no gaps. Finally, attach cushions to make it more comfortable.
And that’s it!
How to Build an Outdoor Bench With Storage
Whether you’re looking to add extra seating to your outdoor space or simply want a place to store garden tools, an outdoor bench with storage is a great solution. With a few basic carpentry skills and some lumber, you can easily build one yourself in just a weekend.Start by cutting the boards for the seat and back of the bench.
If you’re using 2x4s, cut them to be 24 inches wide. Then, use a saw to notch out the corners of each board so they fit together snugly. Next, attach the seat and back boards together with screws or nails.
Now it’s time to add the supports for the bench. Cut four 2x4s to be 18 inches long each and screw them into the underside of the seat and back boards. These will act as legs for your bench.
Finally, cut another 2×4 or two (depending on how long you want your bench) and screw them horizontally into the supports on either end of the bench. This will create a shelf for storing gardening supplies or other outdoor items.Paint or stain your new bench and enjoy!
How to Make a Garden Bench from Pallets
If you have ever wanted to build your own garden bench but didn’t know where to start, then this guide is for you. We will show you how to make a garden bench from pallets in just a few simple steps.The first thing you need to do is find some pallets.
You can usually find them for free at your local hardware store or lumberyard. Once you have your pallets, the next step is to disassemble them. This is easily done with a pry bar or hammer and screwdriver.
Once the pallets are disassembled, it’s time to cut them down to size. You’ll want to create four equal-sized pieces for the sides of the bench and two smaller pieces for the front and back supports. Use a saw or power drill to make these cuts.
Now it’s time to sand down all of the rough edges on your wood pieces. This will help create a smoother surface for painting or staining later on. After sanding, wipe down all of the pieces with a damp cloth before moving on to the next step.
It’s now time to assemble your bench! Start by attaching the side pieces together using screws or nails . Then do the same with the front and back supports .
Once everything is securely in place, flip over your bench and admire your handiwork!
How to Build a Park Bench
When it comes to creating a comfortable and inviting outdoor space, seating is key. Not only does it give people a place to rest and enjoy the surroundings, but well-designed benches can also be beautiful additions to any garden or park. If you’re handy with tools and have basic carpentry skills, building your own park bench is a great way to add both function and style to your outdoor spaces.
To build a basic park bench, you will need:-4 2x4s (8 feet long)
-1 2×6 (8 feet long)
-2 1/2″ deck screws
-1 pound of 3″ nails
-1 tube of wood glue
-SandpaperFirst, cut your lumber into the following lengths:-4 legs at 24″ each
-2 side rails at 45″ each
-1 seat board at 48″ longOnce all of your pieces are cut, use sandpaper to smooth out any rough edges.
Next, lay out the legs and side rails in their respective positions as shown in the diagram below. Make sure that all corners are square before proceeding to the next step.
Conclusion
Building a garden bench is a project that can be fun and practical. The following steps can help you create a beautiful and functional bench for your garden.1. Choose the right location for your bench.
You’ll want to consider factors such as how much sun or shade the spot gets, as well as whether it’s near a planting bed or other feature you want to highlight.2. Cut your lumber to size using a saw. You’ll need four boards for the seat and two for the legs.
If you’re using 2x4s, you’ll want to cut them down to 1-1/2 inches thick so they’re more comfortable to sit on.3. Assemble the frame of your bench by nailing or screwing the boards together. Make sure everything is square and level before moving on.
4 . Add supports underneath the seat boards if necessary. This will help prevent sagging over time.
Use scraps of lumber or metal brackets for this step.5 . Attach the legs to the frame using screws or nails, making sure they’re level with each other before tightening everything down .
Depending on how tall you want your bench , you may need to adjust the length of your legs accordingly . For example, if you’re using 2x4s for the legs , cutting them down to 3 feet long will result in abench that’s about 18 inches tall . 6 .
Finish off your bench by sanding any rough edges and adding a sealant or stain, if desired . Once everything is dry , enjoy your new garden bench !