Okay, you’re starting a woodworking project and need to cut 45-degree angles. Simplify it for you. Use a protractor to measure the exact angle, then pencil-mark the wood. Next, set your miter saw to 45 degrees before cutting.
However, don’t rush! Before lowering the blade, double-check your measurements and alignment. Practice makes perfect! Embrace trial-and-error to master 45-degree cuts like a pro.
Want to cut wood at 45 degrees for your DIY project? A professional look requires precise measuring and marking. We’ll show you how to make furniture and other wood crafts correctly. Let’s practice angled cuts!
Essential Tools for Precision Angle Cutting
Table of Contents
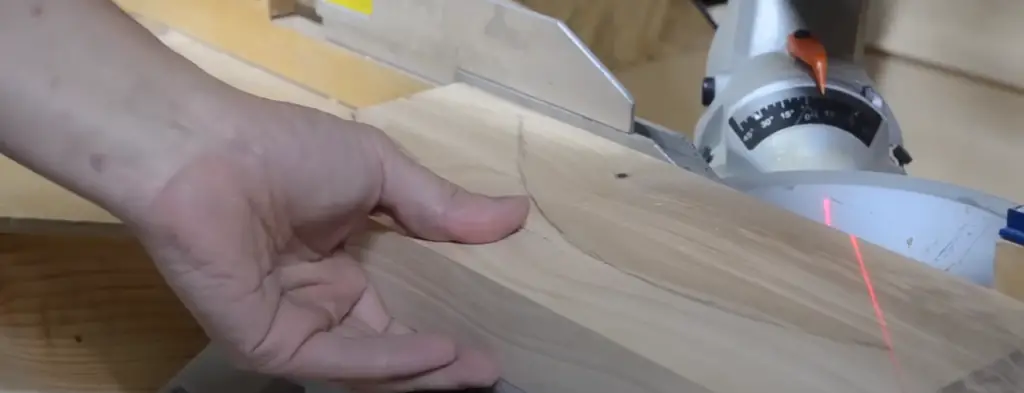
Miter Saw
A miter saw is essential for angled wood cutting. It makes precise cuts like a magic wand. Adjust the blade to cut at the right angle every time. This tool is your best friend for getting angles straight while building ornate frames or molding.
Protractor
Measure and configure wood-cutting angles with protractors. As in math, it arranges wood before cutting. To ensure 45-degree wood, check. This is like having a detective decide if your wood can be cut 45 degrees or needs repairs.
Clamps
Clamps are essential for angled wood cutting. The wood stays put while using power equipment like a miter saw. Clamps protect your wood while you work on it.
Measuring and Marking Lumber Accurately
Using a Reliable Tape Measure
Use a reliable tape measure for measuring and cutting wood at 45 degrees. This ensures accurate measurements and wood cutting. If you need many 45-degree cuts, a reliable tape measure ensures consistency.
Marking the Cut Line
Marking the cut line precisely is crucial when cutting a 45-degree angle in wood. Mark the lumber precisely with a sharp pencil or marking knife. This step is necessary for a precise 45-degree cut.
Checkout From Amazon
Using a T-Bevel for Marking Miter Cuts
Adjusting the T-Bevel
To make a 45-degree wood angle, set the T-bevel correctly. Align it with the cut and secure it. Keep both edges snug to produce a great angle and accurate wood cuts.
Transferring Angle to Wood
Cutting wood at 45 degrees requires understanding which part to remove. Waste side. Mark the garbage side with an “X” or other symbol. Find waste by wood grain. Waste-side post-cut grain angles out. It reduces errors and improves projects.
Identifying the Correct Waste Side on Wood

Marking the Waste Side
Cutting wood at 45 degrees requires knowing which section you don’t need. The garbage side. Clearly indicate the trash side with a “X” or other indication. Find the waste side by wood grain. Post-cut grain angles out on the waste side. It will reduce errors and improve your project..
The importance of Recognizing the waste side
Marking the wood to discard prevents mistakes that can ruin your project. Making sure each piece is in position before cutting saves time and materials.
Marking the waste side helps angled picture frame components fit together. Knowing which part to remove when making tables or cabinets makes everything uniform.
Ensuring Accuracy with Square Checking
Using a Carpenter’s Square
Carpenter’s squares are cut straight. Put the square on the wood for a 90-degree angle. It helps you measure correctly before cutting. Check both sides of the wood after positioning the square to ensure corner matches. This ensures precise cuts and measures.
Adjusting as Needed
Before cutting 45-degree angles, use a carpenter’s square to inspect them. This helps you detect and rectify problems, so your woodworking cuts fit perfectly.
Checkout From Amazon
Calculating the Length for a 45-Degree Cut
Trigonometry Principles
Woodcutting at 45 degrees requires math. This requires a formula or calculator to calculate the cut length. Wood thickness determines cut side length. Thicker timber needs longer cut sides. It ensures optimum angles and project appearances.
Example Scenario
You want flawless corners when building a photo frame. If each frame side is 8 inches long, apply trigonometry to calculate the short sides’ length. You must also consider material thickness because it impacts side length.
Techniques for Snapping Chalk Lines
Clear Cutting Guides
Chalk lines help cut 45-degree wood angles straight. Tighten and snap the chalk line against the wood for a clear cutting guide. To clarify, use different-colored chalk on each side of the line. After snapping the lines, remove the chalk to clarify your guide. It helps cut wood properly.
Tips for Achieving Precise Angle Cuts
Checkout From Amazon
Securing the Wood
Holding the wood firm when cutting at 45 degrees ensures accurate and safe cuts. You can use clamps or a vise. Sawhorses help stabilize lengthy wood pieces. This lets you cut without the wood moving.
Making Controlled Cuts
A sharp blade is essential for 45-degree wood cutting. It ensures smooth, accurate cuts and avoids wood splitting. Slowly cut and watch your lines. Rushing may reduce quality.
Cut some waste wood before cutting the actual wood. This lets you verify if your tools need tweaks before starting your primary job. Testing first will ensure perfect cuts from the start.
Applications in Common Wood Projects
Picture Frames
Cutting professional photo frame corners at 45 degrees is required. Frame parts fit precisely and attach cleanly when measured and cut at 45 degrees on both ends. Picture frames with polished edges enhance pictures and artwork.
Use a backsaw, miter saw, or miter box for precise cutting. Frame side lengths first. Hold your saw at 45 degrees and cut each piece’s lines gently. Wood glue makes solid joints.
Cool Furniture!
For smooth table and chair assembly, cut wood at 45 degrees. This makes furniture sturdy and attractive. Before sawing wood, craftsmen measure and mark angles with a particular instrument.
Checkout From Amazon
Final Remarks
You learned about 45-degree wood cutting. More woodworking jobs are conceivable. Use your tools, measure carefully, and enjoy making cool wood things. Practice will help you cut projects perfectly. Good luck!
Frequently Asked Questions
How can I accurately measure and mark a 45-degree angle on wood?
Use a T-bevel to measure and mark a 45-degree angle from your reference edge. Mark points with a sharp pencil or knife for accurate measurements.
What tools do I need to cut a 45-degree angle in wood?
The basics include a miter saw or handsaw, a T-bevel, a combination square, measuring tape, and a chalk line. These tools make 45-degree woodworking cuts accurately and cleanly.
How do I ensure that my angle cuts and measurements are precise?
Before cutting angles, double-check your measurements for accuracy. Clamps and sharp saw blades make cleaner, more accurate cuts.
Can you explain how to identify the correct waste side of the wood when cutting angles?
When making angled cuts in wood, identify the waste side by visualizing where material will be removed. This helps prevent mistakes during cutting as you focus on preserving the essential part of your workpiece.
Are there any common mistakes to avoid when cutting 45-degree angles in woodworking projects?
Missing adequate measurement techniques can result in incorrect cuts. Avoid rushing during marking or cutting to maintain precision.