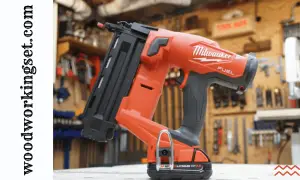
A brad nailer is best used for precision in woodworking projects and for attaching delicate trims. Its narrow gauge allows for concealing nail heads for a neat finish.
Brad nailers are popular due to their precision and gentle touch. For woodworking enthusiasts or professionals, brad nailers are a handy tool to have in their arsenal. With its small nails, it’s useful in attaching thin and delicate trims, and for tasks requiring precision.
Due to its narrow gauge, the nail heads can be hidden, giving a neat and clean finish. Moreover, brad nailers can fasten thin materials without the risk of them splitting. Their popularity increased due to their gentle touch and precision. Let’s explore in more detail about what a brad nailer is, how it functions, and some of its practical applications.

Credit: www.amazon.com
Projects Suitable For A Brad Nailer
Table of Contents
Are you new to diy projects and wondering what kind of tools you need to get started? A brad nailer is a versatile power tool that should definitely be on your shopping list. It drives thin nails into different kinds of wood, making it perfect for small and delicate projects.
In this article, we’ll discuss the projects most suitable for a brad nailer, with specific examples of when and how to use it.
Using A Brad Nailer For Trim Work
As its name implies, a brad nailer is perfect for trim work, such as baseboards, crown moldings, and window casings.
- It provides a clean and professional look to your trim work, without visible nail holes or cracks.
- It saves time, as it is faster and easier than using a hammer and nails.
- It reduces the risk of damaging your trim work, as it uses thin nails that are less likely to split the wood.
When using a brad nailer for trim work, here are some tips to keep in mind:
- Pre-drill holes for larger nails or where the wood may split.
- Use the appropriate nail size and thickness for your project.
- Test your nailer on a scrap piece of wood before starting on your main project.
Building Cabinets Or Furniture With A Brad Nailer
If you’re building cabinets or furniture, a brad nailer can be a great help in securing the various parts together.
- It provides a strong and secure hold for your joints, without the need for clamps or excessive use of wood glue.
- It accelerates the assembly process, as it is faster and more efficient than using screws or nails.
- It allows for precise and clean placement of nails, resulting in less visible holes and less sanding work.
When using a brad nailer for building cabinets or furniture, here are some tips to keep in mind:
- Use wood glue in combination with the nails for extra strength.
- Clamp the pieces together before nailing to prevent them from shifting.
- Use a punch to sink the nails below the wood surface, making it easier to sand and finish.
Other Appropriate Projects For A Brad Nailer
Aside from trim work and woodworking, there are many other diy projects that can benefit from the use of a brad nailer.
- Installing beadboard or wainscoting
- Attaching thin or delicate materials, such as fabric or leather, to wood
- Making picture frames or shadow boxes
- Creating decorative wall paneling or ceiling tiles
When using a brad nailer for these projects, here are some tips to keep in mind:
- Use an appropriate nail size and thickness for your materials.
- Test your nailer on a scrap piece of material before starting on your main project.
- Be careful not to overuse the nails, as it can weaken the structure or damage the surface.
A brad nailer is an essential tool for any diy enthusiast looking to tackle various projects around the house. From trim work to woodworking and beyond, a brad nailer can save you time, effort, and frustration. Just remember to follow the tips and guidelines we’ve provided, and you’ll be on your way to a successful and satisfying project.
Factors To Consider When Choosing A Brad Nailer
When it comes to woodworking, a brad nailer is essential for making precise, clean cuts and securing delicate materials. But with so many options available, it can be challenging to know which factors to consider when choosing the right brad nailer for your project.
In this section, we’ll break down the crucial factors to keep in mind.
Size Of The Brad Nailer
The size of the brad nailer is an essential factor when determining the tool’s suitability for your project. Brad nailers come in different sizes, including 15-gauge, 16-gauge, and 18-gauge.
- 15-gauge: best for heavy-duty projects such as installing baseboards, crown molding, and large trims.
- 16-gauge: suitable for a variety of projects, from baseboards to window casings and door trims.
- 18-gauge: ideal for decorative work, small trims, and delicate pieces of woodwork.
Brad Size And Length
The brad size and length are just as crucial as the brad nailer size. The size of the brad should accommodate the thickness of the material you are working with, and the length should be long enough to hold the material firmly in place but not too long that it splits the wood.
- Brad size: consider the thickness of the material you are working with when selecting the brad size. For example, use 18-gauge brads on thin materials and 15-gauge brads on thicker materials.
- Brad length: the brad length should be at least twice the thickness of the material you’re working with.
Gauge
The gauge of the brad nailer determines the thickness of the nail’s diameter. Choose the right gauge based on the project requirements.
- 15-gauge: produces stronger and thicker nails and ideal for larger, robust materials.
- 16-gauge: produces nails that are useful for medium-sized materials and everyday use.
- 18-gauge: produces thin nails that are ideal for smaller, delicate materials like trim work.
Operating Pressure
The operating pressure of your brad nailer depends on the project requirements. The pressure range is usually between 70 psi and 120 psi.
- 70-90 psi: ideal for lightweight materials and trim work.
- 90-100 psi: best for medium applications, such as baseboards and window casings.
- 100-120 psi: suitable for heavy-duty projects, such as crown molding and large trims.
Additional Features
Apart from the crucial factors mentioned above, there are other features to consider when selecting the right brad nailer for your project.
- Depth adjustment features: provides fine-tuning and precision when setting the nail’s depth in the material.
- Dry fire lockout feature: prevents misfiring and damage to the tool.
- Jam release feature: allows for easy removal of brads that get stuck in the tool.
Consider the size of the brad nailer, brad size and length, gauge, operating pressure, and additional features when choosing the right brad nailer for your project. With these factors in mind, you’ll be able to select the best brad nailer for the job.
Brad Nailer vs Finish Nailer: A Comprehensive Guide to Choose the Right Tool for Your Projects
When Not To Use A Brad Nailer
Brad nailers are a fantastic tool that can be used for various diy projects, such as crown molding, baseboard installation, and even small woodworking projects. However, as with all tools, there are times when a brad nailer should not be used.
In this article, we will focus on the scenarios in which you should avoid using a brad nailer.
Projects With Thicker Or Harder Wood
While brad nailers are great for smaller and thinner wood pieces, they might not hold up on thicker or harder wood.
- Hardwoods such as oak, maple, or hickory, require a more robust fastening solution.
- Thick wood pieces such as post or beam require heavier duty mechanism that brad nailers may not be able to penetrate well.
- Projects involving rough lumber — avoid using the brad nailer, since rough surfaces may cause the brads to bend, and result in the poor quality of work.
Jobs Requiring A Stronger Fastening Power
Although brad nailers provide a quick way to fasten pieces of wood, they lack the strength that other types of nailers offer.
- When working with pieces that require a strong attachment, like stair treads, use a finish nailer instead.
- Structural elements such as stair risers, are better suited to use the framing nailer to get stronger gripping.
- Projects that require framing or sheathing of a structure, such as a house, require a framing nailer that is more powerful.
Projects Where Appearance Is A Priority
While brad nailers offer a clean and neat work finish, there are certain scenarios where the appearance of your work needs to be taken to another level.
- Crown molding or window casings need a perfect finish and a visible seam that designers will often use different larger size trims and finish nailers for superior looks.
- Projects such as decorative wall paneling may require decorative nails that are suitable to the wood. This results in visibility or design enhancements and added strength for the elements extending beyond the walls.
- Projects for furniture and cabinetry may require glue and dowels to join pieces of wood together. In this case finishing nails will be required as well.
Brad nailers are not always the right tool for the job. They are designed for use with thin, softwood, and delicate pieces of wood while still providing easy quick finishing. However, if you are working with thicker, harder, or more substantial wood or require a stronger fastening power, or need finishing work that requires a more firm grip or visible seams, then you should avoid using a brad nailer.
The best way to ensure that you are using the correct tool for the job is to consult with industry experts or professional handymen before starting any diy project.
Tips For Using A Brad Nailer Safely And Efficiently
Using a brad nailer can be a time saver when it comes to woodworking projects. It helps to achieve clean and precise work seamlessly. However, knowing how to use a brad nailer correctly is just as important as owning one.
In this article, we will explore tips on how to use a brad nailer safely and efficiently.
Selecting The Appropriate Brad Size And Length
Choosing the correct brad size and length is essential in achieving perfect results when working with a brad nailer. It’s important to ensure that the selected brad is suitable for the thickness of the material you’re working on.
- For thin and delicate materials, use a brad with a smaller diameter
- The longer and thicker the material, the longer the nail should be
- Use longer nails for denser materials
Maintaining A Consistent Air Pressure
With a brad nailer, the air pressure should be consistent to function properly and to prevent jamming or misfiring. It’s crucial to regulate the air pressure to ensure effectiveness and safety.
- Check the air pressure before using the nailer
- Make sure to use the recommended pressure range specified by the manufacturer
- Continuously check the pressure gauge during the project
Properly Loading The Brad Nailer
Loading the brads correctly into the nailer is vital in preventing accidents and guaranteeing effectiveness.
- Disconnect the power supply before inserting the brads
- Open the magazine or loading chamber appropriately
- Align the brads along the rails, ensuring not to overload the nailer
Wearing Protective Gear
Working with a brad nailer can be dangerous, so it’s essential to protect yourself.
- Safety goggles to protect your eyes from flying debris
- Ear protection to prevent hearing damage due to the loud noise from the nailer
- Gloves to protect your hands from injury
Avoiding Common Mistakes
Even with careful attention put into using a brad nailer, accidents can still happen.
- Not making sure that the nailer is turned off and disconnected from the power supply before inserting the brads
- Failing to maintain proper air pressure
- Application of too much force while using the nailer, which can lead to an uneven finish or projectiles.
Using a brad nailer can take any project to the next level, but understanding how to use it correctly is crucial. By following these safety and efficiency tips, you are well on your way to achieving professional results while avoiding accidents.
Frequently Asked Questions For When To Use A Brad Nailer
When Should I Use A Brad Nailer Instead Of A Regular Nailer?
A brad nailer is a better choice for delicate moldings and trim that can split or crack easily.
What Are The Advantages Of Using A Brad Nailer?
Using a brad nailer results in smaller holes, less possible damage, and a cleaner-looking finished product.
Is A Brad Nailer Effective For Hardwood?
A brad nailer is not effective for hardwoods thicker than 1/4 inch. Use a finish nailer instead.
Should I Use A Brad Nailer For Projects Involving Heavy-Duty Woods?
A brad nailer is not recommended for heavy-duty construction projects involving hardy and dense woods.
Conclusion
A brad nailer is an essential tool that every woodworker must have in their arsenal. It’s ideal for small woodworking projects such as crown molding, baseboards, and trim work. Unlike traditional nail guns, the brad nailer uses thin nails that leave minimal marks and holes on the surface of the wood.
This feature makes it perfect for finishing work, which requires a clean and professional look. Additionally, it’s ideal for delicate materials such as thin wood, which can easily break if you use a traditional nail gun. However, before using a brad nailer, ensure that you have the right type of nails and gauge thickness for the project at hand.
With the right brad nailer and accessories, your woodworking projects will turn out great and look professional.