Building a table saw table involves selecting the right materials, measuring and cutting the components, and assembling them securely. A table saw table provides a dedicated and stable surface for your table saw, enhancing its functionality and safety.
Whether you are a professional woodworker or a DIY enthusiast, constructing a table saw table can greatly improve your woodworking experience. By following a few simple steps, you can create a durable and customized table that suits your specific needs.
In the following guide, we will walk you through the process of building a table saw table from start to finish. So let’s get started and create a sturdy and reliable table saw table for your workshop.
The Benefits Of Building Your Own Table Saw Table
Table of Contents
Building your own table saw table is a practical and rewarding project for any woodworker. Not only does it give you the opportunity to showcase your craftsmanship, but it also offers a range of benefits that can significantly enhance your woodworking experience. In this article, we will explore the benefits of building your own table saw table, including enhanced stability for accurate cuts, improved safety features, and customization to suit your specific needs.
Enhanced stability for accurate cuts
One of the primary advantages of building your own table saw table is the enhanced stability it provides. When using a pre-built table saw table, there is always a chance of it being slightly uneven or unsteady, which can compromise the accuracy of your cuts. However, by constructing your own table, you have full control over its design and materials, allowing you to create a solid and stable surface. This stability ensures that your table saw stays in place during operation, minimizing vibrations and guaranteeing precise and accurate cuts every time.
Improved safety features
Safety should always be a top priority in the workshop, and building your own table saw table allows you to incorporate custom safety features to suit your needs. Pre-built tables may not have all the safety features you desire, leaving you to make compromises or purchase additional accessories. By constructing your own table, you have the freedom to add features such as a blade guard, a riving knife, and even a sophisticated dust collection system. These customized safety enhancements provide you with peace of mind and ensure that your woodworking projects can be completed safely.
Customization to suit your specific needs
Every woodworker has unique preferences and requirements when it comes to their table saw setup. Whether it’s the size and dimensions of the table, the position of the fence, or additional storage compartments, a custom-built table allows you to tailor every aspect to your specific needs. This level of customization ensures that you have a table saw table that perfectly suits your workflow, making your woodworking projects more efficient and enjoyable. Additionally, as you gain experience and your needs evolve, you can easily modify or upgrade your table without being limited by the constraints of a pre-built option.
In conclusion, building your own table saw table offers a range of benefits that can greatly enhance your woodworking experience. The enhanced stability allows for accurate cuts, the improved safety features provide peace of mind, and the customization options ensure a setup that perfectly suits your specific needs. By embarking on this DIY project, you not only create a functional and durable table saw table, but you also gain valuable woodworking skills and a deeper understanding of your tools. So why settle for a generic table when you can build your own customized solution?
Essential Tools And Materials Needed
Building a table saw table requires a specific set of tools and materials to ensure a smooth construction process and a durable end product. In this section, we will discuss the essential tools and materials you will need to successfully build your own table saw table.
List of tools required
To get started, you will need the following tools:
- Table saw
- Drill
- Screwdriver
- Tape measure
- Clamps
- Hammer
- Chisel
- Level
- Router
- Circular saw
- Speed square
These tools will be essential in measuring, cutting, and assembling the various components of the table saw table.
Recommended materials for durability
When it comes to materials, it is important to choose ones that are strong and durable to ensure the longevity of your table saw table. Here are some recommended materials:
- Hardwood plywood: This material is sturdy and provides excellent stability for the tabletop.
- Hardwood boards: These will be used for the frame and legs of the table.
- Screws: Opt for high-quality screws that will securely hold the components together.
- Bolts and nuts: These will be necessary for attaching certain components and ensuring stability.
- Wood glue: Use wood glue to reinforce joints and add extra strength to the table.
By using these recommended materials, you can ensure that your table saw table will be able to withstand the rigors of everyday use.
Safety equipment you’ll need
When working with power tools, safety should always be a top priority. Make sure you have the following safety equipment:
- Safety goggles: Protect your eyes from flying debris and dust.
- Hearing protection: Safeguard your ears from the loud noise produced by power tools.
- Dust mask: Prevent inhalation of harmful dust particles.
- Work gloves: Protect your hands from cuts and abrasions.
Having the right safety equipment will help minimize the risk of accidents and ensure a safer working environment.
Step-By-Step Guide To Building A Table Saw Table
Are you a DIY enthusiast looking to upgrade your woodworking tools? Building your own table saw table can be a rewarding project that not only saves you money but also allows you to customize your workspace to fit your exact needs. In this step-by-step guide, we will walk you through the process of building a table saw table, from preparing the workspace and gathering materials to adding the tabletop and fence, incorporating safety features, and applying finishing touches and adjustments.
Preparing the Workspace and Gathering Materials
Before you dive into building your table saw table, it’s important to make sure your workspace is ready and you have all the necessary materials at hand. Here’s a checklist of what you’ll need:
- A sturdy and flat surface to work on, such as a workbench or sawhorses
- Measuring tape and a straightedge
- Table saw with the necessary accessories
- Plywood for the tabletop
- Lumber for the base and support structure
- Screws, nails, or other fasteners
- Power drill or screwdriver
- Safety goggles, ear protection, and a dust mask
Building the Base Structure
Now that you have all the materials ready, it’s time to start building the base structure for your table saw table. Follow these steps:
- Measure and mark the desired dimensions for your table saw table on the plywood.
- Cut the plywood according to your measurements, ensuring smooth and clean edges.
- Assemble the base structure using the lumber, making sure it is sturdy and level.
- Attach the plywood tabletop to the base structure using screws or other fasteners.
Adding the Tabletop and Fence
With the base structure in place, it’s time to add the tabletop and fence. Here’s how:
- Measure and mark the position for the table saw opening on the tabletop.
- Use a jigsaw or a router to cut out the opening for the table saw.
- Attach the tabletop to the base structure securely.
- Add a fence along one edge of the tabletop to guide your workpiece.
Incorporating Safety Features
Ensuring safety should be a top priority when building your table saw table. Consider implementing the following safety features:
- Install a blade guard to protect your hands from accidental contact with the saw blade.
- Add a riving knife to prevent kickback and ensure smooth cutting.
- Mount a push stick near the table saw for added control while feeding workpieces.
- Always wear safety goggles, ear protection, and a dust mask when operating the table saw.
Finishing Touches and Adjustments
Once the main structure and safety features are in place, it’s time to add the finishing touches and make any necessary adjustments. Here are some things to consider:
- Sand down any rough edges or splinters on the table surface for a smooth finish.
- Make sure the table is level and square by using a leveling tool.
- Check the alignment of the fence and adjust if necessary.
- Apply a protective finish to the table surface to prevent moisture damage and enhance durability.
By following this step-by-step guide, you can create a functional and customized table saw table that will elevate your woodworking projects to the next level. Remember to take your time, work safely, and enjoy the process of building your own workspace!
Tips For Designing Your Table Saw Table
Designing your table saw table is an important step in creating a functional workspace for your woodworking projects. When it comes to choosing the right dimensions, assessing the height, and deciding on mobility and storage options, there are a few factors to consider. In this article, we will explore these tips to help you create a table saw table that meets your needs and enhances your work efficiency.
Choosing the right dimensions for your workspace
One of the first things to consider when designing your table saw table is the dimensions that will best fit your workspace. The size of your table should be proportional to the available space in your workshop or garage. It is essential to measure the area where you plan to set up your table saw and have a clear idea of the dimensions you need.
Here are a few tips:
- Consider the length and width of your table saw, taking into account any extensions you may use.
- Leave enough space around the table saw for maneuverability and safety. It’s important to have sufficient room to handle long pieces of wood.
- Think about the additional equipment you might want to include in your table saw table setup, such as a router table or a miter saw station. Plan for enough space to accommodate these accessories.
Assessing the height for comfortable use
The height of your table saw table is crucial for comfortable and efficient use. A table set at an ergonomically correct height will help reduce strain on your back, shoulders, and arms, enabling you to work for longer periods without fatigue.
Follow these guidelines to assess the ideal height:
- Stand in front of your table saw and position your hands as if holding a workpiece.
- Bend your elbows at a comfortable angle, around 90 degrees.
- Measure the distance from the floor to your hands and adjust your table saw table accordingly.
Keep in mind that everyone’s height and preferred working position may vary, so it’s essential to customize the height to your specific needs.
Options for mobility and storage
Depending on the layout of your workshop or garage, you may require mobility and storage options for your table saw table. This is particularly useful if you have limited space and need to move your table saw around or store it when not in use.
Consider the following possibilities:
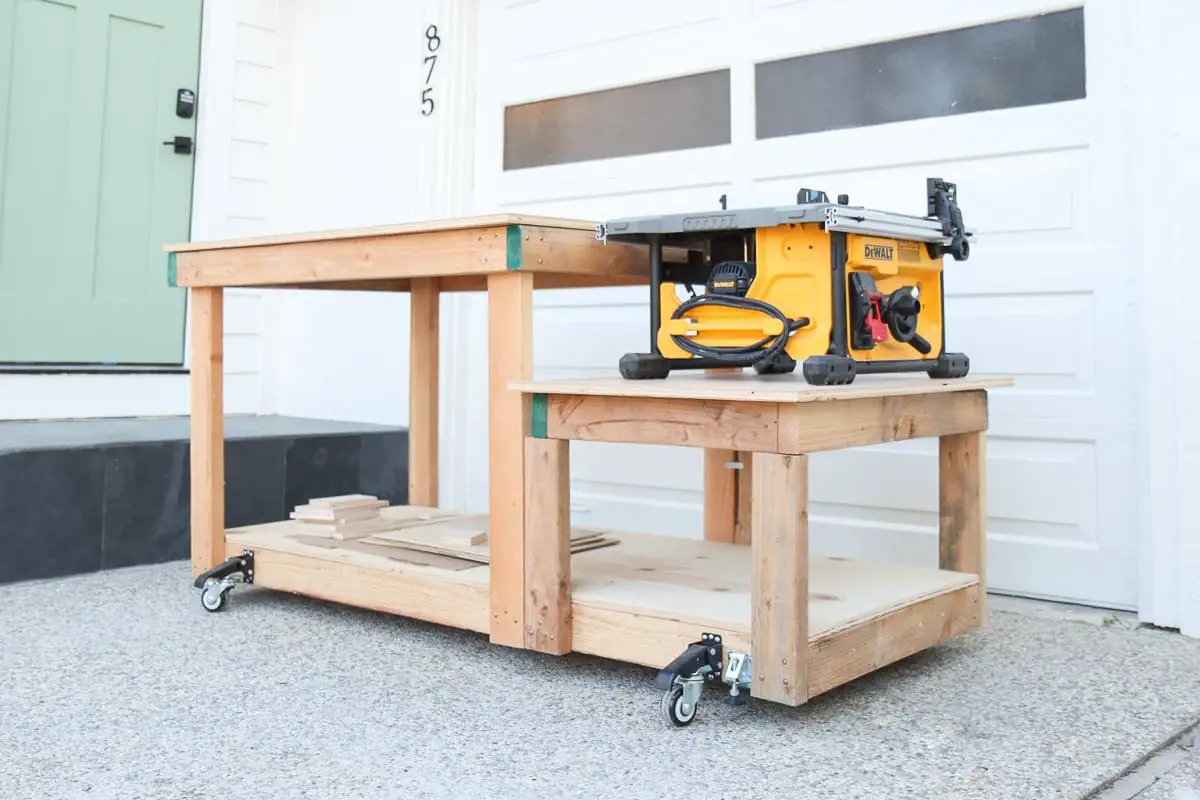
- Choose a table saw table with built-in wheels for easy maneuverability. This feature allows you to move your table saw effortlessly and position it wherever it suits your current project.
- If you need to tuck away your table saw when not in use, opt for a foldable design or a table that can be disassembled for compact storage.
- Include storage drawers or shelves in your table saw table design to keep your tools, accessories, and safety equipment within reach.
By carefully considering your mobility and storage requirements, you can ensure that your table saw table is both practical and adaptable to the available space in your workshop.
Designing the perfect table saw table involves thoughtfully selecting the dimensions, assessing the height for comfortable use, and considering mobility and storage options. By following these tips, you can create a table saw table that not only fits seamlessly into your workspace but also enhances your woodworking experience. Happy building!
Safety Considerations And Best Practices
Building a table saw table can be a rewarding and practical project for any woodworking enthusiast. However, it’s important to prioritize safety throughout the process. By following proper guidelines and utilizing essential safety equipment, you can greatly reduce the risk of accidents and injuries. In this section, we will discuss three crucial aspects of safety: the proper positioning of the table saw, using safety guards and push sticks, and maintenance and regular inspections.
<h3>Proper Positioning of the Table Saw</h3>
The positioning of the table saw plays a significant role in ensuring safe and effective operation. To begin, make sure your table saw has ample space around it, allowing for unrestricted movement. Ideally, your work area should have approximately 36 inches of clearance on all sides of the saw table. This clearance provides enough room for you to handle large workpieces without compromising your safety. Additionally, ensure that the table saw is set up on a stable and level surface to prevent wobbling or tipping during use.
<h3>Using Safety Guards and Push Sticks</h3>
When working with a table saw, it’s crucial to utilize safety guards and push sticks. Safety guards, such as blade guards and riving knives, are designed to protect your hands and fingers from coming into direct contact with the spinning blade. Always keep these guards in place, ensuring they are properly adjusted and functioning correctly. Push sticks are another essential tool for table saw safety. They allow you to keep your hands at a safe distance from the blade while providing control and guidance for the workpiece. When using a push stick, apply consistent pressure and maintain control of the workpiece throughout the cut.
<h3>Maintenance and Regular Inspections</h3>
Regular maintenance and inspections are vital to the safe and efficient operation of your table saw. Start by checking the blade alignment and ensuring it is properly tightened and secured. Dull or damaged blades should be replaced immediately to prevent kickback and poor cutting performance. Additionally, inspect the fence alignment, making sure it is parallel to the blade to ensure accurate cuts. Regularly clean the table surface and remove any debris that may interfere with the smooth movement of your workpiece. Finally, inspect and lubricate all moving parts of the table saw to maintain optimal performance and extend the tool’s lifespan.
Enhancing Your Table Saw Table With Accessories
Enhancing your table saw table with accessories is an excellent way to maximize its capabilities and elevate the quality of your woodworking projects. By investing in a few key accessories, you can greatly expand the range of cuts and improve the safety and efficiency of your table saw. In this article, we will explore three essential accessories that can take your table saw table to the next level.
Importance of a Miter Gauge and Sleds
A miter gauge is an indispensable tool when it comes to achieving accurate angled cuts on your table saw. It allows you to guide the workpiece precisely at the desired angle, ensuring clean and precise cuts every time. Whether you’re working on crown molding, picture frames, or any project that require angled cuts, a high-quality miter gauge is a must-have accessory.
In addition to a miter gauge, using sleds can greatly enhance your table saw’s capabilities. Sleds are specially designed table saw accessories that provide a stable and controlled platform for making crosscuts and angle cuts. They not only ensure safety by preventing kickback, but also offer incredible accuracy and control. With the help of sleds, you can confidently tackle projects that involve cross-cutting large or irregularly shaped workpieces.
Utilizing Jigs for Specialized Cuts
When it comes to specialized cuts, jigs are your best friend. Jigs are simple yet effective tools that help you achieve consistent results for specific woodworking tasks. For example, a finger joint jig allows you to create precise and interlocking finger joints, while a box joint jig simplifies the process of creating strong and decorative box joints.
Whether you want to tackle dovetail joints, tenons, or any other intricate woodworking technique, investing in jigs specific to each task will save you time and frustration. These accessories can be easily customized to suit your desired specifications, ensuring consistent results and a professional finish.
Dust Collection Systems for a Cleaner Workspace
Woodworking can generate a significant amount of sawdust and debris which, if left unattended, can create a messy and hazardous workspace. To keep your work area clean and maintain good indoor air quality, it’s crucial to invest in a dust collection system for your table saw.
A dust collection system effectively captures and collects sawdust and debris, preventing them from accumulating on your table surface, in your lungs, or even in your workshop. By integrating a dust collection system into your table saw setup, you can enjoy a cleaner working environment, extended tool life, and improved overall safety.
Enhancing your table saw table with accessories is not only a great way to improve your woodworking experience but also allows you to unlock the full potential of your table saw. With the addition of a miter gauge and sleds, utilizing jigs for specialized cuts, and investing in a dust collection system, you’ll be equipped with the necessary tools to bring your woodworking projects to new heights.
Troubleshooting Common Issues
While building your own table saw table can be a rewarding experience, it is not without its challenges. In this section, we will address some common issues that you may encounter during the building process and provide solutions to ensure that your table saw table functions properly.
Misalignment of the tabletop and fence
One of the most common issues with table saw tables is the misalignment between the tabletop and the fence. This can result in inaccurate cuts, frustration, and wasted material. Here are a few possible causes and solutions for this problem:
- Uneven mounting: Ensure that the tabletop is securely mounted to the saw’s base using evenly distributed screws or bolts. Use a level to check for any unevenness before tightening the fasteners.
- Improper fence adjustment: Check that the fence is parallel to the saw blade. Adjust it accordingly by loosening the mounting bolts and using a straightedge to guide you.
- Warping or bowing: If the tabletop or fence is warped or bowed, it can cause misalignment. Consider replacing the affected parts or reinforcing them with additional support to straighten them out.
Problems with stability and wobbling
In order to achieve accurate cuts, it is essential that your table saw table is stable and doesn’t wobble during use. Here are a few steps you can take to address stability issues:
- Leveling the base: Ensure that the table’s base is level by using adjustable feet or shims. This will help prevent any rocking or instability while using the saw.
- Reinforcing the frame: Adding additional cross braces or supports to the frame of the table can help improve its stability.
- Proper floor contact: Make sure the table saw table is sitting on a flat and even surface. Uneven flooring can contribute to wobbling and instability.
Solutions for inaccurate cuts
If you notice that your cuts are consistently inaccurate, there are a few steps you can take to rectify the problem:
- Blade alignment: Check that the saw blade is aligned with the miter gauge slots. If it is not, adjust it by loosening the trunnion bolts and using a straightedge as a guide.
- Miter gauge calibration: Ensure that the miter gauge is square to the blade. You can do this by using a reliable square to check the alignment and adjusting it as necessary.
- Replace worn-out parts: If the saw blade, miter gauge, or rip fence are worn or damaged, they may cause inaccuracies in your cuts. Replace these parts if needed.
By addressing these common issues and implementing the appropriate solutions, you can ensure that your table saw table performs optimally, allowing you to achieve accurate and precise cuts for your woodworking projects.
Credit: hydrangeatreehouse.com
Maintenance And Care For Longevity
Maintaining and caring for your table saw table is essential for ensuring its longevity and optimal performance. By regularly cleaning and lubricating, checking for wear and tear, and replacing parts as needed, you can extend the lifespan of your table saw table, enhance its functionality, and ensure safe operation. Implementing these maintenance practices will not only save you time and money in the long run but also contribute to the quality of your woodworking projects.
Regular cleaning and lubrication
Regular cleaning and lubrication of your table saw table are vital to keep it in top condition. Accumulated sawdust, debris, and other residues can interfere with the smooth movement of the table and result in inaccurate cuts and diminished performance. To prevent this, follow these steps:
- Start by clearing the table saw table of any loose debris using a brush or vacuum cleaner. Ensure all sawdust, chips, and dust are thoroughly removed from the table’s surface, miter slots, and other crevices.
- Use a mild cleaning solution or specific table saw cleaner to wipe down the entire surface. Be sure to remove any stubborn residue or sticky substances. Avoid using harsh chemicals that can damage the table’s finish.
- After cleaning, apply a suitable table saw lubricant to the moving parts such as the blade elevation mechanism, sliding components, and pivot points. This will ensure smooth operation and reduce friction, preventing premature wear.
- Finally, wipe off any excess lubricant and ensure the table saw table is completely dry before use to prevent any slipping accidents.
Checking for wear and tear
Regularly inspecting your table saw table for signs of wear and tear is crucial to address small issues before they escalate into major problems. Perform these checks periodically:
- Examine the table’s surface for any deep scratches, dents, or warping. If you notice any irregularities, consider sanding or planing the surface to restore its smoothness and flatness.
- Inspect the miter slots for any signs of damage or excessive wear. If the slots are worn, they may negatively impact the accuracy of your cuts. Consider using a miter slot bar or replacing the entire table saw table if needed.
- Check the fence alignment and accuracy by measuring the distance between the fence and the blade at various points along the table’s length. Adjust or replace the fence if necessary to ensure precise and consistent cutting results.
- Ensure the safety features, such as the blade guard, riving knife, and anti-kickback pawls, are intact and functioning correctly. If any of these components are damaged or missing, replace them immediately to ensure your safety during operation.
Replacing parts as needed
Replacing worn or damaged parts is vital to maintain the quality and safety of your table saw table. By promptly addressing these issues, you can prevent accidents and further damage to the equipment. Follow these guidelines:
- If you notice a dull or damaged blade, replace it immediately to ensure clean cuts and optimum performance. Choose a blade suitable for your woodworking needs, considering the type of material you frequently work with.
- Inspect the power cord, switch, and other electrical components for any signs of wear or damage. If you detect any issues, replace or repair these parts to avoid electrical hazards.
- Replace the guide rails and bearings if they become worn or damaged. Worn guide rails can cause inaccurate cuts and compromise the overall performance of your table saw table.
- Regularly replace the sacrificial insert or zero-clearance insert to support smooth and precise cuts. These inserts may wear out over time due to repeated use.
By incorporating these maintenance and care practices into your routine, you can ensure the longevity and optimal performance of your table saw table. Regular cleaning, lubrication, thorough checks for wear and tear, and timely replacements of worn or damaged parts will significantly contribute to the superior quality and safety in your woodworking endeavors. Start implementing these practices today to reap the benefits in the long run.
Frequently Asked Questions On Building A Table Saw Table
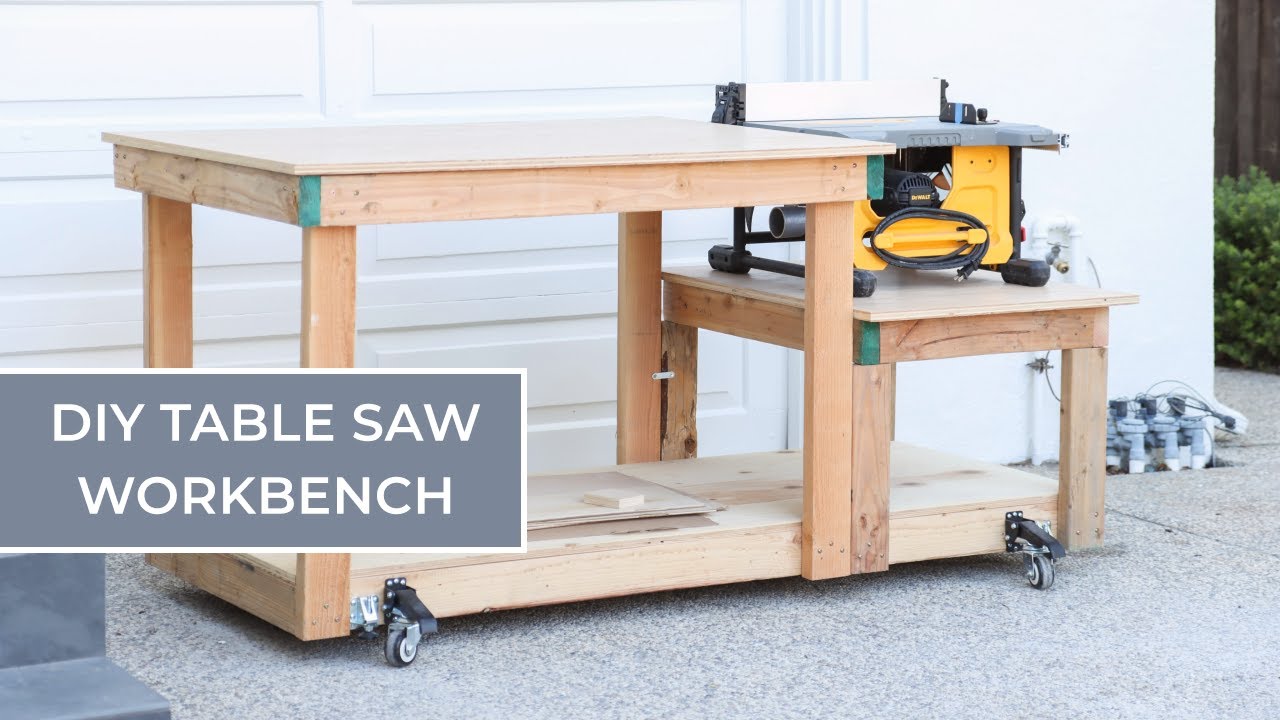
How To Make A Table Saw Workbench?
To make a table saw workbench, follow these steps: 1. Measure and cut plywood to the desired size for the workbench top. 2. Construct a frame using 2×4 lumber, securing it with screws or nails. 3. Attach the workbench top to the frame using screws or a strong adhesive.
4. Install a table saw onto the workbench, ensuring it is securely fastened. 5. Add any desired accessories or features, such as storage drawers or shelves. 6. Test the table saw on the workbench to ensure it is functioning properly.
How High Should A Table Saw Table Be?
The table saw table should be at a height that allows you to comfortably stand and work.
What Is The Best Surface For A Table Saw?
The best surface for a table saw is a sturdy and flat workbench or table.
How Big Should A Table Saw Bench Be?
A table saw bench should be sized according to the dimensions of your table saw for optimal use.
Conclusion
Building a table saw table is a worthwhile investment for any woodworking enthusiast. It not only provides a stable and functional workspace but also enhances safety and precision in your projects. With the right materials, tools, and a systematic approach, constructing your own table saw table can be an enjoyable and rewarding experience.
By incorporating adjustable features, storage options, and ergonomic design, you can customize the table to fit your specific needs and preferences. Remember to prioritize safety throughout the construction process and consult professional resources for guidance if needed. With a well-built table saw table, you can elevate your woodworking capabilities and take your projects to the next level.
Happy building and happy sawing!

- 12 Inch Wood Planer: Smooth Your Woodworking Projects Like a Pro - 01/10/2023
- Table Saw Blade: Unleash the Cutting Power - 22/09/2023
- Vintage Table Saw: Uncover the Unparalleled Power - 22/09/2023
