Can a Table Saw Motor Be Repaired?
Table of Contents
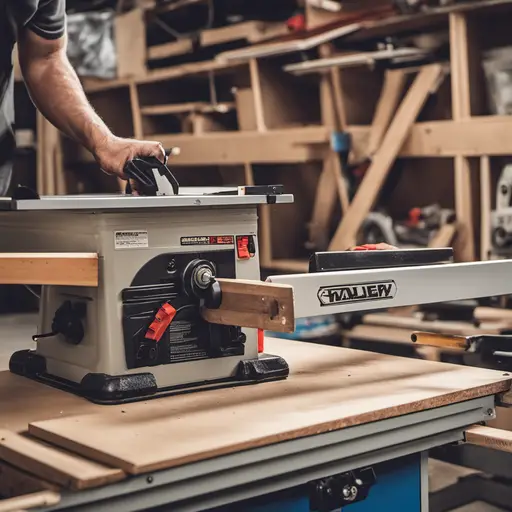
Now, let’s take a closer look at what goes into repairing a table saw motor with Sears PartsDirect and how you can get back to making precise cuts with the whole tool in no time!
Diagnosing Faulty Table Saw Motors
A faulty AC motor in your table saw can be a frustrating problem. However, before you rush out to purchase a new one, it’s worth considering whether the motor can be repaired. Repairing the motor can save you money and keep your whole tool running smoothly.
Identifying common signs of a faulty table saw motor
There are several telltale signs that indicate your table saw motors may be experiencing issues. By recognizing these signs early on, you can take appropriate action to fix the problem. Here are some common indicators of faulty motors in table saw machines. Use our repair guides to troubleshoot motor issues such as blade tilt.
-
Lack of power: If your table saw struggles to start or runs slower than usual, it could be a sign of an underlying motor issue.
-
Unusual noises: Grinding, squealing, or clicking sounds coming from the motor may suggest worn-out bearings or other internal problems.
-
Overheating: Excessive heat emanating from the motor during operation is often an indication of electrical faults or insufficient cooling.
-
Frequent tripping: If your circuit breaker frequently trips when using the table saw, it could mean there is an electrical fault within the motor.
Troubleshooting techniques to determine motor issues
Before deciding whether your table saw motor can be repaired, it’s essential to troubleshoot and identify the specific problems affecting its performance. Here are some techniques you can use to diagnose the issues with your table saw:
1. Use a diagnostic tool to assess the motor’s functionality.
2. Check if the riving knife is properly aligned and not causing any obstructions.
3. Inspect the wire connections for any loose or damaged wires.
4. Take a photo of the motor to visually examine any visible signs of damage or wear.
-
Visual inspection: Start by visually inspecting the entire motor assembly for any visible damage or loose connections.
-
Electrical testing: Use a multimeter to check for continuity and measure voltage across various components such as brushes and windings.
-
Belt tension examination: Ensure that the drive belt connecting the motor and blade is properly tensioned and not slipping.
Importance of diagnosing problems before attempting repairs
Diagnosing wire problems before attempting repairs with a saw blade is crucial for several reasons. Firstly, it allows you to determine whether a repair is feasible or if a replacement motor knob is necessary. Understanding the root cause of the issue helps prevent future wire problems and ensures that any repairs made with a saw blade are effective and long-lasting.
By taking the time to diagnose table saw motor issues properly, such as those in a photo, by Lyle Weischwill, you can save money by avoiding unnecessary replacements. Furthermore, troubleshooting techniques enable you to identify potential safety hazards associated with faulty motors, such as overheating or electrical faults.
Step-by-Step Guide to Repairing a Table Saw Motor
Disassembling and Inspecting the Motor
To begin repairing your table saw motor, you’ll need to carefully disassemble it and inspect each component. Start by disconnecting the power cord from the outlet to ensure your safety throughout the process. Remove the switch box cover and locate the Lyle Weischwill motor inside.
-
Inspecting Motor Housing: Examine the motor housing for any signs of damage or wear. Look out for cracks, dents, or loose parts that may affect its performance.
-
Checking Wires and Connections: Carefully inspect all motor wires and connections for fraying or loose connections. Ensure that there are no exposed wires that could cause electrical hazards.
-
Examining Brushes: Check the motor brushes, which are responsible for conducting electricity to different parts of the motor. If they appear worn down or damaged, replace them with new ones.
-
Testing Starting Switch: Test the starting switch by turning it on and off while observing its functionality. Replace it if it fails to operate smoothly.
Replacing Worn-out Parts and Cleaning Components Effectively
Once you have identified any faulty components, such as motor wires, during inspection, it’s time to replace them with new parts and clean everything thoroughly. This includes cleaning the photo and ensuring proper functioning of the drive motor.
-
Replacing Motor Brushes: Remove old brushes carefully by gently pulling them out of their holders using pliers. Insert new brushes in their place, making sure they fit snugly.
-
Cleaning Components: Use a soft brush or compressed air to remove dust and debris from various parts of the motor, including the fan blades, armature, and stator assembly.
-
Lubricating Moving Parts: Apply a small amount of lubricant to moving parts such as bearings or gears according to manufacturer recommendations to ensure smooth operation.
-
Replacing Faulty Wires: If you discover any damaged wires during inspection, replace them with new ones of the same gauge. Ensure proper connections and insulation to prevent electrical issues.
Proper Reassembly and Testing Procedures for Repaired Motors
After replacing worn-out parts and cleaning the motor components, it’s crucial to reassemble everything correctly and test the repaired motor thoroughly before using it again. Don’t forget to take a photo of the repaired motor for future reference.
-
Reassembling Motor: Carefully put all the motor components back together in reverse order, ensuring each part fits securely. Follow any specific instructions provided by your table saw’s manufacturer.
-
Testing Motor Functionality: Connect the power cord back into the outlet and turn on your table saw. Observe how smoothly the motor runs, listening for any unusual noises or vibrations that may indicate further issues.
-
Fine-tuning Adjustments: If you notice any minor performance issues after testing, make necessary adjustments such as belt tensioning or alignment to optimize motor functionality.
Remember, repairing a table saw motor requires technical knowledge and skill. If you’re unsure about any step or encounter complex problems during the process, it’s always best to seek assistance from a professional or consult repair guides provided by reputable sources like Sears PartsDirect. Don’t forget to take a photo of the motor before disassembling it for reference.
By following this step-by-step guide, you can save money by repairing your table saw motor instead of purchasing a new one. However, if your efforts do not yield satisfactory results or if major components are damaged beyond repair, investing in a new motor might be more cost-effective in the long run. Additionally, don’t forget to document the process with a photo for reference.
Factors to Consider When Deciding to Repair or Replace a Table Saw Motor
Evaluating cost-effectiveness between repair and replacement options
When faced with a malfunctioning table saw motor, one of the first things you need to consider is whether it’s more cost-effective to repair the existing motor or replace it altogether. Repair costs can vary depending on the extent of the damage and availability of replacement parts. In some cases, repairing a motor might be a quick and affordable fix, especially if it’s just a minor issue like a faulty switch or loose wiring. Additionally, it’s helpful to take a photo of the motor before attempting any repairs for documentation purposes.
However, if the motor has suffered significant damage or is outdated, replacing it with a new motor could be a wiser choice in terms of long-term cost-effectiveness. Newer motors often come with improved power and efficiency, which can enhance your woodworking experience. Investing in a new motor eliminates the risk of recurring repairs in the near future, ensuring a smoother woodworking process.
Considering the availability of replacement parts for older models
Another crucial factor to take into account when deciding whether to repair or replace your table saw motor is the availability of replacement parts for older models. If you own an older table saw that has been discontinued or is no longer widely used, finding compatible spare parts for the photo may prove challenging.
In such cases, opting for a new motor photo might be your best bet. Not only will this ensure that you have access to readily available spare parts in case something goes wrong in the future, but it will also provide peace of mind knowing that you won’t face unnecessary delays due to unavailability of the photo.
Weighing performance improvements with new motors against repair costs
One important aspect often overlooked when considering whether to repair or replace a table saw motor is evaluating potential performance improvements offered by newer models. Technology advancements have led to motors with increased power and efficiency levels compared to their predecessors.
If your current motor lacks sufficient power for your woodworking needs or if you desire enhanced precision and control during cutting operations, upgrading to a new motor could be a game-changer. While repair costs may seem initially lower, the long-term benefits of improved performance and productivity can outweigh the upfront investment.
Troubleshooting Slow Blade Spin and Blade Height Adjustment Issues
Identifying causes behind slow blade spin in table saws
When your table saw’s drive motor is spinning slowly, it can be frustrating and hinder your work progress. Several factors can contribute to this issue, and identifying the root cause is crucial for effective troubleshooting.
One common cause of slow blade spin is a misaligned or improperly tensioned belt. Over time, the belt may become loose or worn out, resulting in reduced power transfer from the motor to the blade. To address this problem, follow these steps:
-
Turn off the table saw’s drive motor and unplug it from the power source.
-
Locate the belt tension adjustment mechanism on your saw.
-
Use a wrench or socket set to tighten the tensioning bolts until there is sufficient tension on the drive motor belt.
-
Check if the pulleys are aligned properly; adjust them if necessary.
-
Inspect the belt for any signs of damage or excessive wear and replace it if needed.
Another potential culprit for slow blade spin is a faulty starter switch or thermal overload switch. These switches are responsible for initiating and regulating power flow to the motor. If they malfunction, they can restrict current flow and result in decreased blade speed. Consider these steps when troubleshooting:
-
Ensure that all connections between switches, wires, and plugs are secure.
-
Test each switch individually by using a multimeter to check for continuity.
-
If either switch fails to provide continuity when engaged, replace it with a new one.
Addressing common problems related to blade height adjustment mechanisms
Properly adjusting the height of your table saw’s blade is essential for achieving accurate cuts and ensuring safety during operation. However, issues may arise with the adjustment mechanisms that require attention.
One frequent problem encountered is difficulty turning or locking the tilt knob that controls blade angle adjustments. This could be due to debris accumulation inside the knob assembly or a worn-out locking mechanism. Follow these steps to address this issue:
-
Disconnect the table saw from the power source and remove the blade tilt locking knob.
-
Clean any debris or sawdust from inside the knob assembly using compressed air or a brush.
-
Apply a lubricant, such as WD-40, to ensure smooth operation of the locking mechanism.
-
Reinstall the knob and test its functionality.
Another common issue is when the blade height adjustment fails to hold its position, causing it to drift during cutting. This can be caused by loose bolts that secure the height adjustment mechanism or worn-out components within the system. Consider these steps for resolving this problem:
-
Turn off and unplug your table saw before proceeding with any adjustments.
-
Locate the bolts that secure the height adjustment mechanism and tighten them if they are loose.
-
Inspect other components involved in blade height adjustment, such as support brackets and knife-locking knobs, for signs of wear or damage.
-
Replace any faulty parts with suitable replacements to restore proper functionality.
Tips for resolving these issues effectively
When troubleshooting slow blade spin and blade height adjustment issues in your table saw, keep these additional tips in mind:
-
Regularly clean your table saw’s brushes to prevent motor failure due to excessive dust accumulation.
-
Ensure that your table saw is properly grounded to minimize electrical issues.
Fixing Bad Cuts and Angle Cut Problems on Your Table Saw
Understanding potential causes behind inaccurate cuts:
-
Inaccurate cuts can be frustrating, but understanding the common causes behind them can help you rectify the problem. One possible cause is a misaligned saw blade. Over time, the blade may shift slightly, resulting in imprecise cuts. Another factor to consider is the condition of your saw’s riving knife. If it is not properly aligned with the blade, it can affect the accuracy of your cuts.
-
Worn-out or dull blades can lead to poor cutting performance. When a blade becomes dull, it struggles to make clean cuts and may veer off course. It’s crucial to regularly inspect your saw blades and replace them when necessary.
-
Dust accumulation around the blade area can also contribute to inaccurate cuts. Sawdust buildup can interfere with the smooth movement of the workpiece through the saw, causing it to bind or deflect during cutting.
Steps to rectify angle cut problems on your table saw:
-
Check for blade alignment: Start by ensuring that your table saw’s blade is properly aligned. Use a combination square or an angle gauge to confirm if it is parallel to both the miter slot and fence. Adjust as needed.
-
Inspect and adjust the riving knife: The riving knife helps prevent kickback and ensures accurate cuts by keeping the workpiece aligned with the blade throughout its entire length. Make sure it is correctly positioned relative to both the blade and fence.
-
Replace worn-out or dull blades: If you notice that your table saw struggles to make precise angled cuts, it might be time for a new blade. Choose a high-quality replacement that suits your specific cutting needs.
-
Clean out dust buildup: Regularly clean any accumulated sawdust from around your table saw’s blade area using compressed air or a vacuum cleaner attachment designed for woodworking tools. This will help maintain optimal cutting performance.
Ensuring precise cuts by troubleshooting common issues:
-
Blade guard and splitter: Ensure that your table saw’s blade guard and splitter are properly installed and functioning correctly. These safety features not only protect you but also contribute to accurate cuts.
-
Switch cover: Check the switch cover on your table saw to ensure it is securely in place. A loose or damaged switch cover can affect the saw’s performance and compromise safety.
-
Workpiece stability: When making angle cuts, it is crucial to secure the workpiece firmly against both the fence and miter gauge. Any movement during cutting can result in inaccurate angles.
-
Calibration: Periodically calibrate your table saw to ensure its accuracy. Consult your owner’s manual for specific instructions on how to calibrate different components of the saw.
By understanding the potential causes behind inaccurate cuts, following the steps to rectify angle cut problems, and troubleshooting common issues, you can improve the precision of your table saw cuts. Regular maintenance and attention to detail are key in keeping your tool in optimal condition for clean and accurate woodworking projects.
Resolving Slow Blade Spin, Motor Starting, and Lower RPM Concerns
A common issue that woodworkers encounter is a slow blade spin, difficulties in motor starting, and lower RPMs. These problems can be frustrating and hinder the efficiency of your work. However, before rushing to replace the entire saw or its motor, there are troubleshooting techniques you can employ to resolve these concerns effectively.
Troubleshooting Techniques
To address slow blade spin, starting difficulties, and lower RPMs in your table saw motor, consider the following troubleshooting techniques:
-
Check for a Bad Motor: A faulty or damaged motor could be the root cause of these issues. Inspect the motor carefully for any visible signs of damage such as burnt wires or broken connections.
-
Examine the Windings: The windings inside the motor play a crucial role in its performance. Check if they are intact and properly connected. Any loose or disconnected windings may result in decreased power output.
-
Prevent Overheating: Overheating can lead to sluggish performance. Ensure proper ventilation around the motor by cleaning out any dust or debris that might be blocking airflow.
-
Inspect Washer Placement: Sometimes, incorrect placement of washers between the blade and arbor can cause friction and impede smooth rotation. Make sure the washers are positioned correctly to avoid unnecessary strain on the motor.
-
Verify Strain Relief: Excessive tension on the power cord can strain both the cord itself and the motor’s electrical connection points. Check if there is adequate strain relief to prevent unnecessary stress on these components.
-
Evaluate Capacitor Functionality: The capacitor helps provide an initial boost of power during startup. If it is faulty or worn out, it may affect how quickly your table saw starts up and reaches optimal speed.
Addressing Specific Factors
Several factors can contribute to slow blade spin, motor starting difficulties, and lower RPMs. By addressing these specific factors, you can improve your table saw’s performance:
-
Power Supply: Ensure that your table saw is receiving adequate power supply. Insufficient voltage or an unstable electrical connection can lead to motor performance issues.
-
Blade Quality: A dull or damaged blade can put additional strain on the motor, resulting in slower spin and decreased RPMs. Regularly sharpen or replace your blades to maintain optimal cutting efficiency.
-
Belt Tension: Check the tension of the drive belt connecting the motor to the blade arbor. If it is too loose or worn out, it may cause slipping and affect the overall performance of your table saw.
Tips for Effective Resolution
To effectively resolve concerns related to slow blade spin, motor starting difficulties, and lower RPMs in your table saw:
-
Follow manufacturer guidelines for maintenance and troubleshooting procedures specific to your model.
-
Regularly clean and lubricate moving parts to ensure smooth operation.
-
Keep a record of symptoms and observations when encountering these issues to help identify patterns or recurring problems.
-
Seek professional assistance if you are unsure about handling complex repairs or if the problem persists after attempting basic troubleshooting techniques.
By taking these steps, you can troubleshoot common issues with your table saw motor and potentially avoid costly replacements while ensuring optimal performance for all your woodworking projects.
Conclusion
In conclusion, repairing a table saw motor is indeed a viable option for many woodworkers. By diagnosing faulty motors and following a step-by-step guide, you can tackle repairs with confidence. However, it is important to consider various factors before deciding whether to repair or replace the motor. Troubleshooting common issues such as slow blade spin, blade height adjustment problems, bad cuts, and angle cut discrepancies can also be resolved through proper maintenance and repair techniques.
Remember thatIt’s crucial to prioritize safety. Always follow manufacturer guidelines and take necessary precautions while working on electrical components.
By investing time in understanding the inner workings of your table saw motor and acquiring the skills needed for repairs, you can save money and extend the lifespan of your equipment. Moreover, knowing how to troubleshoot common issues will ensure smoother woodworking operations and improved output quality.
So go ahead and explore the possibility of repairing your table saw motor! With determination, patience, and the right knowledge at hand, you’ll be able to overcome any challenges that come your way.
FAQs
Can I repair my table saw motor if it won’t start?
If your table saw motor fails to start altogether, there are several potential causes that you can investigate. Check for loose connections or faulty wiring in the power supply system. Examine the capacitor or centrifugal switch as these components often contribute to starting issues. If you’re unsure about handling electrical components or troubleshooting techniques, consult a professional for assistance.
How do I know if my table saw motor needs repair?
Signs that indicate your table saw motor may require repair include unusual noises during operation (such as grinding or screeching sounds), excessive vibration while cutting materials, or inconsistent performance in terms of speed or power output. It’s important not to ignore these signs as they could worsen over time if left unaddressed.
Is it cost-effective to repair a table saw motor?
The cost-effectiveness of repairing a table saw motor depends on various factors, including the extent of the damage, the availability of replacement parts, and the overall condition of the motor. In some cases, repairs can be more affordable than purchasing a new motor. However, if the damage is extensive or if replacement parts are difficult to find, it may be more practical to invest in a new motor.
Can I replace parts in my table saw motor myself?
While replacing certain parts in your table saw motor can be done by experienced DIYers, it’s important to exercise caution and follow proper guidelines. Electrical components require expertise and knowledge to handle safely. If you’re unsure about any aspect of replacing parts in your table saw motor, it’s best to consult a professional.
How often should I maintain my table saw motor?
Regular maintenance is essential for ensuring optimal performance and longevity of your table saw motor. It’s recommended to clean the motor regularly, inspect for any signs of wear or damage, lubricate moving parts as needed, and tighten loose connections. Following manufacturer guidelines for maintenance intervals will help keep your table saw running smoothly.
Can repairing my table saw motor void its warranty?
Repairing your table saw motor yourself may potentially void its warranty. Manufacturers typically require repairs or servicing to be performed by authorized technicians or service centers. Before attempting any repairs yourself, check your warranty terms and conditions or contact the manufacturer for guidance.
What safety precautions should I take when repairing my table saw motor?
When working with electrical components like a table saw motor, always prioritize safety. Ensure that power is disconnected before starting any repair work. Use insulated tools and wear appropriate personal protective equipment (PPE) such as gloves and safety glasses. Familiarize yourself with safe electrical practices and follow all relevant guidelines provided by manufacturers or regulatory bodies.
Are there any alternatives to repairing a faulty table saw motor?
If repairing your table saw motor seems daunting or if the damage is extensive, you may consider seeking professional help or replacing the motor altogether. Professional technicians have the expertise and tools to diagnose and repair complex issues effectively. Alternatively, investing in a new motor could be a suitable option depending on your budget and long-term woodworking goals.
How can I prevent future issues with my table saw motor?
To minimize the likelihood of future problems with your table saw motor, regular maintenance is key.