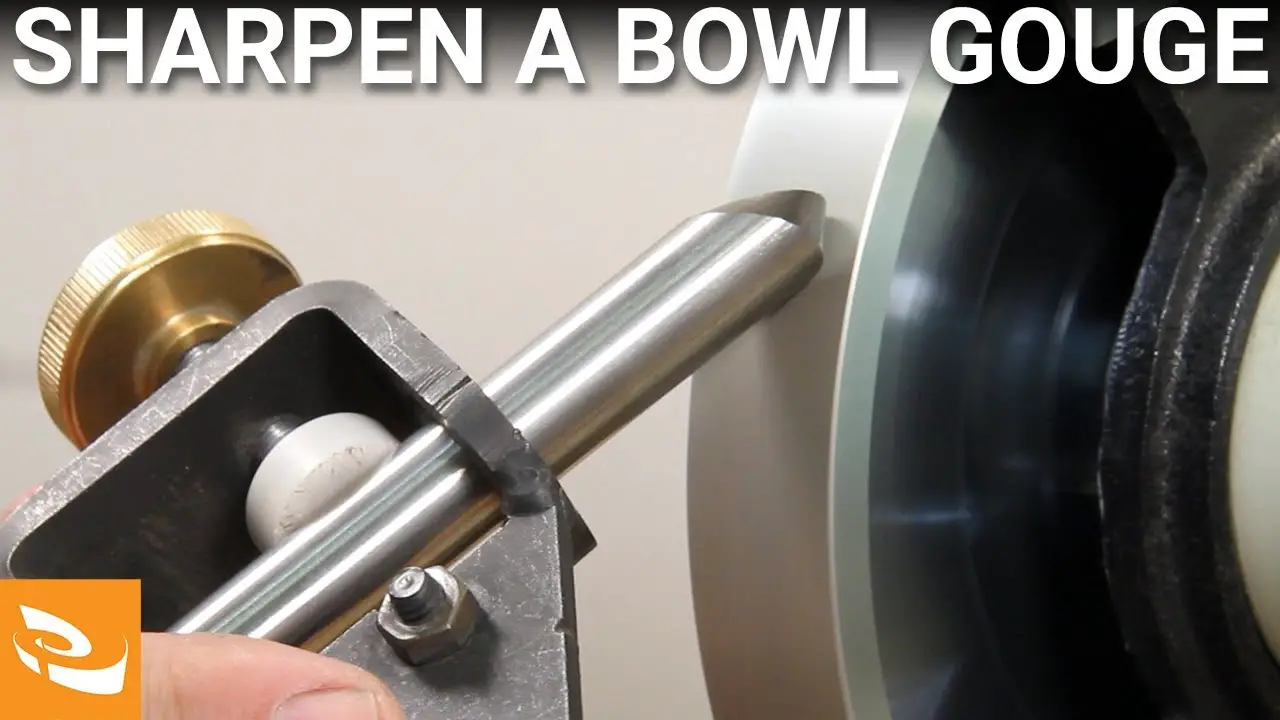
Bowl gouges are sharpened using a grinding wheel. The first step is to dress the wheel with a diamond dressing tool. This will create a clean, flat surface on the wheel.
Next, the bowl gouge is held at a 30-degree angle and pushed away from the body. The bevel is then ground down until it’s sharp.
If you’re a woodturner, then you know that having sharp tools is essential to your success. And one of the most important tools in your arsenal is the bowl gouge. But how do you sharpen it?
There are a few different ways to sharpen a bowl gouge. You can use a handheld grinder, a bench grinder, or even a lathe-mounted sharpener. Whichever method you choose, the basic process is the same:
1. First, dress the wheel with a diamond abrasive tool. This will remove any glazing from the wheel and create a fresh surface for grinding.
2. Next, set the angle of your grindstone to match the bevel angle on your bowl gouge (usually about 35 degrees).
3. Then, holding the bowl gouge against the wheel with light pressure, move it back and forth until you’ve created a nice sharp edge. Remember to keep the bevel angle consistent as you grind!
4. Finally, strop the edge on leather or canvas to polish it up and remove any burrs left from grinding.
And that’s all there is to it! With practice, you’ll be able to get your bowl gouges razor sharp in no time flat.
How to Sharpen and Use Bowl Gouges | Woodturning Essentials
Table of Contents
How Do You Sharpen a Traditional Bowl Gouge?
Assuming you are starting with a relatively sharp bowl gouge, the following is a basic Sharpening Sequence for a Bowl Gouge. This can be done by hand or on a machine.
1) Rough Grind – Using a rough grinding wheel, establish the primary bevel.
This should be around 35 degrees.
2) Secondary Bevel – Using a honing wheel or strop, create a secondary bevel of 10-15 degrees.
3) Micro Bevel – Using either your honing wheel/strop or a microbeveler (if you have one), create an even smaller bevel of 1-2 degrees.
This will serve as your “cutting edge”.
4) Polish the Edge – Once you have your microbevel set, use either diamond paste or polishing compound on your strop to really polish up that edge. You want it to be razor sharp!
Now that you have your basic sequence down, let’s talk about how to actually use it…
The first step is to get your tools set up properly. Make sure your workpiece is firmly secured and that you have good lighting so you can see what you’re doing.
You’ll also want to make sure your grinding and honing wheels are clean and in good condition – no need to make things more difficult than they need to be!
Next, take your bowl gouge and position it so the cutting edge is pointing away from you at roughly a 35 degree angle. Apply light pressure as you move the tool back and forth across the grinder until you’ve established the primary bevel all along the cutting edge.
Try not to overheat the tool during this process – if it starts to turn blue, stop and let it cool down before continuing.
Once the primary bevel is complete, it’s time for the secondary bevel. This time, we’re going to use a honing wheel or strop instead of the grinder.
Position the bowl gouge so that only the very tip of the cutting edge is touching the surface of the honing wheel/strop (you may need to experiment with this part until you find what works best for you).
What Grit is Best for Sharpening Bowl Gouges?
There are many factors to consider when choosing the right grit for sharpening your bowl gouge. The most important factor is the type of wood you will be working with. Soft woods like pine and fir require a coarser grit, while hardwoods like maple and oak require a finer grit.
The other factor to consider is the condition of your tools. If they are extremely dull, you will need to start with a coarse grit and work your way up to a finer one. If they are only slightly dull, you can start with a medium or fine grit.
The type of wood you’re working with is the most important deciding factor for what kind of grit to use when sharpening your bowl gouge.
If you’re working on softwoods like pine and fir, go for a coarser grit since those woods aren’t as tough as hardwoods. On the other hand, if you’re shaping hardwoods like maple and oak, use a finer grit since those woods are tougher and will require a sharper edge.
How Do You Sharpen Gouges by Hand?
If you’re a woodworker, chances are you have a few gouges in your toolkit. Gouges are incredibly versatile tools that can be used for everything from roughing out lumber to shaping intricate details. And while they’re relatively easy to use, they can be difficult to sharpen by hand.
In this article, we’ll show you how to sharpen your gouges by hand, using only a few simple tools.
The first step is to select the right sharpening stone. For most gouges, a medium-grit stone will work well.
If your gouge is particularly dull or damaged, you may need to start with a coarse-grit stone. Once you’ve selected your stone, wet it with water and set it on a flat surface.
Next, take your gouge and place the cutting edge against the wetstone at a 20-degree angle.
Apply light pressure and push the blade forward along the length of the stone (away from you). You should make about 10 passes on each side of the blade before moving on to the next step.
Once both sides of the blade are evenly sharpened, it’s time to move on to honing.
To do this, simply increase the angle of your blade slightly (to around 30 degrees) and repeat the process above. This time, however, focus on making fewer passes with more pressure applied – aim for 5 or 6 passes per side at most.
Finally, once both sides of the blade are nice and sharp, it’s time to strop them.
This helps remove any small burrs or imperfections that may be left behind after honing. To strop your gouge blades, simply rub them backwards (towards you) across a piece of leather or canvas that has been treated with abrasive compound . A few strokes per side should suffice – just be careful not to overdo it or you could damage the blades!
How Often Should You Sharpen a Bowl Gouge?
Assuming you are referring to a woodturning gouge:
A bowl gouge is one of the most versatile tools in a woodturner’s arsenal and, as such, it see a lot of use. This means that it will need to be sharpened more often than other tools.
How often you need to sharpen your bowl gouge will depend on how much you use it and what kind of wood you are working with.
If you are using your bowl gouge regularly on hardwoods, you will need to sharpen it more frequently than if you were only using it on softer woods. Likewise, if you are taking heavy cuts or working with difficult grain, your tool will require more frequent Sharpening.
As a general rule of thumb, however, most turners like to sharpen their bowl gouges after every 3-4 hours of use.
Of course, the best way to keep your Gouge sharp is to practice proper care and maintenance from the start. This includes honing the edge with a diamond cutter before each use and maintaining a consistent angle while turning.
With proper care, your bowl gouge should give you years of faithful service.
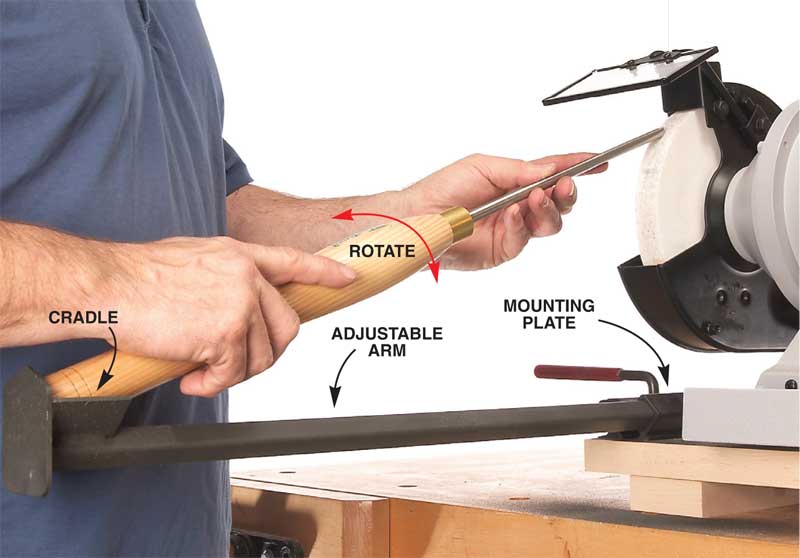
Credit: www.popularwoodworking.com
How to Sharpen a Bowl Gouge by Hand
Bowl gouges are one of the most important tools for a woodturner. They are used to create smooth, concave surfaces on bowls and other turned projects. A sharp bowl gouge is essential for getting a good finish on your work.
There are two methods for sharpening a bowl gouge by hand: using a honing guide, or freehand sharpening. Freehand sharpening is the more traditional method, and it can be faster once you get the hang of it. But if you’re just starting out, or if you want more control over the process, using a honing guide is probably the better option.
To sharpen your bowl gouge freehand, start by holding the tool in your dominant hand and resting the butt of the handle on your thigh. Position the blade so that it’s pointing straight up, then tilt it forward until the bevel touches your Sharpie line. Use your other hand to apply pressure to the back of the blade as you slowly push it forward.
As you do this, rotate the blade so that you’re always shaving off fresh metal from both sides of the bevel. When you reach the end of your stroke, flip the blade over and repeat in reverse.
With a honing guide, things are a little different.
Start by clamping the guide to your workbench so that its jaws are level with each other. Then insert your bowl gouge into one of them, making sure that the bevel is facing down (toward The Guide). Adjust The Guide’s set screws until they just barely touch The Blade – you don’t want to apply too much pressure or you’ll risk damaging The Blade or The Guide itself.
Once everything is positioned correctly, tighten The Guide’s thumbscrews to lock everything in place. Then simply run The Blade through The Guide’s jaws like you would when using any other handheldsharpening tool – remember to keep an even pressure on both sides ofThe Blade as you do this! When you’re finished honing, removeTheBlade fromTheGuide and checkyour progress againstYour original Sharpie line – ifit looks good,you’re all done!
Bowl Gouge Sharpening System
One of the most important tools in a woodturner’s toolkit is the bowl gouge. This essential tool is used to shape and smooth the inside and outside surfaces of bowls. A properly sharpened bowl gouge can make quick work of even the most challenging projects.
There are many ways to sharpen a bowl gouge, but one of the quickest and most effective methods is using a sharpening system. These systems typically consist of two wheels – one for rough grinding and one for fine honing. By using these wheels in succession, you can quickly achieve a razor-sharp edge on your bowl gouge.
When choosing a sharpening system, it’s important to select one that will accommodate the specific size and geometry of your bowl gouges. Most systems come with adjustable jigs or fixtures that allow you to customize the angle and depth of cut for each individual tool. With a little practice, you’ll be able to get consistent results every time you sharpen your bowl gouges – making them last longer and perform better than ever before!
Bowl Gouge Sharpening Angles
Most people think of a bowl gouge as primarily a tool for shaping the outside of a bowl.
And while it’s true that a bowl gouge can be used for this purpose, it’s also an excellent tool for other jobs, such as hollowing out the inside of a bowl and shaping the inside of vases and other vessels.
But regardless of what you’re using it for, one thing is always true: the sharper your bowl gouge, the better it will perform.
So in this blog post, we’re going to take a look at how to sharpen a bowl gouge, including what angles to use and how to achieve a razor-sharp edge. Let’s get started!
Best Bowl Gouge Sharpening System
If you’re a woodturner, then you know that having a sharp bowl gouge is essential to your success. There are many different ways to sharpen a bowl gouge, but finding the best method can be difficult. In this blog post, we’ll take a look at the best bowl gouge sharpening system on the market today.
The first thing you need to consider when choosing a sharpening system is what type of steel your bowl gouge is made from. If your Gouge is made from high-carbon steel, then you’ll want to use a different system than if it’s made from stainless steel. The reason for this is that high-carbon steels are more difficult to sharpen and require more care.
With that said, let’s take a look at some of the best systems available.
One popular system is the Tormek T-7 Water Cooled Sharpening System . This unit uses water to keep the blade cool while you’re sharpening it.
This prevents heat build-up which can damage the temper of your blade. TheTormek also comes with jigs for sharpening both standard and side grind Bowl Gouges .
Another great option is the Worksharp WS3000 Woodworking Tool Sharpener .
This unit uses diamond abrasives to quickly sharpen your tools without damaging them. It also has an adjustable stop so you can get consistent results every time. The WS3000 also comes with jigs for both standard and side grinds on Bowl Gouges .
No matter which system you choose, make sure you read the instructions carefully before using it. Always test the sharpener on scrap wood before using it on your actual project piece. By following these simple tips, you’ll ensure that your bowl gouge always has a razor-sharp edge!
Make a Bowl Gouge Sharpening Jig
A bowl gouge is one of the most important tools for a woodturner. It is used to create bowls, platters and other turned objects. A sharp bowl gouge is essential for getting a smooth, clean cut and avoiding tear out.
Unfortunately, keeping a bowl gouge sharp can be a challenge. The good news is that there are a number of ways to do it, and one of the simplest is to use a sharpening jig.
There are many different designs for sharpening jigs, but they all work on the same principle.
You start by attaching the jig to your lathe or workbench. Then you secure your bowl gouge in the jig so that the cutting edge is exposed. Once everything is locked in place, you simply run your bowl gouge along the abrasive surface of the jig until it is nice and sharp.
Sharpening jigs are relatively inexpensive and easy to use, making them a great option for anyone who wants to keep their bowl gouges in top condition. If you’re new to using a sharpening jig, there are plenty of instructional videos and articles online that can help you get started.
Bowl Gouge Grinds And Their Advantages
There are three main types of grinds for a bowl gouge and each has its own advantages:
The first is the traditional “U” grind. This offers good all-around performance and is a good choice for general work.
It is also easy to sharpen.
The second grind is the “V” grind. This offers better cutting performance than the U grind but can be more difficult to sharpen.
It is a good choice for more experienced turners who are looking for improved cutting ability.
The third grind is the “skew” grind. This offers the best cutting performance of the three but can be very difficult to sharpen.
It is only recommended for experienced turners who are willing to put in the extra effort required to keep it sharp.
Conclusion
This blog post covers the basic steps of how to sharpen a bowl gouge. First, you need to find a sharpening jig that is compatible with your lathe. Next, you need to set the bevel angle and then start grinding the edge of the tool.
Finally, you need to test the sharpness of the gouge on a piece of wood. With these simple steps, you can keep your bowl gouges in top shape for years to come.
