An adjustable hand planer is a tool that can be used to smooth out rough edges on wood. The first step is to set the depth of the blade. To do this, you will need to loosen the thumbscrew on the side of the tool and then adjust the blade to your desired depth.
Next, you will need to adjust the fence. The fence is what keeps the wood in place as you plane it. To adjust the fence, simply loosen the knob on the side of the tool and slide it to your desired position.
Finally, once everything is set, you can start plane away!
- Hand planers are one of the most versatile tools in a woodworker’s arsenal, capable of taking care of a wide variety of tasks
- Over time, however, the blades on your hand plane will become dull and need to be replaced
- To change the blades on your hand plane, first remove the cap screws that hold the blade in place
- Next, remove the blade and install a new one in its place
- Make sure that the blade is installed with the bevel facing up
- Finally, replace the cap screws and tighten them down to secure the new blade in place
How to Adjust a Bench Plane | Woodworking
Table of Contents
How Do I Adjust the Depth of Cut on My Hand Planer
Assuming you are talking about a handheld wood planer, most have depth adjustment levers on the top of the device. The blade is mounted on a carriage that can be moved up and down; when you lower the carriage, it brings the blade closer to the surface of the wood, increasing the depth of cut. To adjust, simply find the lever or knob (depending on your model) and turn it to raise or lower the carriage as needed.
How Do I Change the Blades on My Hand Planer
If you’re new to woodworking, the hand planer can be a great tool for quickly removing small amounts of material from a workpiece. But like any power tool, it’s important to keep the blades sharp and in good condition. Here’s a quick guide on how to change the blades on your hand planer.
First, unplug the planer from any power source and make sure that it is completely turned off. Next, locate the blade housing cover – this is usually located at the top of the unit. On some models, you may need to remove one or more screws in order to access the cover.
Once you have access to the blade housing, remove the old blades by simply taking them out of their slots. Be careful not to touch the cutting edges of the blades as they are very sharp. If your model has replaceable carbide inserts, remove these as well (see your owner’s manual for specific instructions).
Now it’s time to install the new blades. Start by inserting one end of each blade into its slot in the blade housing. Then gently push down on each blade until it is fully seated.
Make sure that each blade is installed with its cutting edge facing inwards – if they are installed backwards, they will not cut properly. Once all of the blades are installed, reattach the blade housing cover and tighten any screws that were removed earlier.That’s it!
You’re now ready to get back to work with your newly sharpened hand planer.
How Do I Sharpen the Blades on My Hand Planer
Assuming you’re referring to a hand held wood planer:To sharpen the blades on your hand planer, you will need to remove the blades from the tool. Most hand held wood planers have two blades that can be removed by unscrewing them from the housing.
Once the blades are removed, use a sharpening stone or file to sharpen the cutting edges of the blades. Be sure to maintain a consistent angle while sharpening and avoid over-sharpening which can damage the blade. Once both sides of each blade are sharpened, reassemble the planer and test it on some scrap wood to ensure it is working properly before using it on your project.
Credit: www.woodworkersjournal.com
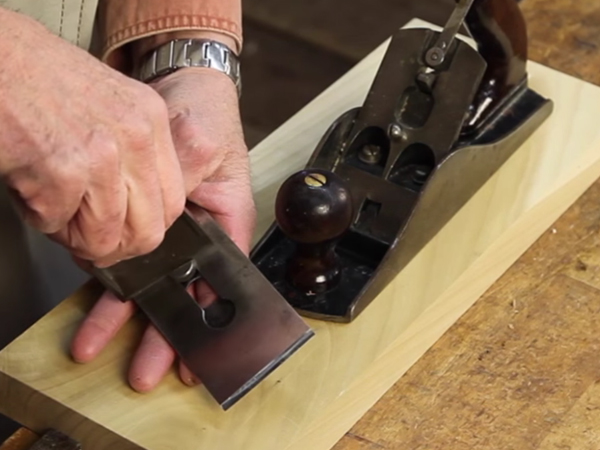
How to Adjust Block Plane
If you’re a woodworker, then you know that one of the most important tools in your arsenal is the block plane. A block plane is a small hand tool that’s used to smooth and shape wood.There are two main types of block planes: the standard block plane and the low-angle block plane.
The standard block plane is best suited for general purpose work, while the low-angle block plane is better for delicate work or working with hardwoods.No matter what type of block plane you have, though, it’s important to know how to adjust it properly. Here’s a quick guide on how to do just that:
1. Start by loosening the lever cap screw and removing the lever cap.2. Next, loosen the blade adjustment knob and slide the blade forward or backward until it’s positioned where you want it.3. Once the blade is in place, tighten down both the lever cap screw and blade adjustment knob until they’re snug.
Be careful not to over-tighten them, as this can damage your tool.
Conclusion
If your hand planer is leaving behind a rough surface, it might be time to adjust the blade. To do this, you’ll need to remove the blade from the tool. Once it’s removed, use a wrench to loosen the blade clamp screws.
Then, you can rotate the blades until they’re in the desired position. Finally, retighten the screws and reattach the blade. With a few simple adjustments, you can get your hand planer back to creating smooth surfaces.