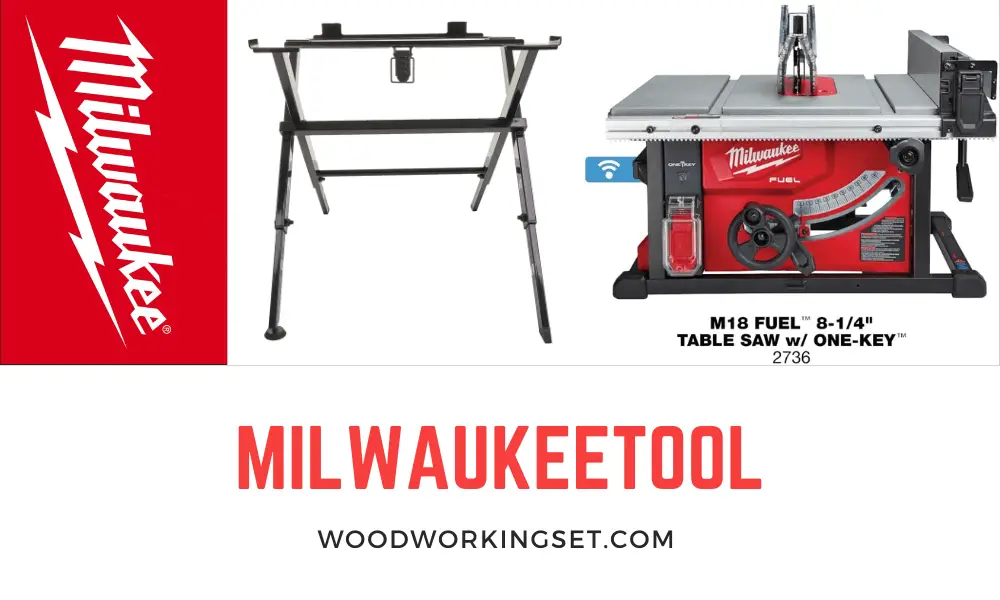
Are you ready to take your woodworking projects to the next level? The Milwaukee table saw stand is the perfect addition to your workshop. With its sturdy construction and convenient features, this stand will make your woodworking experience even more enjoyable. In this article, we will guide you through the step-by-step process of assembling the Milwaukee table saw stand, ensuring that you can start using it in no time.
To begin, gather all the necessary tools and parts for the assembly. Lay them out in a clear workspace, ensuring that you have enough room to maneuver. The instructions provided with the Milwaukee table saw stand are clear and concise, making the assembly process a breeze. The first step involves attaching the legs to the stand base, securing them tightly with the provided screws. The legs are designed to provide stability and support for the table saw, ensuring safe and accurate cuts. Once the legs are securely in place, it’s time to attach the brackets that will hold the table saw in position.
Simply slide the brackets onto the legs and tighten the screws, ensuring that they are snug. The brackets are adjustable, allowing you to customize the height of the table saw to suit your needs. With the brackets in place, you can now attach the table saw to the stand. Gently lift the table saw onto the stand and align the holes on the base with the holes on the brackets. Secure the table saw in place by tightening the screws, ensuring that it is stable and level. Congratulations!

Gather the Necessary Tools and Hardware
Table of Contents
To begin assembling your project, you’ll need to gather the necessary tools and hardware. First, let’s talk about the required tools for assembly. Picture a well-organized toolbox filled with essential items like screwdrivers, wrenches, and pliers. These versatile tools will help you tackle different tasks with ease. Now, let’s move on to the appropriate hardware for assembly. Imagine various sizes and types of screws, bolts, and nuts neatly arranged in compartments. This ensures you have the right pieces to securely fasten your project together. Don’t forget to have a level and tape measure handy for precise alignment and accurate measurements.
Required Tools for Assembly
Now that we have a clear understanding of the importance of assembling the project correctly, let’s move on to the next step: gathering the necessary tools and hardware. Having the right tools and hardware is crucial to ensure a smooth and successful assembly process.
First and foremost, let’s talk about the required tools for assembly. These tools are essential for putting the project together with precision and accuracy. You will need a variety of tools, including a screwdriver set with different sizes and types of screwdrivers. This will allow you to tighten screws of different shapes and sizes.
In addition to a screwdriver set, having a set of wrenches is also essential. Wrenches will come in handy when it comes to tightening bolts and nuts securely. Make sure you have a range of sizes to accommodate various fasteners.
Another important tool to have is a drill with different drill bit sizes. This will be useful when you need to create holes for screws or other fasteners. Additionally, a hammer will be necessary for tasks such as tapping in nails or gently adjusting components into place.
Finally, having a set of pliers will prove invaluable. Pliers will assist you in gripping and manipulating small parts or wires, providing you with more control during the assembly process.
Appropriate Hardware for Assembly
Appropriate hardware for assembly is an essential aspect to consider when gathering the necessary tools and materials for your project. Choosing the right hardware ensures the durability and stability of your finished product.
When it comes to hardware, it’s important to select items that are specifically designed for the type of assembly you are working on. For instance, if you are building a wooden structure, you will need screws, nails, and bolts that are suitable for wood. These hardware items are designed to penetrate and securely hold wood pieces together, ensuring a strong and reliable structure.
Additionally, it’s crucial to choose hardware that is of the correct size and length. Using hardware that is too short or too long can compromise the integrity of your assembly. It’s always best to measure and select the appropriate size and length of screws, nails, or bolts to ensure a secure fit.
Furthermore, consider the material of the hardware you choose. Stainless steel or galvanized hardware is highly recommended for outdoor projects, as they are resistant to rust and corrosion. This will ensure that your assembly remains sturdy and aesthetically pleasing for years to come.
In conclusion, selecting the appropriate hardware for assembly is vital for the success of your project.
Level
Moving on to the next topic in our discussion, let’s talk about the essential tools and hardware you’ll need to gather in order to successfully assemble your project. One of the first tools you’ll want to have on hand is a level.
Imagine a sleek and sturdy tool, its vibrant yellow body standing out against the dark backdrop of your work area. The level, with its precise measurements and bubble indicators, ensures that your project is perfectly aligned and balanced. As you hold it in your hand, you can feel the weight and quality of the tool, giving you confidence in its accuracy.
A level is indispensable when it comes to achieving a professional finish. It allows you to accurately determine if your project is level or plumb, ensuring that it stands straight and true. Whether you’re assembling furniture, installing shelves, or even hanging a picture frame, the level is your trusted companion.
With its clear markings and easy-to-read bubble indicators, the level guides you in aligning your project with precision. No more crooked shelves or slanted pictures. The level empowers you to create a visually appealing and well-balanced end result, enhancing the overall aesthetic of your space.
Remember, it’s important to choose a level that suits the size of your project.
Read the Instructions Carefully
Before diving into any task, it’s crucial to read the instructions carefully. Take a moment to familiarize yourself with the instructions. Imagine flipping through the pages, absorbing the information, and gaining a clear understanding of what lies ahead. As you move forward, make sure to understand the assembly process. Picture yourself meticulously following each step, ensuring that everything is in its rightful place. And remember, subtopics 4, 5, and 10 are waiting for you. Visualize yourself conquering each one with ease, feeling confident and accomplished. So, go ahead, read those instructions, and let the adventure begin!
Familiarize Yourself with the Instructions
Now that you have gathered all the necessary tools and hardware, it’s time to dive into the next crucial step: familiarizing yourself with the instructions. Imagine holding a manual in your hands, eagerly flipping through its pages, ready to embark on this assembly journey. It is important to take the time to thoroughly read and understand the instructions before beginning the process.
As you delve into the manual, you will find a wealth of information waiting to be discovered. Each step is meticulously laid out, guiding you through the assembly process with clear and concise directions. Take a moment to appreciate the thoughtfulness that went into creating these instructions, as they are designed to make your experience as smooth as possible.
The instructions will provide you with a detailed list of all the components that you will be working with. Take the time to familiarize yourself with each part, understanding its purpose and how it fits into the overall structure. Visualize in your mind how these pieces will come together, forming a cohesive whole.
In addition to the list of components, the instructions will also provide you with diagrams and illustrations. These visual aids serve as invaluable tools, allowing you to better grasp the assembly process. Take the time to study these diagrams, tracing each line with your finger, and envision how the pieces will fit together.
Understand the Assembly Process
After gathering all the necessary tools and hardware, you may feel a surge of excitement as you are one step closer to completing your project. Now, it’s time to dive into the next crucial step: understanding the assembly process. This is where the magic happens, where all the pieces come together to create something truly remarkable.
Familiarize yourself with the instructions provided. Take a moment to read through them carefully, allowing the words to paint a vivid picture in your mind. Each step is like a brushstroke, guiding you on this creative journey. As you immerse yourself in the instructions, you will start to grasp the intricate details of the assembly process.
Understanding the assembly process is like deciphering a secret code. It is a puzzle waiting to be solved, a challenge begging to be conquered. Each step is like a clue, leading you closer to achieving your goal. As you absorb the instructions, you’ll begin to visualize how each component fits together, how they interlock with precision, and how they form a cohesive whole.
Imagine yourself carefully arranging the pieces, your hands moving with a purpose and finesse. You understand the significance of each step, the importance of following the instructions diligently. It’s a dance of coordination and focus, where each movement brings you closer to the finished product.
Now that you have gathered all the necessary tools and hardware, it’s time to dive into the next crucial step: reading the instructions carefully. This step may seem mundane, but it holds the key to a successful assembly process. Think of the instructions as a treasure map that will guide you through each step, ensuring that you don’t miss any important details along the way.
Familiarize yourself with the instructions before you begin. Take a moment to read through them thoroughly, absorbing all the information they provide. Pay attention to any diagrams or illustrations included, as they can offer invaluable visual guidance. Understanding the assembly process is vital to achieving a flawless end result.
As you delve into the instructions, you’ll notice that they have been meticulously crafted to guide you through each step of the assembly process. They will outline the specific order in which components should be assembled, ensuring that you don’t miss any crucial steps. Follow the instructions diligently, and you’ll find yourself effortlessly navigating through the assembly process.
Remember, the instructions are your best friend during this journey. They will help you avoid any potential pitfalls or mistakes that could hinder your progress. By taking the time to thoroughly understand the instructions, you are setting yourself up for a seamless and enjoyable assembly experience.
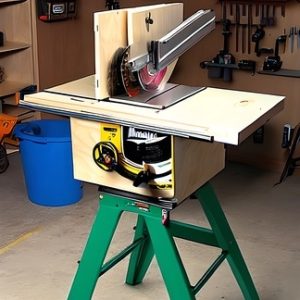
Assemble the Stand
To assemble the stand, start by laying out all the pieces in front of you. This way, you can easily see what you’re working with. Once everything is organized, follow the instructions step-by-step. It’s important to take your time and not rush through the process. After securing the tabletop onto the stand, attach the saw to it. Make sure all the bolts and screws are tightened properly, ensuring the stand is sturdy and safe. By carefully following these steps, you’ll have a fully assembled stand in no time. Happy building!
Lay Out the Pieces for Assembly
As you embark on the exciting journey of assembling your brand new saw stand, take a moment to lay out all the pieces before you. Picture yourself in a well-lit garage or workshop, with tools neatly organized and a sense of anticipation in the air. Before you, a collection of components awaits, each one a vital piece of the puzzle.
Gently place the legs of the stand on the ground, their sturdy construction promising stability and support. Next, lay the tabletop down, its smooth surface gleaming in the light. As you reach for the bolts and screws, imagine the satisfaction of seeing everything come together seamlessly.
Make sure to follow the instructions step-by-step, as they will guide you through the process with ease. Take your time and pay attention to the details, for they are the key to a well-assembled stand. As you progress, the pieces will begin to take shape, forming a solid foundation for your saw.
Patiently secure the tabletop onto the stand, ensuring that it is level and secure. Take a moment to appreciate the craftsmanship of the design, the way each piece fits perfectly into place. Once the tabletop is in position, it’s time to attach the saw itself, completing the transformation.
Finally, before you move on to the next step, ensure that all bolts and screws are tightened.
Follow the Instructions Step-by-Step
Following the previous section’s advice to read the instructions carefully, it is now time to embark on the next step: following the instructions step-by-step. With the necessary tools in hand, you are ready to begin assembling the stand.
As you lay out the pieces for assembly, you can’t help but notice the precision in their design. Each part seems to be crafted with utmost care, ensuring a seamless fit when put together. The instructions, neatly laid out before you, provide a roadmap for the entire process.
Starting with the first step, you carefully follow the instructions, making sure to align each piece as indicated. As you progress, you find yourself marvelling at the genius simplicity of the design. The instructions guide you effortlessly through each stage, making the process seem like a delightful puzzle.
With each step completed, you grow more confident in your ability to assemble this stand. The instructions become your trusted companion, offering guidance and reassurance as you continue to build.
Finally, the moment arrives to secure the tabletop onto the stand. With precision and care, you align the holes, tighten the bolts, and feel a sense of accomplishment as the tabletop becomes an integral part of the stand. The sturdy construction ensures stability, providing a sturdy foundation for the next step.
Secure the Tabletop Onto the Stand
Assemble the Stand
Now that you have carefully read the instructions, it’s time to assemble the stand and bring your project to life! Before you begin, lay out all the pieces for assembly in an organized manner. This way, you can easily locate each component as you progress through the steps.
Next, follow the instructions step-by-step to ensure a smooth assembly process. The instructions will guide you through each action, from securing the legs to attaching the support bars. Take your time and pay attention to every detail, as precision is key to a sturdy and reliable stand.
Now comes the crucial moment – securing the tabletop onto the stand. Gently place the tabletop onto the designated area and align it perfectly with the stand. The tabletop should fit snugly, creating a seamless connection between the two components. Take a moment to appreciate the craftsmanship of your work so far.
To secure the tabletop, carefully insert the provided screws into the pre-drilled holes along the edges. Use a screwdriver to tighten each screw, ensuring that the tabletop is firmly attached to the stand. With each turn of the screwdriver, you can feel the tabletop becoming more secure, ready to support your future projects.
Lastly, take a moment to double-check that all bolts and screws are tightened. This final step ensures the stability and durability of your stand.
Secure the Stand
To ensure the safety of your work area, it is crucial to secure the stand for your table saw properly. Start by tightening all the screws and bolts, ensuring that there are no loose parts that could potentially cause accidents. Use the provided brackets or clamps to securely fasten the table saw to the stand. Double-check all connections and tighten any loose bolts or screws for added stability. Finally, make sure the stand is securely locked in place before using the table saw. By following these steps, you can confidently work on your projects without worrying about any mishaps.
Tighten All the Screws and Bolts
As you continue assembling your stand, it’s important to ensure that every component is securely tightened. This step is crucial to guarantee the stability and safety of your stand. So, let’s dive into the details and tighten all the screws and bolts.
Grab your trusty wrench or socket set, whichever is suitable for the screws and bolts provided. Starting from the bottom, work your way up, checking each joint and connection point. Feel the satisfying resistance as you tighten each screw, knowing that you are creating a sturdy foundation for your table saw.
As you tighten the screws, take a moment to appreciate all the hard work you’ve put into this project. Visualize the stand coming together, transforming from a collection of metal pieces into a reliable and efficient workstation. Each turn of the wrench brings you closer to completing this exciting project.
Pay close attention to the corners and intersections of the stand. These are the areas where stability is crucial. As you tighten the screws, imagine the strength coursing through the metal, ensuring that the stand will withstand the demands of your woodworking endeavors.
With each tightened screw, you are building a solid structure that will support your table saw with unwavering confidence. Take your time, focusing on each connection, and relish in the satisfaction of a job well done.
Check for Any Loose Parts
As we move forward with securing the stand, it is important to check for any loose parts. Before you start working with your table saw, it is crucial to ensure that all components are securely in place.
Take a few moments to carefully inspect the stand, paying close attention to every joint, connection, and attachment. Look for any signs of looseness or movement. Gently wiggle each part to see if there is any play or give. If you notice any looseness, it is essential to address it before proceeding.
Loose parts can compromise the stability and safety of the stand, posing a risk to both you and your work. If any screws or bolts appear to be loose, tighten them using the appropriate tools. Make sure to apply enough pressure to firmly secure them, but be careful not to over-tighten and risk stripping the threads.
In addition to checking for loose screws and bolts, inspect the stand for any other potential sources of instability. Look for any cracks, breaks, or damage that may affect its structural integrity. If you notice any issues, it is best to address them before proceeding.
By thoroughly checking for any loose parts, you are taking an important step in ensuring the stability and safety of your stand. Remember, a sturdy and secure stand is the foundation for efficient and precise work.
“Securely Fasten the Table Saw to the Stand Using the Provided Brackets or clamps.”
With the stand finally assembled, a sense of accomplishment fills the air. The anticipation builds as the audience looks forward to the final steps of securing the stand and preparing it for the table saw. The next crucial task is to securely fasten the table saw to the stand using the provided brackets or clamps.
Carefully, grab hold of the brackets or clamps and position them around the base of the table saw. With a steady hand, tighten each bracket or clamp, ensuring that they firmly grip the edges of the saw. This step is vital to prevent any wobbling or movement while operating the table saw, guaranteeing a safe and stable working environment.
As the brackets or clamps securely hold the table saw in place, a sense of relief washes over the audience. The knowledge that the saw is firmly attached to the stand brings peace of mind, knowing that their future woodworking projects will be executed with precision and safety.
Remember, it is always wise to double-check all connections and tighten any loose bolts or screws. This additional step ensures that every component of the stand is properly secured, leaving no room for accidents or mishaps.
Lastly, before diving into the world of woodworking, take a moment to ensure that the stand is securely locked in place. Give it a gentle shake to confirm its stability.
Test the Stand
Now that you have assembled your stand, it’s time to test its stability. Take a moment to carefully inspect the stand for any wobbles or irregularities. Ensure that it is steady and can support the weight of your table saw. Next, test the stand’s adjustable height feature to make sure it is functioning properly. Adjust it to different heights and observe if it locks securely in place. Lastly, evaluate the stand’s durability by applying pressure to different parts. Give it a gentle push and see if it remains solid. Remember, a reliable and sturdy stand is essential for a successful woodworking experience!
Make Sure the Stand Is Stable
Now that we have successfully secured the stand, let’s move on to the next important step: making sure the stand is stable. A stable stand is crucial for the safety and efficiency of your table saw.
To begin, carefully inspect the stand for any wobbles or irregularities. Walk around the stand and observe it from different angles. Take note of any loose bolts or screws that may need tightening. It’s also important to check the levelness of the stand. Use a level tool to ensure that all four legs are firmly planted on the ground.
Next, it’s time to verify that the stand is stable and can support the weight of the table saw. Gently apply pressure to different areas of the stand and make sure it remains steady. A sturdy stand should not wobble or give in to pressure. If you notice any instability, reinforce the weak areas or consider replacing the stand altogether.
Now, let’s test the stand’s adjustable height feature to ensure it is working properly. Adjust the height to different levels and see if it locks into place securely. The last thing you want is a stand that unexpectedly collapses while you’re working.
Lastly, evaluate the stand’s durability by applying pressure to different parts. Push down on the tabletop and see how it holds up.
Check for Any Wobbles or Irregularities
To ensure the utmost safety and reliability of your stand, it is crucial to thoroughly check for any potential wobbles or irregularities. By taking the time to carefully inspect your stand, you can guarantee a stable foundation for your table saw and minimize any risks or accidents that may occur during use.
Begin by examining the legs of the stand. Run your hand along each leg, feeling for any loose connections or weak points. Pay close attention to the joints and fasteners, ensuring they are secure and tightly fastened. Any signs of looseness or instability should be addressed immediately.
Next, gently push and pull on the stand to test its sturdiness. A well-constructed stand should remain firm and steadfast, without any noticeable wobbles or shifts in weight. If you detect any instability, investigate the source and make the necessary adjustments or repairs.
Once you have assessed the overall stability of the stand, it is crucial to verify that it can adequately support the weight of your table saw. It is recommended to consult the manufacturer’s guidelines for weight limits and compare them to the stand’s specifications. This will ensure that your stand is capable of withstanding the load and prevent any potential accidents or damage.
Remember, a stable and secure stand is the foundation for a safe and efficient woodworking experience.
Verify that the Stand Is Stable and Can Support the Weight of the Table Saw.
Now that we have securely assembled the stand, it is time to ensure its stability and ability to support the weight of the table saw. This step is crucial to guarantee the safety of our work environment and prevent any accidents.
To begin, carefully inspect the stand for any wobbles or irregularities. Gently apply pressure to different parts of the stand, checking for any signs of weakness or instability. It is essential to address any issues before proceeding to the next step.
Next, let’s verify that the stand is capable of supporting the weight of the table saw. Slowly lower the saw onto the stand, ensuring that it rests securely without any tilting or leaning. Take a moment to observe the stand and confirm its stability under the weight of the saw.
Once we have determined that the stand can adequately support the saw, let’s test its adjustable height feature. Raise and lower the stand to different heights, ensuring that it smoothly adjusts without any hitches or resistance. This will allow us to work comfortably at the desired height.
Lastly, let’s evaluate the stand’s durability by applying pressure to different parts. Push and pull the stand in various directions, mimicking the movements it will experience during use. Pay close attention to any signs of weakness or flexing that could compromise its stability.
Conclusion
In conclusion, assembling your Milwaukee table saw stand is a straightforward and rewarding process. By following the steps outlined in this guide, you will have your stand ready for action in no time.
Once you have gathered all the necessary tools and hardware, make sure to read the instructions carefully. This will ensure that you understand each step and can proceed with confidence. As you begin to assemble the stand, the pieces will come together like a well-choreographed dance. The sturdy metal frame will provide a solid foundation for your table saw, giving you the stability you need for precise cuts.
After assembling the stand, it is crucial to secure it properly. This step ensures that your stand will remain stable and secure during use. Tighten all the bolts and screws, double-checking each one to ensure a snug fit. Once everything is securely fastened, it’s time to put the stand to the test. Place your table saw on the stand, making sure it sits securely and doesn’t wobble. Run some test cuts to ensure that the stand provides the stability and support you need for your woodworking projects.
With your Milwaukee table saw stand fully assembled, secured, and tested, you are now ready to tackle your woodworking projects with confidence. Enjoy the convenience and stability that this stand provides, and make the most of your table saw. Happy woodworking!
