You have a gorgeous tabletop but no apron to attach the legs. No worries—we have a brilliant solution that will make your table seem trendy in no time. Consider employing corner brackets or mounting plates instead of apron-attached legs for support.
Screw or bolt the leg top to the tabletop’s underside for a clean, modern look. This prevents you from adding an apron and makes your table look open and spacious. Test alternative attachment methods and hardware finishes to discover the best combination for your style and table stability.
Put legs on a table without a bottom. Lucky you! With this traditional yet cool method, your table looks modern. Follow these techniques for a smooth, long-lasting finish. sturdy, basic design without clunky pieces.
Checkout From Amazon
Understanding Table Leg Attachment Without an Apron
Table of Contents
Purpose of Table Aprons
Table aprons are important because they keep the table strong and steady. They stop the table from wobbling or breaking easily. Aprons make tables last longer and look nice too.
Pros:
- Enhanced stability
- Improved durability
Cons:
- Limit design options
- May add unnecessary weight
Leg Attachment Methods for Tables without Aprons
If your table doesn’t have aprons, you can still attach the legs securely. You can use corner brackets or mounting plates to connect the legs directly to the tabletop. Here’s how you can do it:
1. Put mounting plates on each corner of the table.
2. Screw each leg into its matching mounting plate.
3. Make sure all the legs are lined up right before tightening all the screws.
Benefits and Considerations
When you put on table legs without a bottom part called an apron, it looks cool and modern because you can’t see any screws. It’s easy to assemble, but make sure the legs are straight, or the table might wobble. Fix it if that happens.
Choosing the Right Table Leg Design
Factors to Consider
Choose legs for a table without a middle component based on appearance and function. Does your room lean modern, classic, or country? Consider your table’s usage. For instance, a large dining table needs sturdy legs. Tables need different legs. Choose strong legs to support the top weight.
Popular Styles
Some cool table leg styles are hairpin legs for a modern look, tapered legs for a retro vibe, and turned legs for a classic touch. Match these styles with your table design to make it look nice. Make sure the legs not only look good but also work well with your table.
Popular Table Leg Styles:
- Hairpin Legs: Sleek and minimalist
- Tapered Legs: Mid-century modern feel
- Turned Legs: Classic touch
Matching these choices with other parts of your furniture is crucial as well. Selecting complementary pieces ensures harmony in design throughout your living area.
Tools and Materials Needed for Leg Attachment
Essential Tools for Leg Attachment
Setting legs on a table without an apron requires: Drill bit Drill or screwdriver Clamps can hold legs while attaching. Make sure the legs are the same distance from the edge with a tape measure.
- Clamps
- Measuring tape
Recommended Materials for Secure Attachment
To make sure the legs stay strong on the table, use high-quality screws and metal brackets. You can also add wood glue for extra strength.
Optional Tools and Materials for Enhanced Process
You can use a level to make sure all four legs are even and straight. Sandpaper helps smooth out rough edges on the table and legs for a cleaner finish.
Checkout From Amazon
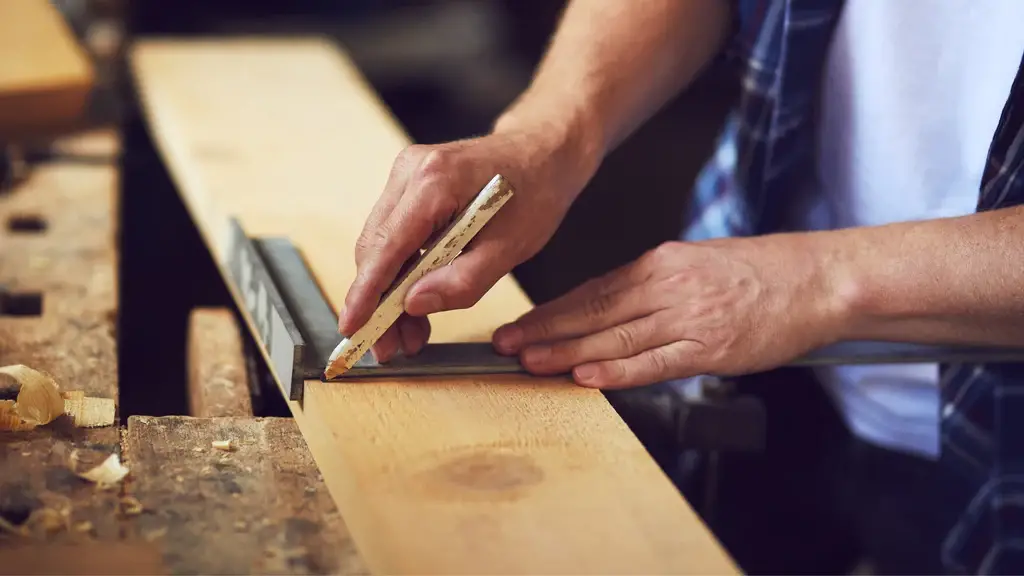
Measuring and Marking for Precise Leg Placement
Importance of Measurements
Measure carefully while mounting table legs without an apron. This ensures leg placement and table stability. If unsure, the table may shake. First, locate each leg. Use a tape measure to ensure each leg is the same distance from the corners. Check your measurements before starting.
Techniques for Marking Leg Positions
Mark the legs’ locations on the table after determining their placement. You can use a pencil or masking tape. You can also use a square tool to mark straight and evenly. This will make your table seem attractive and balanced when assembled.
Tips for Symmetry and Balance
It’s important to make sure the legs are attached evenly for a table to look good and work well. Check your markings before drilling holes. Make sure the corners line up and the legs are the same distance from the edges for balance and stability.
Six Effective Methods for Attaching Table Legs
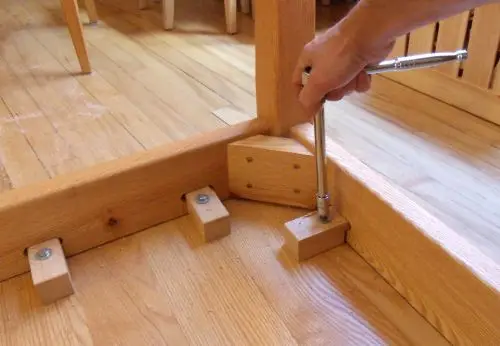
Mounting Plates
Plate mounting is like screwing table legs. The plates are visible, yet they join well. Using it without a frame underneath your table is simple. If you desire a hidden attachment, this may not work.
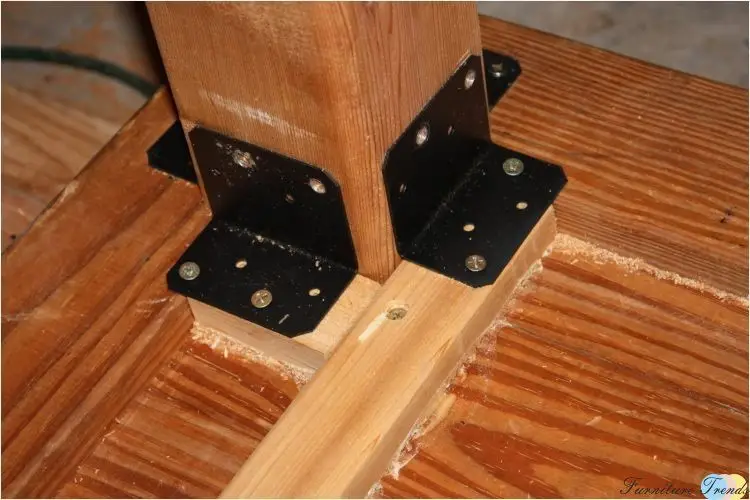
Corner Brackets
Corner brackets are a cool way to attach table legs. They keep the table sturdy and can be hidden easily. If you want your table to be stable and don’t want metal pieces showing, corner brackets are a simple way to go.
Angled Braces
Angled braces make your table super strong by connecting each leg at an angle. They’re really stable but might be a bit harder to put on. If you want a table that’s tough and stays put, angled braces are a good pick. Just remember, they can take more time to set up than other ways.
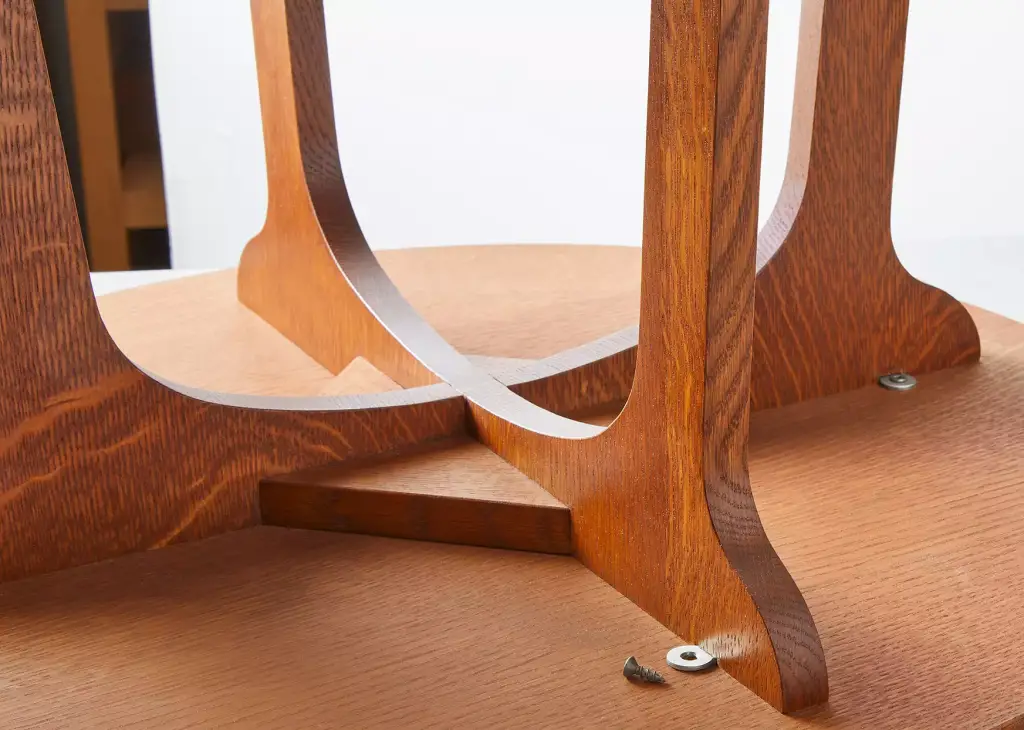
Mortise and Tenon Joints
Mortise and tenon joints are a strong way to connect table legs to the tabletop. They need to be made carefully to work well. If you like good quality and want something that looks nice, these joints might be a good choice, even though they take time to put together just right.
Step-by-Step Guide for Each Attachment Method
Direct Mounting
Direct attaching table legs without a frame is simple. Put the leg under the tabletop and screw or bolt it in. It’s fast and easy, making the table look modern. But heavy tables may need extra support.
Angled Bracket
To attach the brackets, start by putting one side on each leg’s top corner. Then, line up the brackets with the tabletop corners and screw them in. This way is strong and looks nice.
Steps:
1. Attach brackets to the legs.
2. Line up with tabletop corners.
3. Screw brackets in place.
Good Stuff:
makes it strong
hides screws for a smooth look
Not so good:
can’t hold as much weight as other ways’
Hanger Bolts
Drill holes in legs and tables for hanger bolts. Attach bolts to the legs and T-nuts under the table. This makes the table durable and makes it easy to swap legs. Be careful with dimensions during assembly.
Tips and Warnings for Successful Leg Attachment
Ensuring Stability and Durability
Putting legs on a table without a bottom requires stability. Tenons that protrude and fit into table holes work well. It can be strengthened using wood glue. If you put heavy things on the table, corner braces or brackets might strengthen it.
Checkout From Amazon
Precautions and Common Mistakes
Mark the legs’ placement before attaching them. This reduces wobbling. The tools should match the wood. Pine and oak require different tools. Keep your furniture sturdy by doing it right.
Achieving a Professional Finish
Sanding and painting or staining the legs will improve the table. It will shine, and it will be smooth. Round the corners for safety and aesthetics. The following measures will make your table look professional:.
Quality Checks for Sturdiness
Check the table’s stability after installing legs. Carefully move it. Adjust legs or screws if it wobbles. Check four corners. Adjust uneven legs to stabilize the table. Better and safer. It’s worth the extra work!
Summary
You can install table legs without braces. Do it right using your tools, steps, and advice. Use one of the six methods and follow the instructions for powerful legs. Check for tips and warnings to succeed. After finishing and beautifying, test it before using.
Let’s add legs to the table like a boss now that you know how. Have fun constructing your table!
Frequently Asked Questions
How important is the presence of an apron and pocket holes when attaching legs to a table?
Aprons support table legs, but you can attach them without one. Use robust attachments, and consider your table’s weight capacity.
What are some common tools required for attaching table legs without an apron? Drill holes with a drill bit.
To put on the legs, you’ll need a drill, screws or bolts, measuring tape, a level, and either a screwdriver or wrench. Having these tools will help make it easier and more accurate to attach the legs.
Can I customize the design of my table legs when attaching them without an apron?
Choosing cool table legs is crucial. They should match your furnishings and support your table.
Is it necessary to apply any finishing touches after attaching the legs to my table?
Adding a finish to your table makes it look nice and keeps it safe from damage. Try staining or painting the wood parts first, then check if it’s strong and looks good.
How do I ensure precise placement of my table legs and holes when there’s no apron as a guide?
When assembling furniture, measuring and marking table and leg points is crucial. Be cautious to balance the table and even the legs.