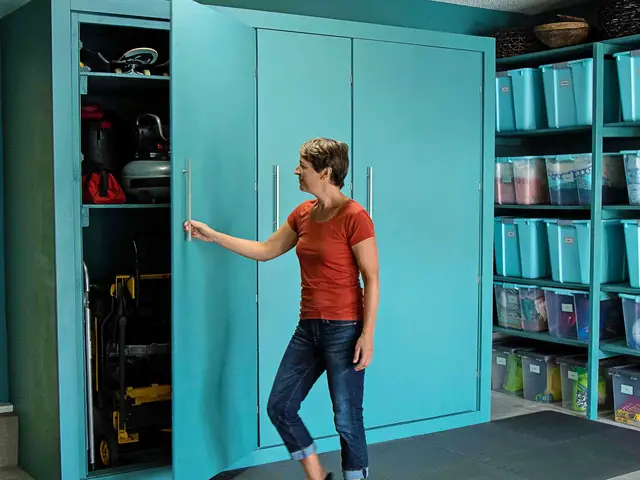
To build a 5ft. High, 3ft.
Wide wood tool box with doors, follow these steps: cut the wood to size, assemble the sides and back, add shelves, attach the doors and hinges, and apply the finishing touches. Crafting your own tool box is a great way to get the exact storage solution you need for your tools.
Depending on your level of woodworking expertise, and the tools you have available, building a tool box can be a rewarding project that you can complete in a weekend. In this article, we will discuss how to build a 5ft. High, 3ft. Wide wood tool box with doors and provide some tips and techniques to help you create a sturdy and functional storage space for your tools. From materials and measurements to assembly and finishing, we’ve got you covered.

Credit: issuu.com
Planning Stage
Table of Contents
Building a wood toolbox requires adequate planning to ensure successful results. In the planning stage, you need to list out all the required materials, including tools and lumber.
Materials Needed
- Plywood sheets
- Wood glue
- Wood screws
- Wood veneers
- Drawer slides
- Sandpaper
Tools Needed
- Measuring tape
- Carpenter’s square
- Circular saw
- Drill
- Impact driver
- Jigsaw
The next step is to select the right type of wood that meets your requirements in terms of thickness, strength, and durability.
Selecting The Right Type Of Wood
- Choose a hardwood that is strong and resistant to scratches, dents, and wear.
- Ensure the wood is moisture-resistant to prevent warping and cracking.
- Choose a wood type with a uniform grain pattern for better aesthetics.
- The thickness of the wood you select should be at least ¾ inch.
It is essential to ensure the correct overall dimensions and sub-units are accounted for before you begin cutting, making sure that each h3 heading adheres to markdown syntax.
Measuring And Cutting The Wood
- Measure and mark all the required pieces of wood as per the overall blueprint.
- Use the carpenter’s square to make sure the cuts are precise and accurate.
- Use the circular saw to cut the wood pieces for the main frame and the drawers.
- Use a jigsaw to make the clean cuts for the plywood sheets.
These simple steps can help you build a wooden toolbox perfectly tailored to your needs. Before beginning, assemble your materials and tools, and make sure to take your time to ensure precise measurements. With the correct preparation, you can create a durable, beautiful wood toolbox to store and organize your tools.
Cutting & Assembly Stage
Building a wooden toolbox can seem like a daunting task, but with the right tools and accurate measurements, it can be a fulfilling process. Here are the detailed cutting plans for each component and step-by-step instructions for assembly:
Cutting Plans
To build a wood toolbox 5 ft. high 3 ft. Wide with doors, you will need the following components:
- Front wall: 60″ x 24″
- Back wall: 60″ x 24″
- Side walls: 56″ x 21″
- Cut 2 pieces for each side wall
- Partitions: 20″ x 20″
- Cut 3 pieces for partitions
- Shelves: 56″ x 12″
- Cut 4 pieces for shelves
- Overall frame pieces:
- Cut 2 pieces measuring 60″ long for the top and bottom
- Cut 2 pieces measuring 21″ long for the sides
It’s important to make precise measurements and use sharp cutting tools to ensure all pieces fit together correctly.
Assembly Instructions
Once you have all components cut, follow these assembly steps:
- Begin by assembling the overall frame, securing the four pieces together with screws or nails to form a rectangular shape.
- Attach the front wall to the frame by nailing or screwing it in place at the top and bottom.
- Attach the partitions to the front wall, placing one on each side and one in the middle.
- Attach the shelves, placing two on each side of the partitions.
- Affix the back wall to the frame, using nails or screws at the top, bottom, and sides.
- Lastly, mount the doors to the front portion of the toolbox. You can use hinges to attach the doors to the frame, giving your toolbox a professional and practical finish.
Sanding And Finishing
After assembly, it’s crucial to sand any rough edges or surfaces to ensure the toolbox is free of splinters. When you’re satisfied with the smoothness of the wooden components, you can apply a stain or oil finish to both protect and beautify the wood.
Here are some useful tips to make this process easier:
- Apply sandpaper with a minimum grit of 120 for best results.
- Use a tack cloth to remove any sandpaper residue before finishing.
- Apply the finish using a brush, roller, or spray, depending on your preference.
- Allow ample time for the finish to dry before using the toolbox, and be aware of any safety precautions needed for the specific product you are using.
With these detailed cutting plans, assembly instructions, and finishing tips, building a wooden toolbox that meets your needs can be an enjoyable and satisfying project.
Personalizing Your Toolbox
Building your own wood toolbox is an excellent woodworking project. Now that you’ve got your toolbox assembled, it’s time to customize it to your woodworking style and aesthetic preferences. Here are some ideas for personalizing your toolbox:
- Add custom handles: Pick handles that match your aesthetic preference or that are comfortable for you to use.
- Incorporate drawers: Add some drawers to your toolbox to hold smaller tools or items. Choose the size and amount of drawers based on the tools you frequently use.
- Include locks: If you store your toolbox in a shared space or would like extra security, add a lock to the doors of your toolbox.
- Add wheels: If your toolbox will be extra heavy, or you plan to move it around regularly, wheels can make transportation a breeze.
Here are examples of customized toolboxes that can inspire your own design:
- Toolbox with sliding drawers: A toolbox that incorporates several sliding drawers for tools and supplies.
- Customized toolbox with a locking mechanism: A toolbox that has two lockable doors with a magnetic snap setup.
- Sturdy and portable wooden toolbox: A toolbox with sturdy grips on top for easy portability and secured drawers.
- Large customizable toolbox: A very large toolbox divided into different sections, ideal for housing larger power tools.
Consider incorporating customizations to your toolbox to make it easier to use and more aesthetically pleasing to you. The possibilities are endless, but these ideas can get you started.
Frequently Asked Questions Of How To Build A Wood Tool Box 5 Ft. High 3 Ft.Wide With Doors
What Are The Tools Needed For Building A Wood Toolbox?
When building a wood toolbox, you’ll need a saw, hammer, screwdriver, measuring tape, wood glue, sandpaper, and durable hinges.
What Materials Are Best For Building A Wood Toolbox?
Choosing high-quality wood like oak, maple or birch, is best for building a wood toolbox. Avoid using softwoods like pine because it’s easily damaged.
How Can I Make My Wood Toolbox Last Longer?
To make your wood toolbox last longer, use a protective wood finish or apply a coat of paint. Avoid leaving it in damp or humid areas.
What Are Some Tips For Building A High Wooden Toolbox?
Cut all of the pieces to the right size before assembling and use a clamp to hold the wood in place. Use screws instead of nails to create a strong joint.
How Long Does It Take To Build A Wood Toolbox?
The time it takes to build a wood toolbox depends on your level of expertise. But with the right tools and preparation, you can build a wood toolbox in one to two full days.
Conclusion
Now that you have completed the construction of your wood toolbox, you have a practical and functional storage option for your tools. With the right planning and careful execution, you can complete this diy project in no time. This project not only saves you money, but it also helps you develop your carpentry skills.
Building a 5ft. High and 3ft. Wide wood toolbox with doors may seem like a daunting task, but it is not as complicated as it may appear. Take your time, ensure accuracy, and follow the necessary precautions to keep yourself safe during the process.
Use high-quality materials and tools to ensure durability and longevity for your toolbox. In addition, you can customize your toolbox to your liking by adding shelves, drawers, or handles. With this guide, you can build a wood toolbox that is both practical and aesthetically pleasing.
Happy woodworking!