There are a few things you need to do in order to change the blade on your table saw. First, you need to unplug the saw from its power source. Second, you need to raise the blade guard.
Third, you need to remove the old blade by loosening the arbor nut with a wrench. Fourth, you need to install the new blade onto the arbor and tighten the arbor nut. Finally, you can lower the blade guard and plug the saw back in.
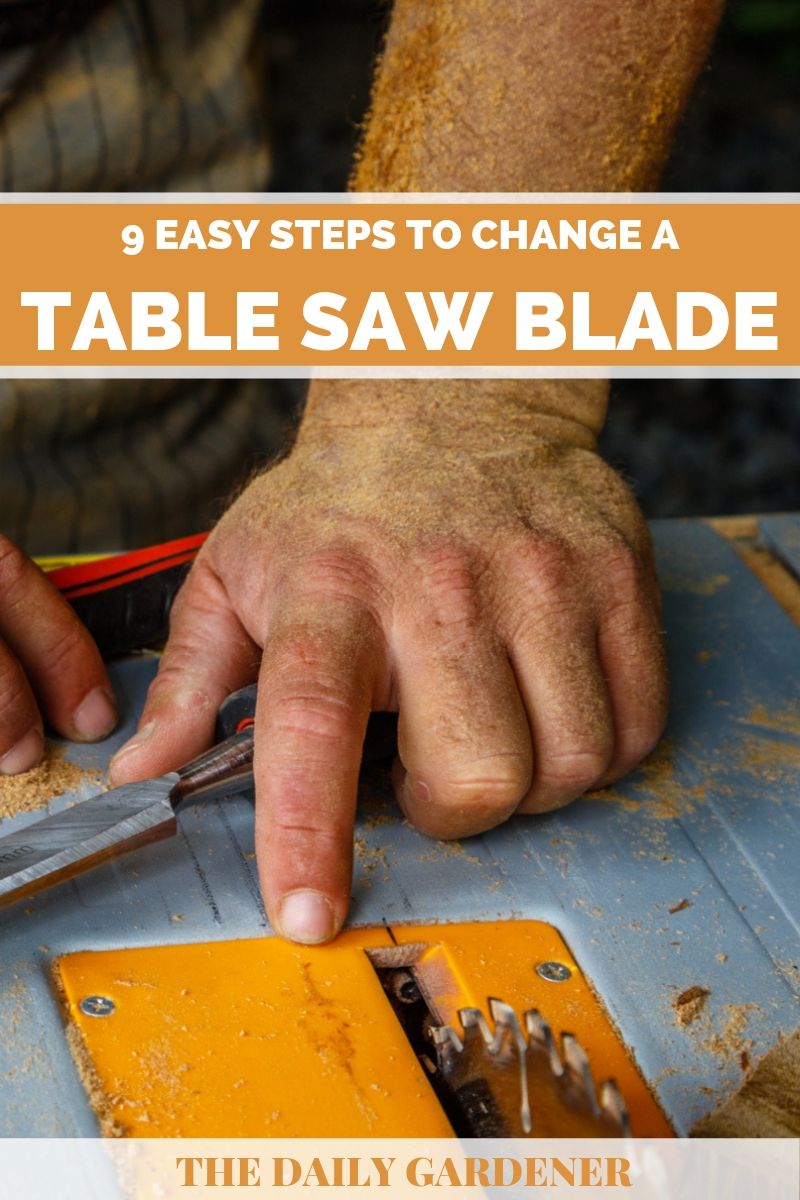
- Unplug the saw from its power source and remove any debris or wood chips from the table surface
- Use the blade guard to support the blade while you loosen the arbor nut that secures the blade to the spindle
- Remove the old blade carefully, taking note of which way it was mounted on the arbor
- Mount the new blade onto the arbor, making sure it is oriented in the same direction as the old one was
- Re-tighten he arbor bolt to secure Blade in place and re-install The guard
- Plug in your saw and test it out on a piece of scrap wood before cutting into any project pieces
How to Change Table Saw Blade Without Arbor Wrench
Table of Contents
Assuming you have a standard 10″ table saw, the following instructions will show you how to change the blade without an arbor wrench. It is always recommended to use eye and ear protection when working with power tools:1) Unplug your saw from the power source.
2) Remove the throat plate by loosening the screws that hold it in place. The throat plate is located under the table top and covers the blade opening.3) Use a hex key or Allen wrench to loosen the arbor nut, which is located on top of the motor housing (if your saw has a dust cover, you will need to remove this first).
4) Carefully remove the old blade from the arbor shaft. Be careful not to touch the teeth of the blade as they are extremely sharp. If necessary, use a putty knife or other flat object to help pry off stuck-on blades.
5) Inspect your new blade to ensure that it is compatible with your saw model and that there are no damaged teeth.
Credit: www.thedailygardener.com
What are 4 Steps to Changing a Saw Blade?
Assuming you are referring to a standard handheld circular saw, the process is as follows:1. Unplug the saw from its power source and remove any batteries if applicable.
2. Loosen the blade guard by gently pushing up on the lever located behind the handle (this will differ slightly depending on your model of saw).
3. Using an allen wrench or similar, loosen the bolt that secures the blade in place. Be sure to hold onto the blade with one hand while doing this, as it can fall out once loosened.
4. Remove the old blade and insert a new one, making sure it is facing in the correct direction (the teeth should be pointing downwards as you look at it from above).
Once inserted, tighten down both bolts until secure.
5. Replace the blade guard and push down firmly on the lever to lock it into place.
6. Reconnect any batteries or plug in your saw and you’re good to go!
Which Way Do You Turn to Loosen a Table Saw Blade?
If you’re having trouble loosening a table saw blade, there are a few things you can try. First, make sure that the blade is completely unplugged from the power source. Next, grab a pair of pliers and try to loosen the bolt that secures the blade in place.
If that doesn’t work, you may need to use a wrench to loosen the bolt. Finally, if all else fails, you can try using a hammer to lightly tap on the back of the blade until it comes loose.
Are Table Saw Blades Reverse Threaded?
Are table saw blades reverse threaded?This is a common question that we get here at TheToolReport.com, and it’s one that can be a bit confusing for people who are new to woodworking or don’t have a lot of experience with tools. So let’s clear things up.
First off, it’s important to understand that there are two different types of threads – left-handed and right-handed. Left-handed threads are actually the more common type, but they’re often referred to as “reverse” because they twist in the opposite direction of right-handed threads. This can be confusing, because it seems like it would make more sense for left-handed threads to twist the other way around.
But the reason they’re called “left-handed” is because if you hold a screw in your left hand and twist it clockwise, it will screw into the wood (or whatever material you’re using). If you do the same thing with a right-handed thread, it will unscrew itself.So what does this have to do with table saw blades?
Well, most table saws have right-handed threads on their arbors (the shaft that holds the blade), so that means the blades themselves must also be right-handedthreaded in order to fit onto the arbor. However, there are some exceptions out there – primarily European models – which have left-handed threaded arbors. That means those models require left-hand threaded blades.
It’s important to note that even if your saw has a left-hand threaded arbor, you can still use standard right-hand threaded blades by simply flipping them over so that the teeth face downwards instead of upwards (which is how they’re normally installed). This isn’t ideal from a performance standpoint since gravity is working against you when cutting this way, but it’s still possible in a pinch.So to answer the question directly – no, table saw blades are not reverse threaded.
How Do You Change the Blade on a Tradesman Bench Table Saw?
Assuming you’re talking about a table saw with a 10″ blade, the process is actually quite simple. Just follow these steps and you’ll have the new blade installed in no time:1. Unplug the table saw from its power source.
2. Remove the throat plate by loosening the two screws that hold it in place.3. Use a wrench to loosen the arbor nut, which secures the blade to the spindle.4. Carefully remove the old blade from the table saw.
Be careful not to touch the teeth of the blade as they can be extremely sharp.5. Install the new blade onto the spindle, making sure that it is lined up correctly with the miter slots on either side of the blade opening. Then tighten down both set screws on either side ofthenew bladeto keepit from moving during use .
You may also want to use some thread locking compound on these set screws for extra security . Make sure thattheteethof thenew bladeshould be pointing downwards when installed correctly . If they are facing upwards , this could result in serious injury ifthebladeshould happen tobindduring use .
Also make surethat thenew bladeshould be positioned so thatyou willbe able tore-installthethroatplate without havingto readjusttheblade first .6 Once everythingis lined up correctly , tighten down thenut usinga wrench counterclockwise until it is snug . Do not overtighten as this could damage thenut or strip its threads .
How to Change a Table Saw Blade | Rockler Skill Builders
Conclusion
If your table saw is producing less than stellar cuts, it might be time to change the blade. Follow these simple steps and you’ll have a new blade installed in no time.First, unplug your table saw and make sure the blade is completely stopped before proceeding.
Next, use a wrench to loosen the arbor nut that holds the blade in place. With the nut loosened, you should be able to remove the old blade by hand.Now it’s time to install the new blade.
Start by threading it onto the arbor, then use the wrench to tighten the arbor nut until it’s snug. Be careful not to overtighten – you don’t want to strip the threads.Once the new blade is installed, plug in your table saw and give it a test run on some scrap wood before cutting into any project pieces.
With a sharp new blade, you should notice an immediate improvement in cut quality!