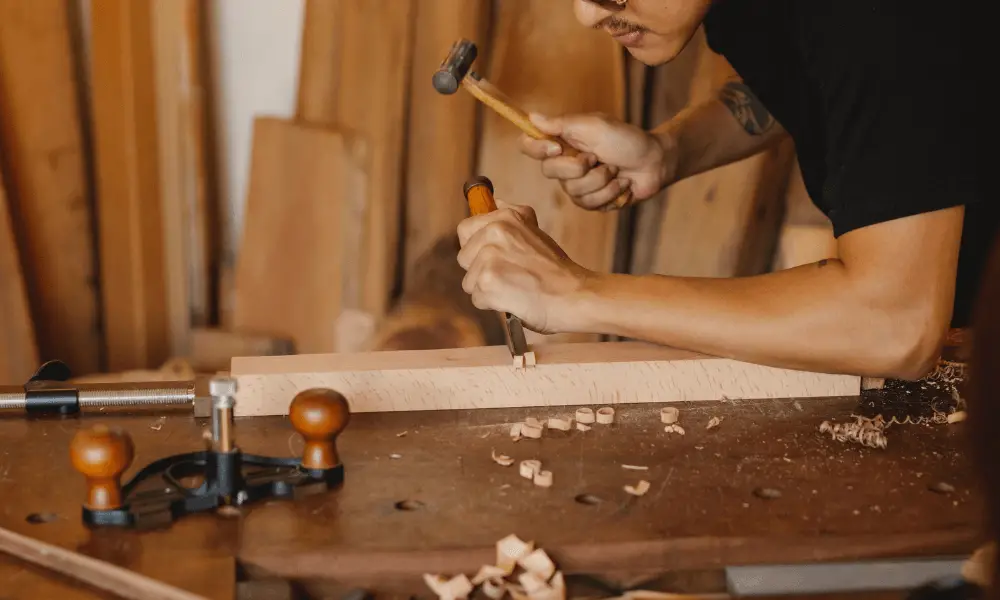
Carving wood slats is an easy way to make your furniture look nicer. It’s easy and saves you money because you don’t have to buy a new chair. This tutorial will teach you how to make slats in wood using a chisel and hammer.
How to Carve a Slat in Wood with a Chisel and Hammer
Table of Contents
For this project, you will need the following:
A 3/4-inch chisel
We recommend buying a cheap knife because it’s easy to sharpen. If you want a better option, you can choose one specifically designed for cutting slats. Chisel cover.
If your chisel is sharp, you can still cut a slat. Place a chisel guard between your hand and the wood, like you would when carving. This will help keep your hand steady while you cut.
The guard won’t keep the chisel blade from breaking, but it will protect your hand. You can buy these at a hardware store or home improvement store.
Hammer
It is not necessary to use a hammer, but it can help make cutting lines in the wood easier. That is why we recommend using a hammer with a flat edge.
Prepare your work surface.
When starting your wood carving, make sure you have a flat and smooth surface to work on. You will also need a piece of wood to support your cutting board. You can use any type of wood, but it should be at least 2 inches thick. If you don’t have a work surface, you can use your cutting board or kitchen table.
1: Prepare Your Wood Carving Board.
Cutting a groove in wood can be tricky if you don’t have the right tools.
We’ll show you how to make a simple groove using a wooden cutting board that already has a 3/4-inch hole in it.
If you don’t have a carving board, you can use a piece of wood you have lying around.
Use a drill to make a 3/4-inch hole in the back of your cutting board. Use this as a guide for the chisel as you cut your groove in the front.
2: Trim your scrap wood.
You’ll need a piece of scrap wood that’s 2 inches thick to use as the base for your cutting board. Use a hand saw or circular saw to cut the wood to 2 inches thick. Lay it flat so it’s easier to cut the wood.
3: Clean the surface of the wood.
After you’ve cut your scrap wood, wipe any debris off the surface of the wood with a damp cloth. To do this, place the wood on a towel and cover it with a damp cloth. Let the wood dry for a few minutes, then repeat this step until the surface is completely clean.
4: Use your chisel to make a groove on the front of your board.
Place your chisel in the 3/4-inch hole in your cutting board. Press your hand down on the cutting board as you cut the groove in the wood. You may need to adjust your method to make your groove, but if you are steady and careful, you can make a smooth groove using just one hand.
5: Take It To The Next Level With A Hammer.
If you have a tool, you can make the notch even better. Use the flat side of your hammer to make the notch. Also, using this will make the process faster and easier than just using a knife. Keep using your flat head until the notch is deep enough.
6: Sand your notch.
After you finish cutting the notch with the hammer, sand it smooth using a fine-tooth sander. This will get rid of any small imperfections in the surface of your notch. You can use a piece of wood to keep your cutting board stable while you sand.
Step 7: Add the finishing touches.
After you have selected your desired finishing material, add it to your project. You can use a variety of materials such as shellac, oil, polyurethane, or other finishes. You can also consider using a stained finish for a more rustic look.
When adding your finish, make sure it is at least 1/2 inch thick. Apply as many coats as you want to reach your desired thickness. Make sure each coat is completely dry before applying the next.
8: Make a handle.
Place your chisel in the blank and start shaping the handle. The handle will be slightly curved due to the groove. As you cut, pay attention to where your handle starts to curve. You can use your screwdriver to create the curve. Once you have shaped most of your handle, remove the chisel from the slot.
9: Apply a protective layer.
We will finish our lesson by applying a coat of clear polyurethane. You can use this material to protect your carving from scratches and dents. It makes the thing shiny.
Safety tips for using chisels and hammers in woodworking
- Use safety equipment: Always wear safety glasses to protect your eyes from wood chips and dirt. Consider wearing a glove on your other hand to avoid cuts.
- Use sharp tools: A sharp knife requires less effort, making it safer and less likely to slip or cause accidents. Dull tools are riskier and harder to handle.
- Hold the wood in place: Use a clamp to firmly attach the wood to your desk so it doesn’t move while you work.
- Position your body correctly: Stand or sit safely, and keep your hands behind the sharp edge of the chisel to avoid damage.
- Control your blow: Use a mallet or hammer with gentle taps rather than hard blows to stay accurate and prevent falls.
- Keep the chisel away from yourself: Always keep the knife away from your body and hands to reduce the chance of injury.
- Look for nails or knots: Check the wood for nails, screws, or knots that could cause the chisel to move in surprising directions.
- Store tools safely: Keep chisels and hammers in a tool roll, rack, or box with blade guards to prevent cuts when not in use.
- Work in a well-lit area. Make sure your area is well-lit so you can see your marks and cuts clearly, which helps prevent mistakes.
- Keep your work area clean: Regularly clear away wood chips and debris to prevent tripping or slipping.
- Choose the right tool for the job. Choose the right chisel size and type for the job so you can control it well and stay safe.
- Avoid distractions: Focus solely on your work to avoid mistakes.
- Learn proper techniques: Practice using chisels and hammers correctly to feel more confident and avoid injury.
- Check tools before use: Check your tools for cracks, loose handles, or any damage before starting a job.
- Keep children and pets away: Make sure your work area is free of distractions and hazards from children or pets.
Follow these safety tips to reduce risks and make woodworking better.
FAQs: How To Cut A Groove In Wood With Chisel
What type of chisel is used to make oil grooves?
You can use a straight or slightly curved chisel to cut oil lines. It should be sharp and its edge should be square so that it fits tightly into the groove. When cutting, be careful not to apply too much pressure, otherwise you can damage the metal.
Can I use a router instead of a chisel to cut grooves?
Yes, a router is faster and more efficient for cutting grooves, especially for larger projects or hardwoods.
What is a cape chisel?
A cape chisel is a tool used to cut away the reinforced fiberglass that makes up the “cape” or roof material of some cars.
The name comes from its early use for sealing boats with pitch and tar. Pitch was usually too difficult to work with tools, so it was decided to use a mallet-like tool called a “cape”.
Today’s cape chisels are usually made of titanium alloy steel, which strengthens them and enables them to handle heat treatments such as tempering and stiffening.
In Conclusion:
Hey, isn’t it fun to use a wood chisel and hammer? Now is the time to put your new skills to use. Be realistic.
When starting out in woodworking, you’ll need to learn about many different types of tools and methods. One of the most important things you’ll learn is how to use a simple and affordable tool called a “chisel and hammer.” This tool will help you make almost any type of hole in any type of wood… With practice, you’ll be able to quickly make all the cuts and grooves you need for any job you can imagine.