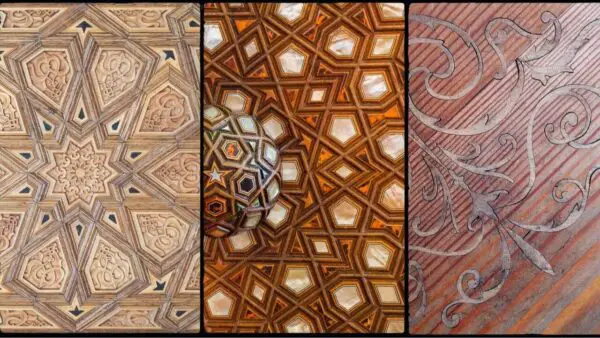
Wood inlay is a popular furniture design all over the world. It is a technique or process to create many attractive designs into the main planks using different colors maples or woods. It uses on the home and office furniture, frame, hutch, or any other wood products to get an ordinary look, but the question is how to do wood inlay?
If you are not doing any type of wood inlay, then you should start with straight lines. Mainly two tools are popular for wood inlay one is a router, and another is hand scraper. Here we guide you to make wood inlay by yourself with a hand scraper. To use a router, you need the skills to operate it.
The process to make wood inlay: We guide you to do wood inlay step by step in this article. We divide the whole process into two parts. So, without further ado let begin the process.
How to do wood inlays by hand
Table of Contents
If you are looking for something more professional, it is better to use wood inlays. You can make these inlays by using your hands. Wood inlays are more attractive than conventional wood because they will give a special look to the wood.
Inlays are the way to go if you are looking for something different, but you don’t have much time to make them. Wood inlays can be made in many different designs and colors, but making simple inlays is very easy. Let us have a look at some easy steps to make wooden inlays by hand.
Steps:
Make a base for the inlay:
You can make this base by using plywood or hardboard. Once you have made a base, then draw the shape of the inlay on the base.
Cut the wood to make the inlay:
Cut the wood in the shape that you have drawn on the base.
Apply stain on the wood:
Staining is one of the most important steps. Use good quality stain and apply it uniformly. You should try to apply 3 to 4 coats of stain.
Sand the stain to get a uniform look:
Sand the stain till it is completely dry. You can use sandpaper to smooth the stain.
Mix color and apply it to the stain:
Mix colors to get the desired color. Apply the color in such a way that the stain can be seen from the surface of the wood.
Use a wood polisher:
Wood polishing is an important step because if you don’t polish your wood inlays, you will not get the required shine. Use a polisher to polish the wood.
Simple Wooden Inlays: How to Make them
Wood is the best material to make furniture, wall art, and other accessories, and it is also an affordable and cost-effective material. We have seen many people make DIY wood crafts for their homes, but it was not easy.
Tips and tricks
We need to get 4-5 sheets of plywood and cut it to the size we want to make our inlays. Then start making the inlay designs using sandpaper. We can use the templates or make the designs by hand.
Once we have made the design, we can now glue to attach the wood pieces to the plywood. Make sure you make holes in the right places. After that, wait for 20 minutes, remove the excess glue from the inlay and allow it to dry. Once it is completely dried, apply the stain to make it look beautiful.
First Part:
Step-1 Select wooden object for inlay: To inlay, we need to select wood inlay materials. To make it, we need to choose the thin and the hard stuff. You can take wooden Venice, maple, etc. The base part must be thicker than the size of the cutting part. The part should not be the same color as the base part. It is better to set it as a contrast color.
Step-2 Make wood inlay design: To make the inlay, we have to choose thin and flat hard material. You can take wood veneer, maples, ivory, etc. Then we have to draw the design onto the wood sheet which you want to use for inlay. You may draw or use some tricks to copy the design onto the board. Choose a design and print, or you can use tracing paper to tracing the design from the screen. Now, Set the page on the wood sheet and stick it well so that it cannot move.
Step-3 Cut the inlay design: After that, take the x-acto or any sharp knife and gently score the design outlay on the paper, and you find a scratching layout onto the inlay material. Now use hand scraper to cut the whole design. Now you find the inlay piece.
Step-4 Sand the inlay piece: Use sandpaper to sand the side edges for smoothing the piece. Here we finish our first part.
Second Part: How to do wood inlay
Step-5 Temporary set exact position: Now we have to find the exact position we want to do inlay. Set the piece with a double side tap and sticky the inlay design piece temporarily on the main wooden base and mark with a pencil and take it off after marking.
Step-6 Pop off the marked area: Take a hand scraper to pop it off the wood inside the marked area. Its depth will be like the inlay design piece height. Hold the scraper horizontal on the border side and keep vertical in the middle. It will be easy to get a sharp line and corners.
Step-7 Smooth the area: It is time to smooth the area so that inlay piece can fit easily. Smooth the corner with a sharp knife and use sandpaper for the middle area. Clean the wood powder.
Step-8 check fittings before final set up: Before use, glue check the fittings carefully. Check to see any glaring irregularities, check the side gap, corner fittings, and the surface level. Remember, if it looks tight, do not force it, you may suffer to get it back. Then use sandpaper to smooth the inlay design piece edges. It makes it a smooth fit.
Step-9 Apply glue and set: If all goes ok then use glue in the gap part to the base piece and put the inlay design piece on it. Use a clamp to tighten the fit and left it there until the glue is dry. After the glue is dry again, check the sides if any gap identifies fill it with the wood putty.
Step-10 Finishing with polish: For getting smooth surface, use sandpaper. You may also use Wood planer if needed.
How to make wood inlay strips?
Installing wood inlay strips. How to do a little edge figuring. How to make a simple spindle sander. How to make wooden gears. How to make wooden chess pieces. How to make a wooden yo-yo. How to carve a letter into a piece of wood. How to create a butterfly in wood. How to carve a squirrel in wood.
How to inlay wood without a router?
” Well, you can use some glue and a hammer to make “lump in the wood”… It is not a good idea. I strongly recommend using a router. Good quality routers are available for under $200. However, if you want something with higher quality, better features, it will cost you more. Also, if you need help making your first inlay project, there are plenty of video tutorials on YouTube.
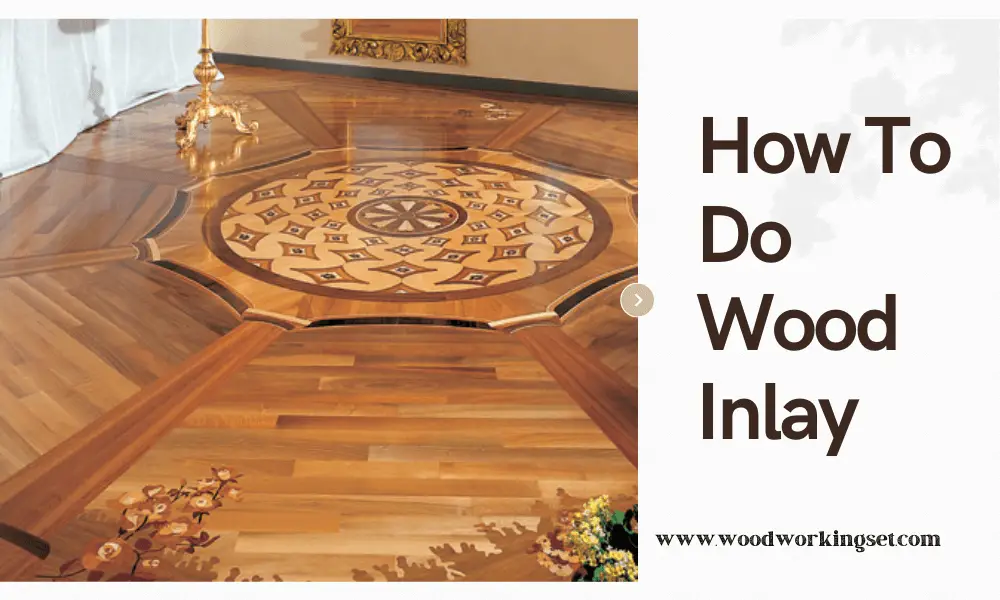
Wood inlays for furniture
The word “fingerboard” was coined because of its use. The original fingerboards were made of ebony, but over time, other materials were used. A fingerboard can be made of any material, commonly wood, plastic, glass fiber. Solid fingerboards are made of rosewood, ebony, or various laminates of wood.
Simple wood inlay patterns
“I like simple things, like inlay. I like patterns that repeat, that are mathematically interesting. Sometimes you just want to put some snowflakes or little stars in your project. You can do that with wood inlay, but it doesn’t have to be complicated. “And sometimes I find myself making things that look too complicated. I’m one of those people who have to try really hard to stop my brain from working.
How to inlay wood with a router?
Yahoo Answers Cutting small inlays with a router is much easier than using a scroll saw or band saw. Because of this, inlaying has become the preferred method to do intricate inlaying work that would be difficult with other tools…. 13/08/2017 · This video shows how to make an inlay in plywood for use in making handmade jewelry boxes. I like to use plywood because it is cheap and easy to work with.
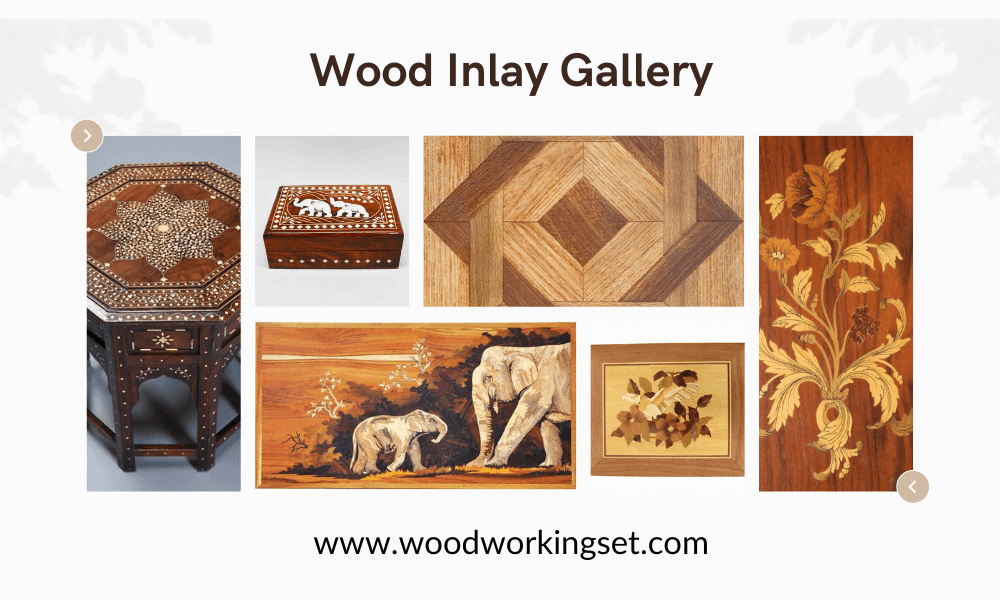
Wood inlays for sale
What you need to know in your shop is a technique of decorating wood with contrasting colored woods. The most common material is wood veneer. Inlays can be made from any type of wood, but many inlays are made from wood veneers on a plywood core. This type of inlay is commonly used in musical instruments, gun stocks and furniture.
Conclusion
This is a very simple and easy way to add nice inlay. You can also use this process to many kinds of wood inlay no matter what project you are working on. Though it takes a long time to finish and patience to do the work. The fact is you must have some knowledge of how to do wood inlay. It will help you to get satisfactory results.
