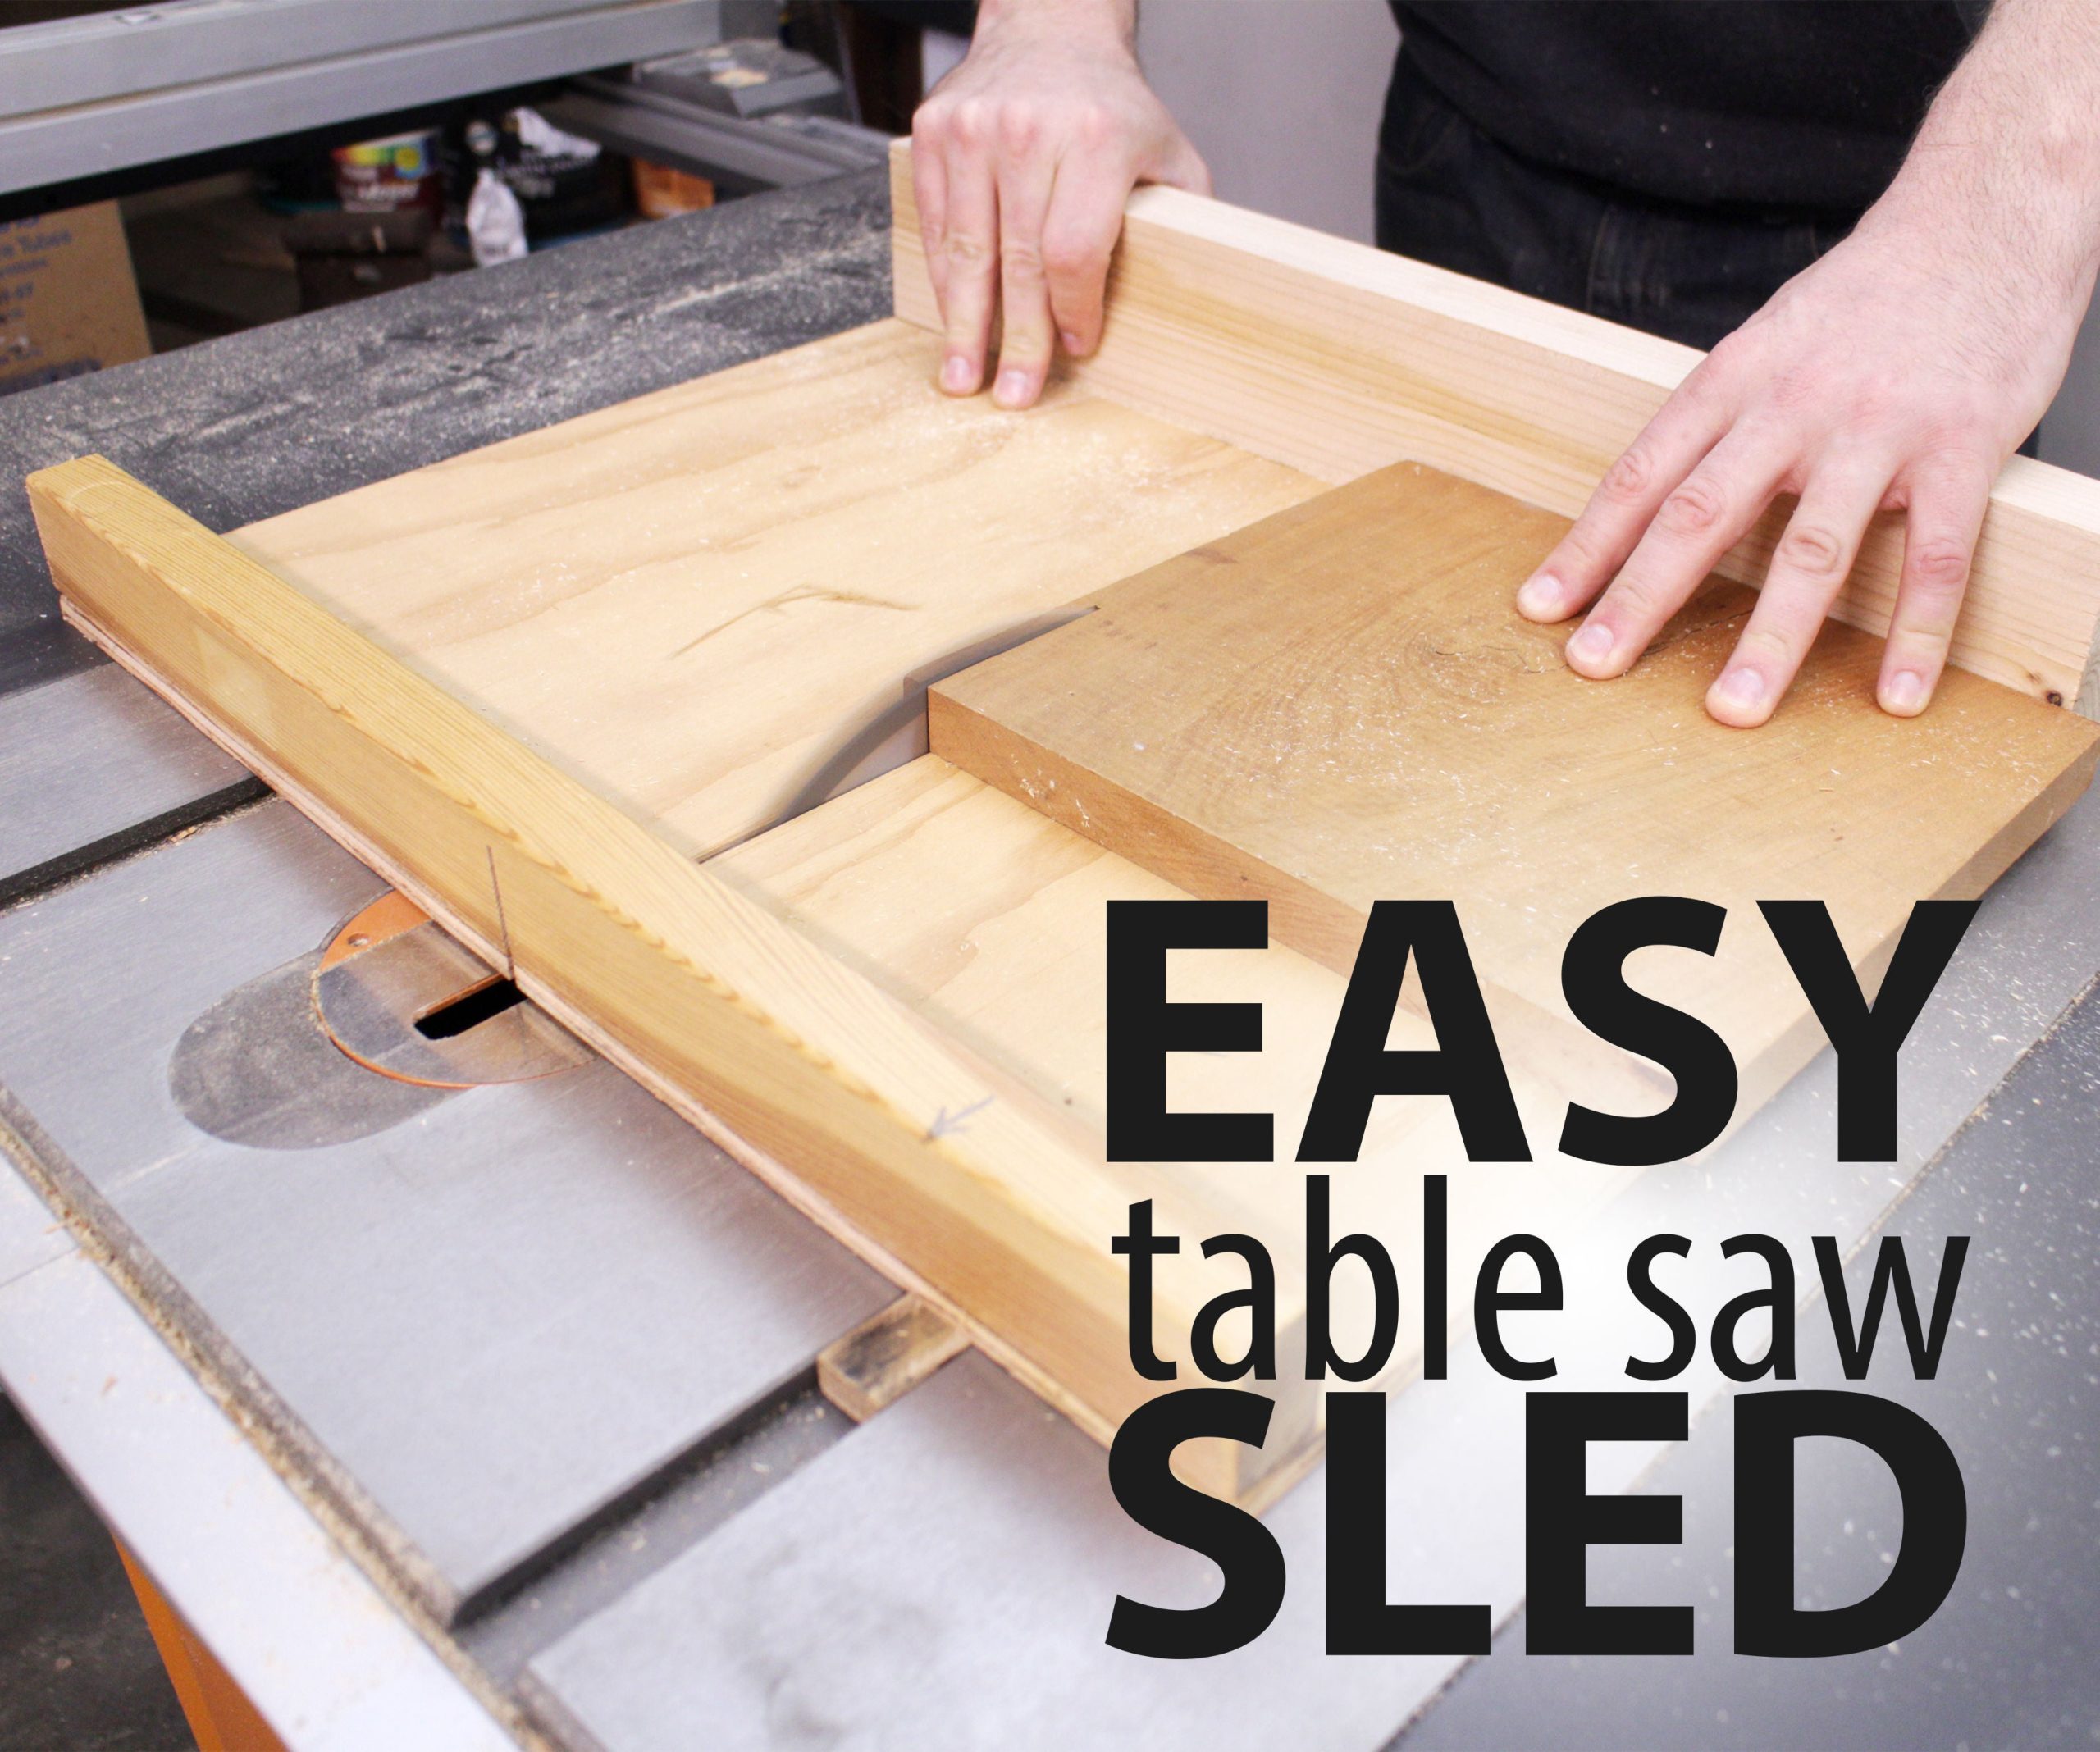
A table saw sled is a great way to make precise cuts in large pieces of wood. To make a table saw sled, you will need a piece of plywood at least 2 feet wide and 4 feet long, a straight edge, clamps, and a drill. First, mark the center of the plywood and draw a line from one end to the other.
Next, clamp the straight edge to the plywood and use it to draw a line parallel to the center line. Now, drill three holes along the parallel line, making sure that they are equidistant from each other. Finally, attach runners to the bottom of the sled using screws or nails.
- Cut a piece of plywood to the size you need for your project
- Attach runners to the bottom of the plywood using screws or adhesive
- Place the sled on your table saw and secure it with clamps
- Adjust the blade height and bevel angle as needed for your project
- Make your cuts, being careful to keep the sled flush against the fence at all times
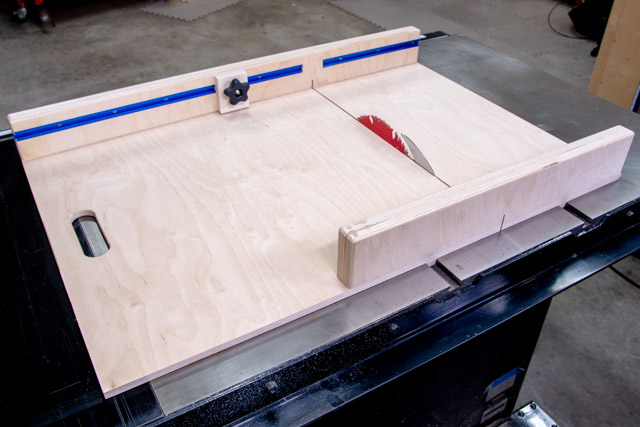
Table Saw Sled Runners
Table of Contents
If you’re looking for a way to make your table saw sled even more precise, consider adding runners. Here’s how to do it:
First, measure the width of your sled base and add 1/4″ to that measurement. Cut two strips of hardwood (preferably oak or maple) that are this width and about 6″ long.
These will be your runners.
Next, use a drill press to drill evenly spaced holes down the center of each runner, making sure that the first and last hole are at least 1/2″ from the ends. Drill as many holes as you need – typically 8-10 will suffice.
Now it’s time to attach the runners to your sled base. First, predrill pilot holes through the base at each of the runner locations. Then countersink these pilot holes so that the head of the screws will sit flush with or below the surface of the wood.
Finally, screw the runners in place using 1-1/4″ wood screws.
Your sled is now ready for smoother action and more precise cuts than ever before!
Credit: fixthisbuildthat.com
What is the Best Material for a Table Saw Sled?
When it comes to choosing the best material for a table saw sled, there are a few things to consider. The most important factor is the type of wood you will be using the sled for. If you plan on using the sled for general woodworking projects, then any type of hardwood will work fine.
However, if you plan on using the sled for more specific tasks like cutting laminate or veneer, then you will need to choose a harder wood like maple or birch. Also, keep in mind that the thickness of the wood will affect how well the sled works. Thinner woods will be easier to maneuver but may not provide as much support as thicker woods.
Ultimately, it is up to you to decide what thickness works best for your needs.
How to Make a Table Saw Panel Sled?
A table saw panel sled is a great way to make cuts in large panels or sheet goods. It is a simple jig that allows you to make perfectly straight, controlled cuts with your table saw. You can make one yourself with some basic woodworking skills and materials.
First, you will need to cut two pieces of plywood to size. The base should be slightly wider than the throat opening of your saw, and the fence should be tall enough to extend above the tallest point of your blade. Next, attach the fence to the base using screws or bolts.
Be sure that the fence is square to the base.
Now it’s time to add the runners. These are strips of wood that slide along the table surface and help guide your panel sled as you make your cuts.
Attach them near the front and back edges of your sled, making sure they’re level with each other. A good tip is to use T-nuts underneath so that you can easily remove and replace them if necessary.
Finally, add some handles on either side of your sled so that you can easily push it through your saw’s throat opening.
And that’s it! Your panel sled is now ready for action.
How Thick Should Table Saw Sled Be?
When it comes to table saw sleds, there is no one-size-fits-all answer. The thickness of your sled should be based on the specific needs of your project.
For example, if you’re working with thinner material, you’ll want a thinner sled so that the blade can make clean cuts without damaging the material.
On the other hand, if you’re working with thicker material, you’ll want a thicker sled to provide stability and prevent the material from warping or bending.
ultimately, the thickness of your table saw sled should be based on the materials you’re working with and the desired results of your project. With a little trial and error, you’ll be able to find the perfect thickness for your needs!
How Big to Make a Table Saw Sled?
A table saw sled is a great way to make precise cuts, and it’s not difficult to make one yourself. The size of the sled will depend on the size of your table saw and the materials you’re using.
For a standard 10″ table saw, you’ll need a piece of plywood that’s at least 24″ wide and 36″ long. The longer the better, as you’ll be able to make longer cuts with it. If you’re using thicker material, like hardwood, you may want to increase the width to 30″.
Once you have your piece of plywood, cut two strips of wood that are 3/4″ wide and as long as your plywood. These will be used for the runners that attach to the table saw fence. Drill four holes in each strip – two at each end – and countersink them so the heads of the screws will be flush with the surface of the wood.
Attach these strips to either side of your plywood using screws or nails.
Now it’s time to add a few more details. Cut another strip of wood that’s 1-1/2″ wide and 24″ long (or whatever length is appropriate for your table saw).
This will be used as a stop block, which keeps your workpiece from sliding off the back of the sled while you’re making a cut. Attach this strip perpendicular to one end of your sled using screws or nails.
Finally, add a handle to one end of your sled so you can easily push it across the table saw blade.
I like to use a scrap piece of 2×4 for this, but anything that’s comfortable for you to grip will work just fine. Cut a 45-degree angle on one end of your handle so it fits snugly against the side rail of your sled (this keeps it from slipping out while you’re cutting). Then just screw or nail it into place!
How to make a simple cross cut sled for your table saw – DIY
Conclusion
This blog post outlines how to make a table saw sled, which is a useful tool for making precision cuts. The author provides clear instructions and illustrations to follow. The sled can be made with a few simple tools and materials, and it is an essential tool for anyone who wants to make accurate cuts.