Planing wood wider than your planer is possible with a few different methods. The first method is to use a hand plane. Hand planes are great for taking small amounts of material off at a time and can be very precise.
Another method is to use a power tool like a router or belt sander. These tools can remove larger amounts of material quickly, but you need to be careful not to over-sand the wood. Finally, you can also use a saw to cut the wood down to size.
This method is the fastest, but it will create more dust and debris than the other two methods.
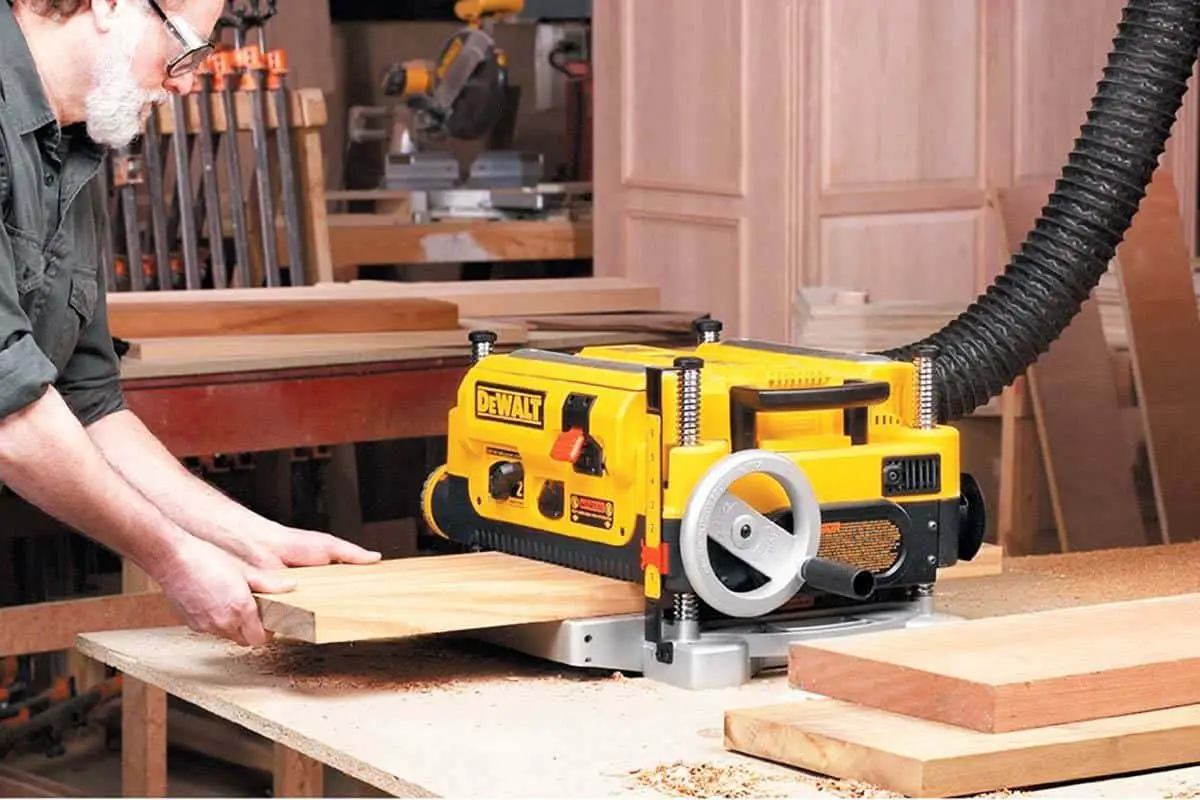
- Measure the thickness of the wood you wish to plane
- Set the depth of cut on your planer according to the thickness of the wood
- Place the wood on the planer bed and feed it through according to your planer’s instructions
- Adjust the depth of cut as needed until you achieve the desired width for your piece of wood
planing wide boards perfectly with electric hand planer / amazing way of planing [woodworking]
Table of Contents
What Can I Use Instead of a Planer?
Assuming you are talking about a woodworking planer:
There are several ways to get a smooth finish on rough lumber without using a planer, though some methods may require more time and effort than others. One way is to use a hand plane.
This will take longer than running the boards through a power planer, but it is much quieter and can be very satisfying to work with hand tools. If you don’t have any hand planes, you could also use a belt sander or orbital sander to remove the roughness from the boards. Be sure to sand with the grain of the wood rather than against it to avoid damaging the surface.
For an even quicker method, you could also use a router fitted with a flush-trimming bit. This will give you quick results, but be careful not to overdo it or you’ll end up with an uneven surface.
How Do You Plane a Board Wider Than a Jointer?
Most jointers are only around 6-8 inches wide, which means that they can’t accommodate boards that are any wider. So, how do you plane a board wider than a jointer?
The answer is actually quite simple – you use a planer.
A planer is a tool that is designed to remove small amounts of material from the surface of a board (or other workpiece), and it’s the perfect tool for taking care of those pesky boards that are just too wide for your jointer.
Here’s how to do it:
1. Set up your planer according to the manufacturer’s instructions.
This usually involves attaching the infeed and outfeed tables, as well as adjusting the depth of cut knob.
2. Place your board on the infeed table and turn on the machine. Feed the board into the planer slowly and evenly, letting the blades do their job.
3. Once the board has been completely fed through, turn off the machine and remove your now narrower board from the outfeed table. Repeat this process until your board is narrow enough to fit through your jointer safely.
How Can I Reduce My Thickness Without a Planer?
If you want to reduce the thickness of a board without using a planer, there are a few ways you can do it. One way is to use a hand plane. This will take some time and effort, but it can be done.
Another way is to use a jointer. This tool will shave off small amounts of wood from the edges of your boards and can help create a thinner board overall. Finally, you could also rip the boards on a table saw or with a handheld circular saw.
This will remove larger pieces of wood, making the boards thinner overall.
Can You Run Wood Across the Grain Through a Planer?
Yes, you can run wood across the grain through a planer. However, doing so can cause tear-out, especially if the wood is not properly supported. It is best to plane with the grain whenever possible.
Credit: www.popularwoodworking.com
How to Plane a Table Top With an Electric Planer
Assuming you would like a blog post about how to plane a table top using an electric planer:
If you have a table that is in need of a makeover, one option is to plane the top. This will remove any existing finishes, as well as any damage or imperfections on the surface.
While it may seem daunting, planes are actually relatively easy to use – and with some practice, you can get a perfectly smooth finish on your table top. Here’s how to do it:
First, start by sanding the entire table top with coarse-grit sandpaper.
This will help create a smooth surface for the plane to glide over. Next, set up your electric planer according to the manufacturer’s instructions. Once it’s all set up, turn it on and slowly lower the blade onto the surface of the wood.
Keep the blade level as you work your way across the entire table top. As you go, be sure to keep an eye out for any knots or uneven areas – these will require more passes with the plane in order to achieve a smooth finish. Finally, once you’ve gone over the entire table top with your electric planer, give it another light sanding with fine-grit sandpaper before applying your desired finish (stain, paint etc.).
How to Plane Wood With Electric Planer
Assuming you would like a blog post discussing how to use an electric hand planer:
Most people who are new to woodworking are intimidated by the idea of using a hand plane. After all, it’s a power tool that can remove a lot of material very quickly.
However, with a little practice, anyone can learn how to use an electric hand planer safely and effectively. Here are some tips on how to plane wood with an electric hand planer:
1. Choose the right tool for the job.
There are many different types and sizes of hand planes available on the market. For most projects, a standard size bench plane will suffice. However, if you’re working on something particularly large or delicate, you may need to invest in a specialty plane.
2. Read the manual before you start. It may seem like common sense, but reading the manual is always the best way to familiarize yourself with any new tool before you start using it. This is especially true for power tools like electric hand planes which can be dangerous if used incorrectly.
3. Set up your work area properly before starting to plane. Make sure your workpiece is securely clamped down so it doesn’t move while you’re working on it and that there’s plenty of clearance around it so you don’t accidentally hit anything else with the plane. Also, be sure to wear safety glasses or goggles to protect your eyes from flying debris.
4 . Start by taking light passes with the plane until you get a feel for how it cuts through the wood and how much material it removes with each pass . Once you have a good understanding of its capabilities , you can begin taking more aggressive passes .
Just be careful not totake off too much material at once oryou could ruin your project .
5 . When finished , unplug the machine and clean up any sawdust or chips before putting it away .
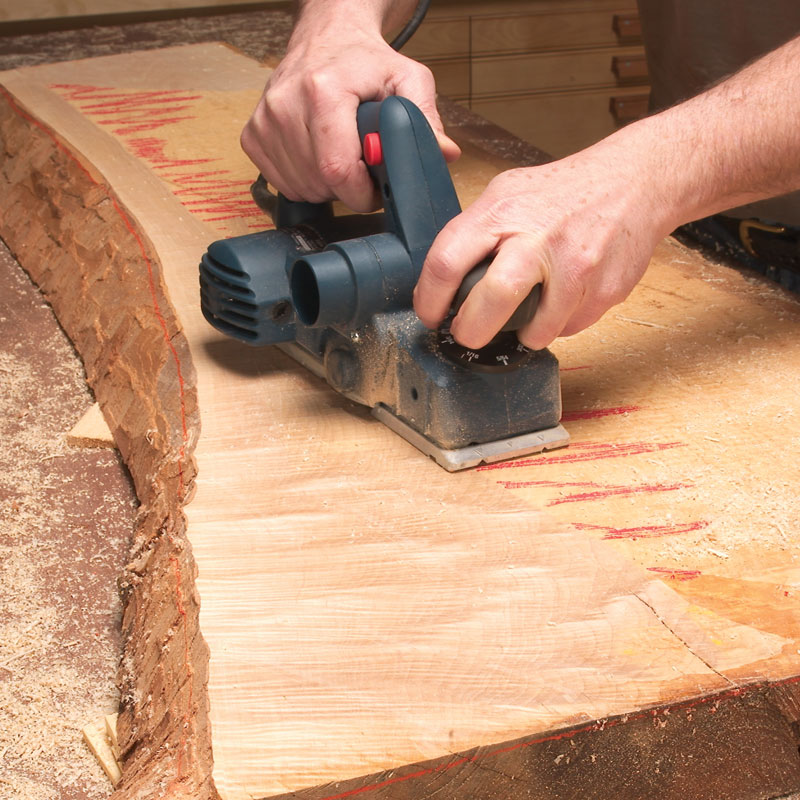
Flattening Slab With Power Planer
If you have a woodworking or carpentry project that requires a perfectly flat surface, you may be wondering if a power planer can help you achieve the results you need. The short answer is: yes, a power planer can definitely flatten a slab of wood – but there are some things to keep in mind before using this tool on your project.
First and foremost, it’s important to understand that a power planer is not a magic wand that will instantly create a flawless, completely level surface.
Rather, it’s a tool that can save you time and effort by quickly removing small amounts of material from your workpiece. So, if your slab is significantly uneven or has high/low spots, it’s best to use another method (like sanding) to even things out before breaking out the power planer.
Another thing to consider is the depth of cut – meaning, how much material do you want to remove with each pass of the planer?
For most projects, taking off around 1/16″ of material per pass should be plenty. But if you’re working with particularly hard or soft woods, you may need to adjust your depth of cut accordingly. Too deep of a cut can damage your workpiece (or even the blades on your power planer), so it’s always best err on the side of caution.
Finally, when using any type of powered tool like a power planer, always take safety precautions and follow the manufacturer’s instructions carefully. If possible, have someone else nearby in case something goes wrong – better safe than sorry!
With these tips in mind, flattening a slab with a power planer is actually pretty straightforward:
1) Set up your workpiece on sawhorses or another stable surface; make sure it’s well-secured before starting.
2) Inspect your blades and ensure they’re sharp and in good condition; dull blades will tear at the wood rather than smoothly cutting through it.
3) Adjust the depth of cut according to what type of wood you’re working with; again, err on the side of shallower cuts rather than deeper ones.
4) Start the machine and slowly lower the blade into contact with the wood; apply light pressure as you move forward until the entire length of blade is engaged.
Conclusion
If you’re looking to plane wood that’s wider than your planer, there are a few things you can do. One option is to use a handheld power planer. Another option is to use a table saw with the blade set at a very low height.
You can also use a router with a straight bit to remove material from the surface of the wood. Whichever method you choose, take care not to remove too much material at once or you could damage the wood.
