A lathe is a woodworking tool that is used to shape and form wood. When used for pen turning, the lathe spins the wood while the user shapes it with various tools. The most common tool used for pen turning is a gouge, which is a curved blade that is used to carve out the desired shape.
To use a lathe for pen turning, first attach the piece of wood to the lathe using a chuck or faceplate. Then, use a roughing gouge to remove any excess material and create a cylindrical shape. Next, use a skew chisel to create the beveled edge of the pen tip.
Finally, use a finishing gouge to smooth out the surface and create the desired finish.
- Choose the wood you want to use for your pen blank
- You can purchase pre-cut blanks or cut your own from a larger piece of wood
- Cut the blank to size using a band saw or other cutting tool, making sure that it is slightly longer than the finished length of the pen
- Mount the blank on the lathe using either a chuck or faceplate and tighten it in place
- Start the lathe and shape the barrel of the pen using various gouges and scrapers until it is smooth and evenly round
- Be careful not to make it too thin as this will cause it to break when you remove it from the lathe later
- Once you are happy with the shape of the barrel, use a parting tool to cut a tenon on one end that will fit into your chosen pen kit’s brass sleeve (the ferrule)
- Reverse the direction of rotation on the lathe and carefully form another tenon on the opposite end of the barrel that will accept your chosen pen tip (the nib)
- Again, be careful not to make this tenon too small or tight as this could cause cracking when you try to pressfit it into place later on
- Once both tenons have been cut, use sandpaper (wrapped around something like a dowel) to smooth them down so they will fit snugly but not tightly into their respective sleeves/tips without requiring any glue or other adhesive
Turning a Pen on a Lathe (Pen Making How-to)
Table of Contents
Q: What are the Basic Steps for Using a Lathe for Pen Turning
A: The basic steps for using a lathe for pen turning are as follows:
1. First, you will need to secure your workpiece to the lathe. You can do this by clamping it in a chuck or by mounting it on a faceplate.
2. Next, you will need to select the appropriate tool for your desired effect. For example, if you want to create a smooth surface, you will need to use a skew chisel.
3. Once you have selected the appropriate tool, you will need to set the speed of the lathe accordingly.
This is usually done by adjusting a knob on the front of the machine.
4. With the lathe running at the correct speed, you can then begin shaping your workpiece with your chosen tool. Remember to apply consistent pressure and keep your hands well away from the rotating parts of the lathe.
5 .
Mount the Wood Blank on the Lathe
Assuming you have a prepared wood blank and a lathe, there are a few things to keep in mind when mounting the wood on the lathe. The first is to make sure the blank is properly supported. The second is to center the blank on the spindle of the lathe.
And finally, you’ll want to secure the blank so it doesn’t move while you’re working with it.
1) Support: You’ll need some kind of support for your workpiece. This can be done with either a faceplate or a chuck.
If you’re using a faceplate, simply screw it into the center of your blank. If you’re using a chuck, you’ll need to mount it onto your spindle first and then carefully align your workpiece with the jaws of the chuck before tightening it down.
2) Centering: Once your workpiece is mounted, take a look at it from all sides to make sure it’s centered on the spindle of your lathe.
This is important because if it’s not centered, your cuts will be uneven and your final product won’t be as nice as it could be.
3) Securing: Now that everything is lined up and ready to go, you’ll need to secure your workpiece so it doesn’t spin off while you’re working with it. The easiest way to do this is by using tailstock centers.
Simply line up the point of one center with the tail end of your workpiece and tighten down the clamping lever until everything feels snug. Repeat this process with another center on the opposite side and you’re all set!
2
What is the difference between an esthetician and a cosmetologist?
An esthetician is someone who performs skin care treatments. This can include facials, waxing, and other body treatments.
A cosmetologist is someone who provides beauty services, such as hair styling, makeup application, and nail care.
Use a Roughing Gouge to Shape the Outside of the Blank
Roughing gouges are one of the most versatile tools in a woodturner’s arsenal. They can be used to quickly remove material from the outside of a blank, as well as to create detailed shapes and textures.
When using a roughing gouge, it is important to keep the tool sharp.
A dull tool will not only make turning more difficult, but it can also cause potential safety issues. Always use a sharpening stone or diamond file to keep your roughing gouge in good condition.
When shaping the outside of a blank with a roughing gouge, it is important to work slowly and carefully.
Start by removing small amounts of material and gradually increasing the size of your cuts. It is also important to keep the tool moving in smooth, even strokes. If you start to see any “catch” marks on the surface of your workpiece, that is an indication that you are applying too much pressure or taking too large of a cut.
As you become more comfortable using a roughing gouge, you will be able to experiment with different techniques and speeds. But always remember – when in doubt, go slow!
3
What is the difference between a 401(k) and a 403(b)?
The primary difference between a 401(k) and a 403(b) is that a 401(k) is offered by for-profit companies, while a 403(b) is offered by non-profit organizations. Both types of accounts are tax-advantaged retirement savings plans that allow employees to contribute a portion of their salary on a pre-tax basis.
Employers may also make matching or discretionary contributions to these accounts.
With a 401(k), employees can choose to invest their account balance in different ways, including stocks, bonds, and mutual funds. Some 401(k) plans also offer features like loan provisions and hardship withdrawals.
In contrast, most 403(b) plans only allow participants to invest in annuity contracts or mutual funds offered by insurance companies. However, some newer 403(b) plans now offer investment options similar to those found in 401(k)s.
Employees who leave their job can typically roll over their 401(k) balance into another retirement account, such as an Individual Retirement Account (IRA).
With a 403(b), employees may be able to keep their account with their former employer or roll it over into another eligible retirement plan.
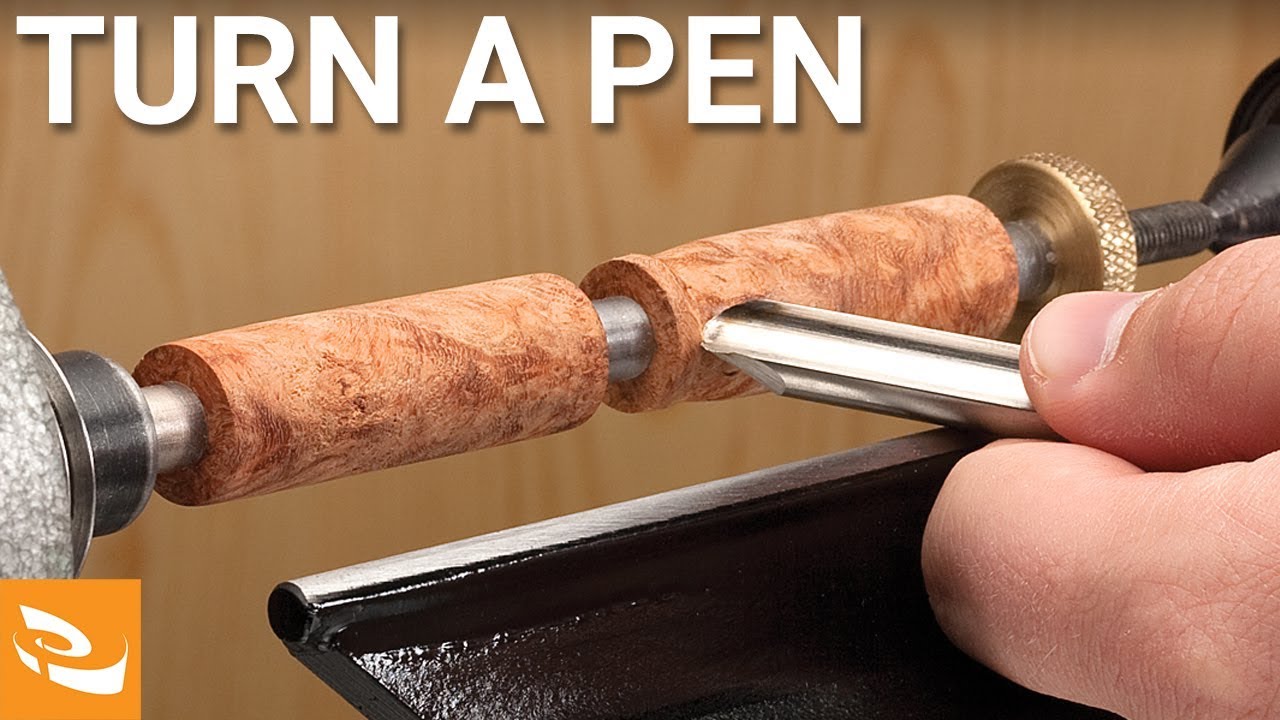
Switch to a Finishing Gouge And Refine the Outside Surface of the Blank
When you’re ready to start working on the outside of your bowl, it’s time to switch to a finishing gouge. A finishing gouge is a small, thin-bladed carving tool that’s designed for creating smooth, precise cuts. It’s also ideal for removing any unwanted bumps or ridges from your workpiece.
To use a finishing gouge, simply hold it in your dominant hand and guide it along the surface of your wood blank. Be sure to keep a light touch on the tool and move it slowly and deliberately; this will help you avoid making any accidental cuts or scratches. As you work, periodically stop and check your progress; if you’re not happy with the way things are shaping up, simply sand down the area until it’s smooth again.
Once you’re satisfied with the outside of your blank, it’s time to move on to the next step: refining the inside surface.
4
What are the four main types of businesses?
The four main types of businesses are sole proprietorships, partnerships, corporations, and limited liability companies (LLCs). Each type of business has its own advantages and disadvantages.
Sole proprietorships are owned by one person and have relatively few regulations. They are easy to form and can be less expensive than other types of businesses. However, sole proprietorships also have some drawbacks.
The owner is personally liable for all debts and obligations of the business. This means that if the business fails, the owner’s personal assets could be at risk.
Partnerships are similar to sole proprietorships in that they are owned by two or more people, but there are some key differences.
Partnerships must be registered with the state in which they operate. Like sole proprietorships, partnerships offer some personal liability protection to the owners. However, each partner is still personally responsible for their own actions and can be held liable for the actions of other partners.
Corporations are separate legal entities from their owners (shareholders). This means that shareholders cannot be held personally liable for debts or obligations of the corporation. Corporations must follow certain rules and regulations set forth by state and federal law.
They also tend to be more complex and expensive to establish than other types of businesses.
Limited liability companies (LLCs) offer many of the same benefits as corporations without some of the drawbacks. LLCs have fewer restrictions on ownership than corporations, making them easier to form.
Cut off the Ends of the Blank With a Parting Tool, Leaving Enough Material to Work With Later on
When you’re ready to start cutting the tenon, do so with a regular old saw. A sharp one works best, of course. You can use a miter box if you have one handy, but it’s not necessary.
Just make sure your cuts are perpendicular to the sides of the blank.
Once the tenon is cut, test-fit it in the mortise. It should be a snug fit, but not so tight that it’s difficult to insert or remove.
If it’s too tight, use a rasp or file to take off a bit more material until it fits properly.
With the fit confirmed, go ahead and glue the tenon in place. Use wood glue and apply it liberally to both surfaces of the joint – don’t be shy about it!
Once the glue is applied, insert the tenon into the mortise and clamp everything together tightly until the adhesive dries.
And that’s all there is to cutting a basic through-tenon joint! With a little practice, you’ll be able to produce strong, attractive joints like this one for all sorts of woodworking projects.
5A
What are the differences between a qualified and non-qualified annuity?
When it comes to annuities, there are two different types: qualified and non-qualified. The main difference between the two is how they are taxed.
A qualified annuity is an annuity that is purchased with money that has already been taxed. This means that when you receive payments from the annuity, you will not have to pay taxes on them. A non-qualified annuity, on the other hand, is an annuity that is purchased with money that has not been taxed yet.
This means that when you receive payments from the annuity, you will have to pay taxes on them.
If You Want to Make a Simple Straight-Sided Pen, Use a Skew Chisel to Cut Grooves in Each End of the Blank for Holding the Nib And Ink Reservoir (Barrel)
If you want to make a simple straight-sided pen, use a skew chisel to cut grooves in each end of the blank for holding the nib and ink reservoir (barrel). The pens shown here were all made from pieces of scrap wood that were laying around my shop. I used a variety of woods including cherry, maple, and walnut.
I started by cutting the blanks to length on the bandsaw. I then marked out the locations for the grooves with a pencil. I used a 3/8″ wide skew chisel to cut the grooves.
I find it easiest to start the groove with one side of the chisel bevel down and then switch to having both sides bevel down as I get closer to the other end of the groove. After cutting both grooves, I sanded them smooth with 220 grit sandpaper wrapped around a dowel rod.
The next step is optional, but I like to round over all of the edges on my pens with a 1/4″ radius rounding bit in my router table.
This gives the pens a more finished look and feel in my opinion.
After rounding over all of the edges, I apply several coats of finish before finally assemblying everything together. For these pens, I used CA glue to attach the nibs and ink reservoirs into their respective grooves.
4B
What is the difference between an Internet Service Provider (ISP) and a search engine? An Internet Service Provider (ISP) is a company that provides access to the internet. A search engine is a website that helps you find information on the internet.
If You Want to Make a More Complex Shaped Pen, Such As One With an Hourglass Waist Or Other Curves, Use Shaping Tools to Create These Features before Cutting off the Ends of the Blank
If you want to make a more complex shaped pen, such as one with an hourglass waist or other curves, use shaping tools to create these features before cutting off the ends of the blank. This will give you more control over the final shape of your pen. You can use a variety of different shaping tools, including files, rasps and sandpaper.
Just be sure to work slowly and carefully so that you don’t remove too much material at once.
5
What is a good way to reduce stress?
There are many ways that people can reduce stress in their lives. Some people find that exercise is a great way to relieve stress, while others find that relaxation techniques such as yoga or meditation are helpful.
Some people also find it helpful to journal or talk to a friend about their stresses. Everyone is different, so it is important to find what works best for you.
Once All Shaping is Complete, Sand All Surfaces Smooth And Remove Any Sharp Edges from Aroundthe Barrel Opening(S)
Once all shaping is complete, sand all surfaces smooth and remove any sharp edges from around the barrel opening(s). Depending on the size of your project and the type of wood you are using, you may want to use a power sander to speed up this process. Just be sure not go too crazy with the sanding – you don’t want to create any new dents or scratches!
Once everything is nice and smooth, give your piece a final wipe down with a damp cloth to remove any dust before proceeding to the next step.
6A
What is the significance of the Battle of Fort Ticonderoga?
The Battle of Fort Ticonderoga was a turning point in the American Revolutionary War. The British had been planning an invasion of New York from Canada, and Fort Ticonderoga was a key part of that plan.
But on May 10, 1775, colonial troops surprised and captured the fort from the British. The victory gave the colonists much-needed guns and ammunition and boosted morale at a time when they were fighting against overwhelming odds. It also showed that the ragtag group of farmers and tradesmen could defeat professional soldiers.
For Making Simple Pens (Straight-Sided), Insert Brass Tubes into Each End Ofthe Barrel Groove And Glue Them in Place Using Ca Glue Or Epoxy Resin
Assuming you would like a blog post discussing how to make a simple pen using brass tubes and either CA glue or epoxy resin:
For many people, pens are an everyday necessity. But have you ever thought about how they’re made?
It’s actually not as complicated as you might think! With just a few supplies and some basic instructions, you can make your own simple pen at home.
Here’s what you’ll need:
-Brass tubes (one for each end of the barrel groove)
-CA glue or epoxy resin
-A pen barrel (you can find these online or at a crafts store)
-A drill with a small bit (this is only necessary if your pen barrel doesn’t already have a hole drilled through it)
Begin by inserting the brass tubes into each end of the barrel groove. If your barrel already has a hole drilled through it, skip ahead to the next step.
If not, use your drill to create a small hole in the center of the barrel. Once the holes are drilled, it’s time to glue the brass tubes in place. You can use CA glue or epoxy resin for this step – just be sure that whatever type of adhesive you use is compatible with both brass and plastic (which most pen barrels are made from).
Apply a generous amount of adhesive around the outside of each tube, then insert it into its corresponding end of the barrel groove. Allow the adhesive to dry completely before moving on to the next step.
Make Sure Thatthe Tubes Extend Slightly Beyondthe Ends Ofthe Barrel So That They Can Be Gripped Bythe Chuck When It Comes Time to Turn Them down to Size
When it comes time to turn your tubes down to size, make sure that the tubes extend slightly beyond the ends of the barrel. This will allow you to grip the tubes with your chuck for a more precise and accurate cut.
6B
What is depression?
Depression is a mental health disorder characterized by persistent sadness and loss of interest. It affects how you feel, think and behave and can lead to a variety of emotional and physical problems.
You may have trouble doing normal day-to-day activities, and sometimes you may feel as if life isn’t worth living.
Depression is one of the most common mental health disorders in the United States. According to the National Institute of Mental Health, about 16 million adults in the U.S. suffer from major depressive disorder each year.
Depression can occur at any age but it often begins in adolescence or young adulthood. Women are also more likely than men to experience depression.
There are many different types of depression, including major depressive disorder, dysthymia (a chronic form of low-grade depression) and seasonal affective disorder (SAD).
Depression can also be caused by certain medical conditions such as an underactive thyroid gland or certain types of cancer.
The exact cause of depression is unknown but it’s thought to be a combination of genetic, biological, environmental and psychological factors. People who have a family history of depression may be more likely to develop the condition themselves.
Other risk factors include stress, trauma, substance abuse and certain medications.
For Making Complex Pens (With Curves), Shape Each Endofthe Barrelto Match The Desired Profile Of The Finished Productbefore Gluing in Place
If you’re looking to create a complex pen with curves, it’s important to shape each end of the barrel to match the desired profile of the finished product before gluing it in place. This will ensure that your pen turns out exactly as you envision it.
To do this, start by measuring the length and width of the barrel.
Then, using a saw or other cutting tool, cut the barrel to the desired length. Next, use a file or sandpaper to smooth down any rough edges.
Once the barrel is the right size and shape, it’s time to glue it in place.
Be sure to use a strong adhesive that will hold up over time. Once the glue is dry, your complex pen with curves is ready to use!
7
What are some of the most popular blogging platforms?
The most popular blogging platforms are WordPress, Tumblr, and Blogger. WordPress is the most popular platform overall, while Tumblr is particularly popular among younger users.
Blogger is also a popular option, though it’s not as widely used as the other two platforms.
Once The Glue Has Set , Mount Oneendofthe Barrelinthe Chuckand Turn Itdown To Size , Then Repeatforthe Otherend
Assuming you are referring to a wood barrel: Once the glue has set, you will need to mount one end of the barrel into the chuck and turn it down to size. Once that is complete, repeat for the other end.
8
What are the pros and cons of taking a gap year?
There are a lot of factors to consider when deciding whether or not to take a gap year. Here are some pros and cons to help you make your decision:
Pros:
1. You’ll have time to figure out what you want to do with your life.
2. You can travel and see the world.
3. You can learn new skills or take courses that interest you.
4. You can gain work experience in your field of interest.
5. You’ll have time to mature and grow as a person before starting university or college.
6. You can save money for school by working during your gap year.
7. You’ll be able to focus on your studies once you start school if you take a break first.
8,You might have a better chance of getting into the school of your choice if you defer for a year .
Cons: 1)It may be difficult to find a job that meets all of your criteria – location, salary, hours, etc.. 2)You may end up not doing anything productive with your time off and just end up wasting it instead..
3)Your friends will likely move on without you while you’re taking time off, so it might be hard to reconnect with them when you start school again.. 4)You may miss out on important opportunities if you’re not around during the key application period.
. 5) Taking too long of a break between high school and college could make it harder for you academically.. 6)A gap year could put you at a disadvantage compared to your peers who go straight through college without taking any breaks..
Turn Downthe Tipoffershortening Itto Create Acapillaryaction Feedfor Drawing Up Ink Fromthe Reservoirwhen Writingwith The Pen 9
When you turn down the tip of your pen, you are actually shortening it to create a capillary action feed for drawing up ink from the reservoir when writing. This is because the ink in the reservoir is under pressure and needs somewhere to go when you start writing. The tip of the pen is the perfect place for this to happen.
Next , Installacolletintothechuckand Gripitfirmly But Not Too Tightly – Justenoughso Thatitdoesn’T Slipwhen Being Turned 10Installarubberstopperintothecolletand Pressittightly Againstoneendofthe Collet’S Shaft 11Trimoffexcessrubberfromaroundthe Stopper 12Removetheshaftfromtherubberstopperand Cutittosizeaccordingthowdeepyouwantyourinkreservoirtobe 13Replace Rubber
Installing a collet into a chuck is a simple process that can be completed in just a few minutes. First, select the appropriate size collet for the job at hand and insert it into the chuck. Next, install a rubber stopper into the collet and press it tightly against one end of the collet’s shaft.
Trim off any excess rubber from around the stopper. Finally, remove the shaft from the rubber stopper and cut it to size according to how deep you want your ink reservoir to be.

Credit: www.woodcraft.com
Advanced Pen Turning Techniques
In pen turning, as with any woodworking technique, there are always ways to improve your skills and try new things. Here are some advanced pen turning techniques that will help you take your pens to the next level!
1. Use a variety of woods.
Wood is one of the most important aspects of a beautiful pen, so don’t be afraid to experiment with different types and colors. You can find many different kinds of wood at your local hardware store or online.
2. Try new finishes.
Finishing is another important aspect of pen making, and there are endless possibilities when it comes to trying new finishes. You can use a simple finish like beeswax or shellac, or go for something more sophisticated like lacquer or varnish. There are also many different color stains available that can really make your pens pop!
3. Get creative with the design. The sky’s the limit when it comes to designing unique pens. You can add inlays, engravings, or other embellishments to really make your pens stand out from the rest.
Be sure to practice on some scrap wood first before you attempt anything too complicated on your final product!
4. Pay attention to detail. In order for your pens to look professional, it’s important to pay attention to all the small details.
Pen Turning Tools
As a woodturner, you have many options when it comes to choosing the right tools for your projects. In this blog post, we will take a look at some of the most popular pen turning tools available on the market today.
One of the most important aspects of any woodturning project is getting the perfect cuts.
This is where having the right tools comes in handy. When it comes to pen turning, there are a few different types of cutting tools that you can use. The type of tool that you choose will depend on the material that you are working with and the design that you want to create.
Some of the most popular cutting tools for pen turning include:
-Chisels: Chisels are one of the most versatile tools that you can use for woodturning. They come in a variety of sizes and shapes, which makes them perfect for creating different types of cuts.
You can use chisels to create both straight and curved cuts.
-Lathe: A lathe is another essential tool for woodturning. It allows you to create evenly shaped pieces of wood by spinning them around an axis.
This is perfect for creating pens that have a uniform shape.
-Router: A router is also a useful tool for making different types of cuts on your project piece. With a router, you can create both straight and curved cuts depending on the bit that you use.
Pen Turning Mandrel
Pen turning mandrels are an essential tool for anyone who wants to turn pens on a lathe. A mandrel is a metal rod that fits inside the barrel of the pen and supports the blank while it is being turned. Mandrels come in different sizes to accommodate different size blanks and barrels.
Pen turning mandrels usually have a 3/8” or 10mm shaft with a #2 Morse Taper. The end of the mandrel where the blank is mounted will also have a smooth surface to prevent marring the finish of your pen blank.
Pen turning is a great way to create beautiful, one-of-a-kind pens.
But without a good quality mandrel, it would be very difficult to turn pens accurately. A good mandrel will allow you to mount your pen blank securely and turn it smoothly without any wobbling or vibration.
If you’re just getting started in pen turning, we recommend checking out our beginner’s guide to find out more about choosing the right tools and materials for your project.
Conclusion
If you’re looking to get into pen turning, or simply want to learn how to use a lathe for woodworking, this guide is for you. We’ll go over the basics of using a lathe and show you how to turn a piece of wood into a beautiful handcrafted pen.
First, you’ll need to gather some supplies.
You’ll need a lathe, of course, along with a few other tools like chisels and gouges. You’ll also need some wood stock – we recommend starting with something small like basswood or maple. Once you have your supplies, it’s time to get started.
The first step is mounting your wood onto the lathe. This is best done with a three-jaw chuck, which will grip the stock securely while allowing you to rotate it evenly. With the wood mounted, it’s time to start shaping it with your chisels and gouges.
Start by roughing out the overall shape of the pen body with large cuts from your chisel. Then switch to smaller cuts and more delicate work as you begin shaping the details. As you work, keep an eye on the symmetry and balance of your design – this is what will make your pen truly unique.
Once you’re happy with the shape of your pen body, it’s time to start working on the nib (the point where ink comes out). For this part, precision is key – take care not mistakely cut too deeply and ruin all your hard work! With patience and practice, anyone can create beautiful pens using a lathe – give it a try today!
