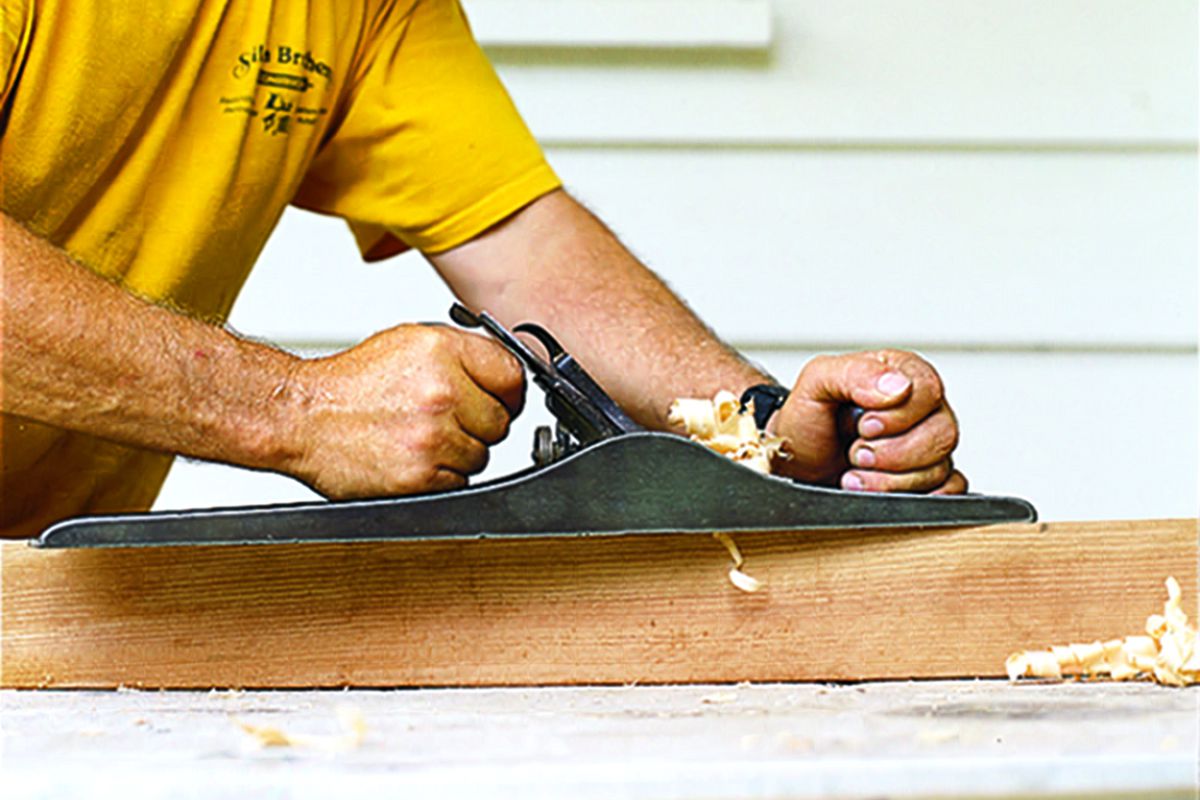
A wood planer is a tool used to shave down the surface of a piece of wood. When using a wood planer on a door, first make sure that the door is flat and level. Place the wood planer on the door and hold it down with one hand while moving it back and forth with the other hand.
Apply pressure evenly as you move the wood planer across the door until the desired thickness is achieved.
- Remove the door from its frame and set it on a work surface
- Position the planer so that the blade is level with the top of the door
- Apply pressure to the planer as you move it back and forth across the door to shave off a thin layer of wood
- Continue until the entire door has been sanded down evenly
- Finish by sanding down any rough edges with a hand sander or power sander
BEGINNERS Guide to Using an Electric Planer.
Table of Contents
Can You Use a Planer on a Door?
A planer is a great tool for door projects. It can quickly and easily remove small amounts of wood from the door, allowing you to create a custom fit. You can also use a planer to create a smooth, finished surface on the door.
How Do You Use a Planer to Cut a Door?
If you’re looking to cut a door down to size using a planer, there are a few things you’ll need to keep in mind. First, make sure the door is securely clamped down before starting. You’ll also want to make sure that the cutting blades on your planer are sharp and ready to go.
Once everything is set up, you can start feeding the door into the planer, making sure to keep an even pressure as you go. The goal is to avoid any chipping or gouging of the door surface. After a few passes, you should have a nicely sized door that’s ready to be hung!
How Do You Hold a Door When Planing?
When you are planing a door, you will need to hold it in place so that it does not move while you are working on it. There are a few different ways that you can do this, depending on the size and type of door that you are working with.
If you have a small door, you can simply hold it in place with your hand.
If the door is larger, you may need to use a piece of wood or another object to prop it in place. You can also use clamps to hold the door in place while you work.
Once the door is secured, you can begin planing it.
Start by running the plane along the edge of the door to create a smooth surface. Then, continue moving the plane across the rest of the door until it is evenly sanded down.
Which Side of a Door Should I Plane?
If you’re planning on hanging a new door, or even just giving your old door a facelift, you’ll need to plane it down to size. But which side of the door should you plane?
The answer may surprise you – it doesn’t actually matter!
Whether you plane the top, bottom or sides of the door, as long as you end up with a smooth, even surface, that’s all that matters.
So go ahead and get started. And if you’re not sure how to plane a door properly, don’t worry – there are plenty of tutorials online that can show you the way.

Credit: www.wikihow.com
How to Shave a Door Without Removing It
Do you have a door in your home that you need to shave down to fit a new piece of furniture? Maybe you’re moving and the doorways in your new place are slightly smaller than the ones in your old place. Or maybe you just want to change up the look of a room by shaving down a door.
Whatever the reason, shaving a door without removing it is actually pretty easy to do!
Here’s what you’ll need:
-A hand saw or power saw with a fine-toothed blade (a jigsaw can also work)
-Sandpaper (coarse and fine grits)
-A level
-Tape measure
-Pencil
First, use your tape measure to determine how much needs to be shaved off of the door. Then, using a pencil, mark out where you’ll be cutting on the door.
It’s important to make sure that your cuts are level, so use a level when marking out your lines.
Now it’s time for the actual cutting! If you’re using a hand saw, start by making shallow cuts along your marked lines.
Once you’ve cut through the top layer of wood, you can start making deeper cuts. Be careful not to cut too deeply – you don’t want to damage the inside of the door! If you’re using a power saw, make sure that the blade is set at a low depth so that you don’t accidentally cut too deeply into the door.
Once all of your cuts are made, it’s time to sand down any rough edges. Start with coarse grit sandpaper and then move on to finer grit sandpaper until all of the edges are smooth.
And that’s it! You’ve successfully shaved down a door without removing it from its frame.
Door Planer Without Removing Door
If you’re looking to quickly and easily add some extra dimension to your doors without removing them, then a door planer is the tool for you! A door planer is a handheld power tool that can be used to shave off small amounts of wood from the surface of a door. This is a great way to add some subtle detail or make an old door look new again.
Here’s everything you need to know about using a door planer without removing the door.
The first step is to choose the right size bit for your needs. The standard size for most door planers is 1/4 inch, but depending on the thickness of your door, you may need a larger or smaller bit.
Once you have the right size bit, attach it to your drill and set the depth stop so that you only remove a small amount of wood with each pass.
Now it’s time to start planing! Start at one end of the door and work your way down, following the grain of the wood.
Make sure to keep the drill moving evenly so that you don’t create any gouges in the surface. If you’re happy with how your doors look, then all that’s left to do is rehang them and enjoy your handiwork!
How to Shave a Door to Fit
If you’re looking to shave a door to fit, there are a few things you’ll need to do. First, you’ll need to remove the door from its hinges. Next, you’ll need to measure the door and mark where you’ll need to shave it.
Once you’ve marked the door, you can begin shaving it with a handplane or power planer. Be sure to go slowly and evenly until the door is the desired thickness.
Conclusion
If you’re looking to give your door a fresh new look, one of the best ways to do so is by using a wood planer. Here’s a quick guide on how to use one:
First, remove the door from its hinges and lay it flat on a work surface.
Next, use a tape measure to find the center of the door and mark it with a pencil. Then, set your wood planer to the desired depth and begin running it along the length of the door, starting at the center mark and working your way outwards. Be sure to keep an even pressure as you go.
Once you’ve gone over the entire door with the wood planer, sand down any rough edges with fine-grit sandpaper. Finally, rehang your door and enjoy your handiwork!
