Table saw tools are essential equipment for woodworking, providing precision and versatility for various cutting tasks. With a powerful motor and a flat, stationary surface, table saws are ideal for making straight cuts on large pieces of wood.
Additionally, they feature adjustable blades and sturdy fences, making them suitable for ripping, crosscuts, miter cuts, and bevels. These tools are commonly used in woodworking shops, construction sites, and home DIY projects, serving both professionals and hobbyists alike. Whether it’s for building furniture, creating cabinetry, or constructing wooden structures, table saws offer efficiency, accuracy, and safety for all woodworking needs.
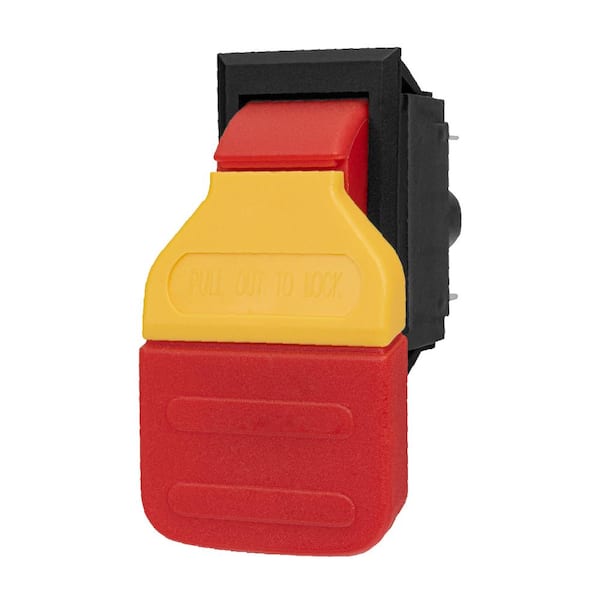
Enhance Your Woodworking Precision With A Rip Fence
Table of Contents
Woodworking is a craft that requires precision and accuracy. Whether you’re a beginner or a seasoned woodworker, one tool that can greatly enhance your woodworking precision is a rip fence for your table saw. A rip fence is an essential accessory that helps ensure straight and consistent cuts, allowing you to achieve professional-quality results. In this blog post, we will explore what a rip fence is, discuss the benefits of using one, provide tips for choosing the right rip fence for your table saw, and share techniques for using a rip fence effectively.
What is a Rip Fence?
A rip fence, also known as a guide fence or a rip guide, is a device that attaches to the table saw and serves as a guide for the workpiece during cutting. It is a parallel piece that runs alongside the saw blade, enabling you to cut materials with accuracy and precision. The rip fence acts as a reference point, ensuring that the workpiece remains in a straight line throughout the cutting process.
The Benefits of Using a Rip Fence
Using a rip fence offers numerous benefits, some of which include:
- Precision: A rip fence ensures that your cuts are clean, accurate, and parallel to the desired measurement, resulting in professional-looking finished projects.
- Consistency: With a rip fence, you can easily replicate identical cuts, allowing you to create parts that fit together seamlessly.
- Safety: The rip fence helps prevent kickback, a potentially dangerous situation where the workpiece is propelled back towards the operator, minimizing the risk of accidents.
- Efficiency: By guiding your workpiece along the rip fence, you can work faster and more efficiently, saving time and effort.
Choosing the Right Rip Fence for Your Table Saw
When selecting a rip fence for your table saw, there are several factors to consider:
- Compatibility: Ensure that the rip fence is compatible with your specific table saw model.
- Build Quality: Look for a sturdy, well-constructed rip fence that will withstand the rigors of repeated use.
- Accuracy: Choose a rip fence that provides precise measurements and allows for easy adjustments.
- Ease of Installation: Consider a rip fence that is easy to install and remove, allowing for flexibility in your woodworking projects.
Tips and Techniques for Using a Rip Fence Effectively
To fully utilize the benefits of a rip fence and ensure accurate cuts, keep the following tips and techniques in mind:
- Measure Twice, Cut Once: Double-check your measurements before making any cuts to avoid costly mistakes.
- Secure the Fence Properly: Ensure that the rip fence is securely tightened and parallel to the blade to maintain accuracy.
- Use a Push Stick: When working with small or narrow pieces of wood, use a push stick to keep your hands at a safe distance from the blade.
- Support Large Workpieces: Use additional supports or roller stands to provide stability and prevent sagging when working with large or heavy materials.
With the right rip fence and proper techniques, you can elevate your woodworking skills and achieve precise, professional results with your table saw. Whether you’re building furniture, cabinets, or other woodworking projects, make the most of your table saw by incorporating a rip fence into your workflow.
Credit: www.homedepot.com
Achieve Cleaner And Safer Cuts With A Push Stick
When working with a table saw, safety should always be a top priority. One essential tool that can help you achieve cleaner and safer cuts is a push stick. In this section, we will explore what a push stick is, why it is important, the safety benefits of using one, different types of push sticks and their uses, as well as proper techniques for using a push stick.
What is a Push Stick and Why is it Important?
A push stick is a simple tool with a handle and a notched end that is used to guide wood through a table saw. It allows for better control and keeps your hands safe by keeping them away from the blade. The importance of using a push stick cannot be emphasized enough, as it helps prevent accidents and ensures a cleaner and more accurate cut.
The Safety Benefits of Using a Push Stick
Using a push stick when operating a table saw offers several key safety benefits. Firstly, it keeps your hands a safe distance away from the blade, reducing the risk of injury. Secondly, a push stick provides better control and stability, minimizing the chance of kickback or the wood binding against the blade. Lastly, it allows for a more accurate cut, as it ensures consistent pressure and feed rate.
Different Types of Push Sticks and Their Uses
Push sticks come in various shapes and designs, each suited for different woodworking projects. Some common types include:
| Push Stick Type | Description |
|---|---|
| Basic Push Stick | A simple stick with a notched end and handle, suitable for most table saw cuts. |
| V-Notched Push Stick | Features a V-shaped notch that allows for greater control when feeding wood through the blade. |
| Thin Rip Push Stick | Designed specifically for making thin rip cuts, with a narrow profile that keeps your hands clear of the blade. |
Proper Techniques for Using a Push Stick
Using a push stick correctly is essential to ensure safety and optimal results. Here are some proper techniques to keep in mind:
- Position yourself to the side of the table saw, allowing for a firm and balanced stance.
- Grip the push stick firmly with your dominant hand, placing your thumb on top for better control.
- Hold the wood being cut firmly against the table and against the push stick’s notched end.
- Apply consistent pressure and feed the wood smoothly through the blade, keeping your hands clear of the cutting path at all times.
- For longer or wider pieces, use an additional push stick or a push block to maintain control and prevent kickback.
By following these techniques and utilizing a push stick, you can achieve cleaner and safer cuts on your table saw, giving you peace of mind and optimal woodworking results.
Improve Accuracy And Efficiency With A Miter Gauge
When it comes to woodworking, precision is key. Whether you are a professional carpenter or a DIY enthusiast, having the right tools is essential to achieving accurate and efficient cuts. One such tool that can significantly enhance your woodworking experience is a miter gauge. A miter gauge is a versatile accessory designed to improve both the accuracy and efficiency of your table saw cuts. Understanding its functions, why every woodworker should have one, choosing the right miter gauge for your table saw, and optimizing your cuts are essential factors to consider when incorporating this tool into your woodworking projects.
Understanding the Functions of a Miter Gauge
A miter gauge is a device that allows you to make precise angle cuts on a table saw. It consists of a long metal bar with a pivot point and a guide block that slides along it, enabling you to set and lock your desired angle. This tool is equipped with angle indicators and adjustable stops, allowing you to make accurate and repeatable cuts at various angles. Additionally, miter gauges often come with a fence that helps you to maintain a consistent distance between the material and the blade, further enhancing the precision of your cuts.
Why Every Woodworker Should Have a Miter Gauge
A miter gauge is an indispensable tool for every woodworker, regardless of their skill level. Its ability to make precise angled cuts opens up a world of possibilities, allowing you to create intricate designs, fit pieces together perfectly, and achieve professional-grade results. By using a miter gauge, you can eliminate guesswork and errors, resulting in flawless cuts that fit together seamlessly. Whether you are working on furniture, cabinetry, or trim projects, a miter gauge will not only save you time and effort, but also elevate the overall quality of your woodworking projects.
Choosing the Right Miter Gauge for Your Table Saw
When it comes to selecting a miter gauge for your table saw, there are a few factors to consider. Firstly, ensure compatibility with your table saw’s miter slot size. Most miter gauges are designed to fit standard slots, but it’s always important to double-check. Additionally, look for a miter gauge that offers a wide range of angle adjustments and has a smooth sliding mechanism for easy and precise adjustments. Consider the materials used in the construction of the miter gauge to ensure durability and stability. Lastly, read reviews and compare different models to find a miter gauge that is reliable and trusted by other woodworkers.
Optimizing Your Cuts with a Miter Gauge
Using a miter gauge effectively can significantly optimize your woodworking cuts. Start by accurately setting the desired angle using the angle indicators and adjustable stops. Make sure to secure the material firmly against the fence to maintain consistency and prevent any movement during the cut. Take your time and apply steady pressure while guiding the material along the miter gauge, allowing the blade to smoothly cut through the material. Always remember to wear appropriate safety gear, such as goggles and gloves, and follow all safety precautions when operating your table saw.
By utilizing a miter gauge, you can elevate your woodworking projects to a whole new level of precision and efficiency. Understanding its functions, recognizing its importance, choosing the right miter gauge, and optimizing your cuts are vital steps in maximizing the potential of this invaluable tool. Incorporate a miter gauge into your woodworking arsenal, and watch as your accuracy and efficiency soar to new heights.
Maximize Your Table Saw’S Potential With Featherboards
Featherboards are an essential tool for any woodworker looking to maximize the potential of their table saw. These simple yet effective devices can greatly enhance the safety and precision of your cuts, ensuring professional-level results every time. In this article, we will explore what featherboards are, how they work, the advantages of using them, the different types available, and provide installation tips for using them effectively.
What are Featherboards and How Do They Work?
Featherboards are specialized accessories designed to hold your workpiece securely against the table and fence of your table saw. They consist of a series of thin “feathers” or flexible fingers that exert pressure on the workpiece, preventing it from moving during the cutting process.
The mechanism behind featherboards is quite simple. The fingers are angled towards the direction of the cut, allowing the workpiece to move forward but not backward. This ensures a steady and controlled feed rate, minimizing the risk of kickback and producing clean, accurate cuts.
The Advantages of Using Featherboards
There are several advantages to using featherboards with your table saw:
- Enhanced Safety: Featherboards firmly hold your material in place, reducing the chance of accidents and kickbacks that can arise from an unstable workpiece.
- Precise Cuts: With the added stability provided by featherboards, you can achieve consistent and accurate cuts, resulting in a higher quality finished product.
- Improved Efficiency: By preventing the movement of your workpiece, you can focus on the cutting process and achieve a smoother workflow.
Different Types of Featherboards and Their Applications
Featherboards come in various types, each suited for different applications:
| Type | Application |
|---|---|
| Single Featherboard | Best for holding the workpiece against the fence during rip cuts. |
| Dual Featherboard | Perfect for holding the workpiece against the table and fence simultaneously, ideal for crosscuts. |
| Miter Gauge Featherboard | Specifically designed for securing angled cuts with a miter gauge. |
Installation and Tips for Using Featherboards Effectively
Installing featherboards onto your table saw is a straightforward process. Follow these tips to ensure effective usage:
- Attach the featherboards snugly against the table and fence, using the provided hardware or clamps.
- Place them in a position that applies pressure to the workpiece but does not impede its movement.
- Test their effectiveness by gently pushing and pulling the workpiece to ensure a secure hold.
- For angled cuts, adjust the featherboard’s position accordingly to maintain a steady grip.
By implementing these installation and usage tips, you can harness the full potential of featherboards, making your woodworking projects not only safer but also more precise and efficient.
Enhance Safety And Precision With Blade Guards And Splitters
When working with table saw tools, one of the most crucial aspects to consider is safety. Blade guards and splitters are essential accessories that can greatly enhance your safety and precision while using a table saw. In this blog post, we will delve into the importance of blade guards and splitters, explore the different types available, discuss how to install and use them safely, as well as provide valuable insights on maintaining and replacing these important tools.
The Importance of Blade Guards and Splitters
Blade guards and splitters play a vital role in table saw safety. They are designed to minimize the risk of accidents by preventing contact with the blade, reducing kickback, and helping to maintain consistent cutting accuracy. These accessories act as a protective barrier between your hands and the blade, preventing potential injuries and ensuring a secure and controlled cutting process.
Understanding the Different Types of Blade Guards and Splitters
Blade guards and splitters come in various types, each offering unique features and benefits. The most common types include:
| Type | Features |
|---|---|
| Riving Knife | Mounts directly behind the saw blade, rises and lowers with the blade, prevents kickback |
| Splitter | Keeps the kerf open, prevents the wood from pinching the blade, reduces kickback |
| Overarm Blade Guard | Provides a transparent protective shield over the blade, offers enhanced visibility and dust collection |
| Dust Collection Blade Guard | Combines a blade guard and a dust collection system, keeps the work area free from debris |
Installing and Using Blade Guards and Splitters Safely
- Read the manufacturer’s instructions carefully before installing the blade guard or splitter.
- Ensure that the saw is properly aligned and the blade is securely in place.
- Attach the blade guard and/or splitter according to the instructions provided, making sure it is properly aligned and tightened.
- Test the functionality and adjust the position if necessary.
- When using the table saw, always keep the blade guard or splitter in place and properly adjusted.
- Follow proper cutting techniques, such as using a push stick or feather board, to reduce the risk of accidents.
- Regularly inspect the blade guard and splitter for any signs of damage or wear. If any issues are found, replace them immediately.
Maintaining and Replacing Blade Guards and Splitters
To ensure optimal functionality and safety, regular maintenance of blade guards and splitters is essential. Follow these tips:
- Keep the blade guard and splitter clean and free from debris.
- Inspect them for any chips, cracks, or other damage.
- Replace any damaged or worn-out parts promptly to avoid compromise in safety.
- Store blade guards and splitters in a safe place when not in use.
By adhering to proper maintenance practices, you can ensure that your blade guards and splitters are always ready to provide the necessary safety and precision while using your table saw.
Boost Dust Collection Efficiency With A Dust Extractor
Table saws are essential tools for any woodworking enthusiast or professional. However, when using a table saw, one common issue that may arise is the accumulation of dust and debris. Not only can this make a mess, but it can also pose health risks and affect the overall performance of your table saw. That’s where a dust extractor comes in handy. A dust extractor is a vital tool that helps improve dust collection efficiency and ensures a cleaner and healthier work environment.
Why Good Dust Collection is Essential
Having an effective dust collection system is crucial for a few reasons. Firstly, it helps to maintain a clean workspace. Sawdust and debris can quickly accumulate and clutter your work area, making it harder to work and potentially causing accidents. Secondly, better dust collection improves the air quality in your workspace. Inhalation of dust particles can lead to respiratory issues and allergies, so it’s vital to minimize exposure to dust as much as possible. Lastly, a clean workspace ensures that your table saw operates at its best, reducing the risk of clogs and malfunctions caused by build-up.
The Benefits of Using a Dust Extractor
A dust extractor offers several benefits that make it an essential tool for table saw owners. Firstly, it efficiently removes dust and debris from the cutting area, ensuring a cleaner work environment. By removing dust as it is produced, a dust extractor prevents it from settling on your workpieces, improving the quality of your cuts and reducing the need for post-work cleaning. Furthermore, a dust extractor helps protect your health by minimizing the amount of dust in the air. This is especially important when working with hazardous materials or in enclosed spaces. Lastly, using a dust extractor can also extend the life of your table saw by reducing the wear and tear caused by dust build-up in critical components.
Choosing the Right Dust Extractor for Your Table Saw
Selecting the right dust extractor depends on various factors, such as the size of your table saw and the level of dust generated. Here are a few key considerations to keep in mind:
- Choose a dust extractor with sufficient airflow and suction power to handle the amount of dust produced by your table saw.
- Ensure that the dust extractor has a compatible hose and fittings to attach to your table saw’s integrated dust collection port.
- Consider the capacity and filtration system of the dust extractor. A larger capacity and efficient filtration will require less frequent emptying and maintenance.
Tips for Proper Dust Collection and Management
To maximize the efficiency of your dust extraction system and ensure proper dust collection and management, keep the following tips in mind:
- Regularly clean and maintain your dust extractor to ensure optimal performance.
- Position the dust extractor close to your table saw, minimizing the hose length to prevent air pressure loss.
- Use additional dust collection attachments, such as a dust shroud or hood, to capture dust and debris more effectively.
- Wear appropriate personal protective equipment, including a dust mask, safety goggles, and hearing protection, to further safeguard your health.
- Invest in quality dust bags or filters to trap fine dust particles and prevent them from re-entering your workspace.
By following these tips and making use of a dust extractor, you can significantly enhance the dust collection efficiency of your table saw, ensuring a cleaner and safer work environment.
Explore Other Essential Table Saw Accessories
Table saws are indispensable tools in woodworking shops, but did you know that there are several accessories that can enhance their capabilities? These accessories not only expand the workspace but also improve cutting performance, enable versatile cutting techniques, and make specific woodworking tasks easier. In this article, we will explore some essential table saw accessories that every woodworker should consider adding to their arsenal.
Outfeed Tables: Expanding Workspace and Supporting Large Workpieces
An outfeed table is a must-have accessory for any table saw owner. It not only expands the workspace but also provides support for large workpieces, preventing them from tipping or falling off the table saw during cutting. This accessory is particularly useful when working with long boards or large sheet goods.
Zero-Clearance Inserts: Improving Cutting Performance and Reducing Tear-out
A zero-clearance insert is a thin piece of material, typically made of wood or plastic, that replaces the standard throat plate of a table saw. It is designed to provide support directly beneath the workpiece, minimizing tear-out and improving cutting performance. With a zero-clearance insert, you can achieve cleaner cuts, especially when working with thin or fragile materials.
Dado Blades: Enabling Versatile Groove and Dado Cutting
Dado blades are specialized cutting tools that allow you to create wide grooves, dadoes, and rabbets in wood. These blades typically consist of two outer blades and a set of chippers that fit in between. By swapping out the standard blade with a dado blade, you can easily create precise grooves for joinery, shelving, or any other application that requires a strong and precise fit.
Sleds and Jigs: Customized Tools for Specific Woodworking Tasks
Sleds and jigs are customized tools that are designed to help you perform specific woodworking tasks with precision and ease. Whether you need to make accurate crosscuts, miter cuts, or dado cuts, there is a sled or jig available for almost any application. These accessories ensure that your cuts are repetitive, consistent, and accurate, saving you time and effort in the process.
Frequently Asked Questions On Table Saw Tools
What Are The Essential Safety Measures To Consider When Using A Table Saw?
It is essential to wear protective gear, such as safety glasses and gloves, and keep the working area well-lit. Make sure to use a push stick or push block to avoid hand injuries and always ensure the blade is properly aligned and sharp to prevent kickbacks.
How Do I Choose The Right Table Saw For My Woodworking Projects?
Consider factors like the type of projects you’ll be working on, the size of the workspace, and the saw’s power and accuracy. Table saws come in various types, including cabinet, contractor, and portable saws, each with unique features suited for different needs.
How Do I Maintain My Table Saw To Ensure Optimal Performance?
Regular maintenance is crucial for prolonged performance. Keep the table clean and free of debris, regularly lubricate moving parts, and check the alignment of the blade and fence. Replace worn-out parts and maintain the correct tension on the blade to prevent accidents and achieve precise cuts.
Can I Use A Table Saw To Cut Other Materials Besides Wood?
While table saws are primarily designed for woodworking, with the right setup and precautions, they can cut materials like plastic, laminates, and even non-ferrous metals. Make sure to use the appropriate blade and adjust the cutting speed accordingly to avoid damage and achieve clean cuts.
Conclusion
The table saw is an essential tool for both professional woodworkers and DIY enthusiasts. By investing in high-quality table saw tools, you can ensure precise and efficient cutting, saving you time and effort. With a wide range of options available in the market, it is crucial to choose tools that align with your specific needs and budget.
Consider factors such as blade quality, safety features, and ease of use when making your purchase. Regular maintenance and care will also extend the lifespan of your table saw tools. Remember to clean them after each use and keep them properly stored.
By following these tips, you can maximize the performance of your table saw tools and achieve outstanding results in your woodworking projects. So, whether you’re a professional or a DIYer, make sure to invest in the right table saw tools to elevate your woodworking game.

- WoodRiver Plane reviews | Best Wood Hand Planer In 2024 - 19/10/2024
- The Best Tung Oil: The Ultimate Guide in 2024 - 19/10/2024
- 12 Inch Wood Planer: Smooth Your Woodworking Projects Like a Pro - 01/10/2023