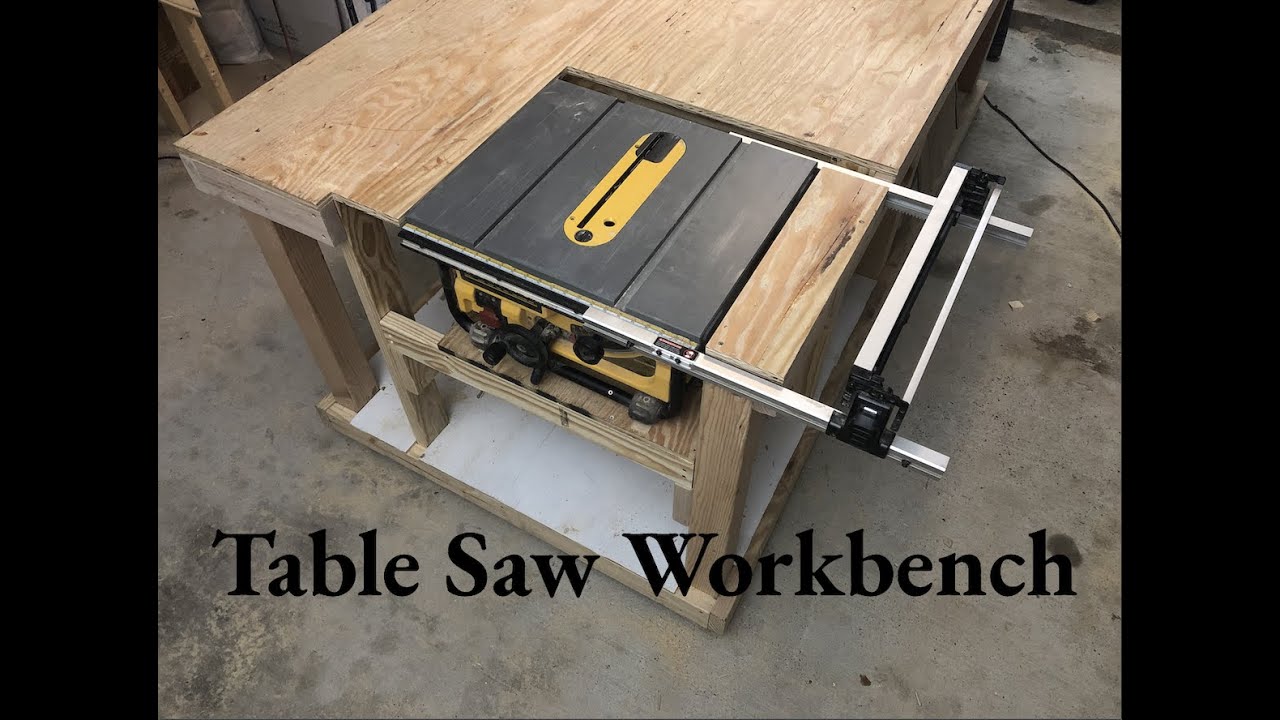
Table saw workstation ideas can help increase efficiency and safety in your woodworking projects. Achieving this goal requires a careful consideration of your workspace, tools, and personal needs.
Woodworking enthusiasts know too well the challenges of organizing their workspaces. With a broad range of equipment and materials, it is easy to have a cramped and unsafe workspace. This is where table saw workstations come in to help. A table saw workstation provides a stable and secure place to work on your materials while improving efficiency.
With the right design, you can have a workstation that doubles up as storage for your equipment and materials. The versatility and customization options of table saw workstations allow you to create a comfortable and safe environment for executing your projects. In this guide, we highlight some table saw workstation ideas to help you optimize your workspace.
Credit: www.youtube.com
Table Saw Workstation Basics
Table of Contents
Choosing The Right Workspace For Your Table Saw Workstation – Benchtop Vs. Mobile Vs. Permanent
When setting up a table saw workstation, the right workspace is essential for efficiency and safety. Here are some ideas for choosing the perfect workspace for your table saw workstation:
- Benchtop workspaces are great for small shops and tight spaces. They’re affordable and lightweight, making it easy to move them around. However, they’re not as sturdy as mobile or permanent workspaces, which could be a safety issue.
- Mobile workspaces provide more stability than benchtops, and they can be easily moved around the shop. They are a great option for bigger shops where space is not an issue. However, they might be pricier than benchtop workspaces.
- Permanent workspaces are the most stable, providing a sturdy and secure surface for your table saw. This option is best for bigger shops with ample space, and they can also be customized to fit your specific needs. Keep in mind that this option might be more expensive than benchtop or mobile workspaces.
Best Materials To Use When Building Your Table Saw Workstation
The materials used to build your table saw workstation are crucial for ensuring its stability, longevity, and safety. Here are some materials that are ideal for building a table saw workstation:
- Solid core doors: These make an excellent work surface that is flat and sturdy.
- Plywood: This type of wood is inexpensive and lightweight, yet still relatively strong.
- Hardwood: Hardwoods like oak, cherry, and maple are sturdy and durable, but can be more expensive.
- Steel: If you’re looking for an industrial look, a steel table saw workstation might be right for you. This material is incredibly robust and long-lasting.
Safety Considerations When Designing Your Table Saw Workstation
Safety is paramount when designing your table saw workstation. Consider the following safety tips when designing your workspace:
- Keep the area around your table saw clear of debris, wires, and tools to prevent potential accidents.
- Make sure your workspace is well-lit so that you can see what you’re doing.
- Use a reliable fence system that adjusts accurately and locks securely in place.
- Use a blade guard to protect yourself from the saw’s sharp edges.
- Install an anti-kickback pawl to prevent lumber from getting thrown back at you.
Remember, safety should always be a top priority when designing and setting up your table saw workstation. With careful consideration, your workspace can be both efficient and safe.
Top Table Saw Workstation Ideas
Table saw workstations can be a game-changer for woodworking enthusiasts. A quality workstation enhances the functionality of your table saw, offering an organized and efficient workspace. Here are some top table saw workstation ideas to take your woodworking game to the next level:
Modular Table Saw Workstation Designs
Modular table saw workstations are a must-have for those with limited space. This type of workstation is designed specifically to adjust to meet your workspace’s size, making it a versatile and practical option. Here are some key points to remember:
- Modular table saw workstations offer flexibility in terms of layout and design.
- They comprise several components that can be rearranged according to the user’s preference.
- These workstations offer more storage solutions, giving you a chance to keep your workspace organized.
Incorporating Storage Solutions Into Your Table Saw Workstation
Efficient storage of your woodworking tools and materials is essential to prevent clutter. All items should be within reach, eliminating the need to move around your workspace. Here are a few ways to incorporate storage solutions:
- Design your table saw workstation with built-in cabinets or drawers for storing tools and materials.
- Install pegboards on the wall for hanging tools.
- Use magnetic strips for items like chisels, which can be attached to the side of the table saw to save space.
Adding Efficiency With Power Tool Space-Saving Solutions
To avoid a cluttered workspace, you need to optimize space as much as possible. One way to do this is to use space-saving solutions for your power tools, such as:
- Invest in a multi-function power tool, like a saw that doubles as a sander.
- Hang your power tools on the wall in a designated area for easy reach.
- Incorporate a multi-layered shelf underneath or beside your table saw to house multiple power tools in a small space.
Combining Table Saw Workstation With Other Bench-Top Tools For Maximum Storage And Space
If you have numerous bench-top tools in your workshop, they can take up lots of space. It’s possible to combine your table saw workstations with other bench-top tools for maximum storage and space. Here are some points to keep in mind:
- Combine your table saw with a workbench for a more versatile workspace.
- Use router tables, sanders, and drills that can double as a workbench.
- If you have a miter saw, add an extension table on the side of the table saw to create a single workspace.
Creating an ideal table saw workstation can improve your woodworking experience and provide a sense of satisfaction with every project completed. Incorporating these tips will allow you to have a functional workspace with all the necessary tools in reach.
How To Build Your Own Table Saw Workstation
Necessary Tools, Equipment, And Materials For Building Your Workstation
Building your own table saw workstation may sound difficult. However, with the right tools and materials, it becomes a straightforward task. Here are some essential items you need to prepare before you begin building your table saw workstation:
- Power drill
- Jigsaw
- Circular saw
- Workbench
- Table saw
- Measuring tape
- Screwdriver
- Level
- Plywood sheets
- 2 x 4 boards
- Wood screws
- Wood glue
With these tools and materials ready, you’re ready to begin building your own table saw workstation.
Step-By-Step Guide For Building Your Own Table Saw Workstation
Before you start building your table saw workstation, make sure you have a clear workspace, and all the necessary equipment is gathered and ready for use. Once you’ve done that, follow these simple steps:
- Take your plywood sheet, and use your circular saw to cut it into half.
- Using the 2 x 4 boards, make the framework for your table saw station floor.
- Attach 2 x 4 boards sides to make the legs of the workstation.
- Attach 2 x 4 corner braces to provide support to the legs.
- Make the frame of the table saw workstation using the plywood sheets, cutting them along the measured lengths to create the workstation sides.
- Place the workstation sides and screw them together using the wood screws, leaving enough space for the table saw in one section of the frame.
- Place the plywood sheet on top of the workstation frame, ensuring a perfect fit.
- Cut the table saw insert using the jigsaw and attach it to the workstation top.
- Attach the table saw to the workstation top using screws and align it correctly.
- Ensure everything is level, and add finishing touches using the wood glue.
Your Brand New Table Saw Workstation Is Now Ready!
Tips And Tricks For Making The Building Process Easier
Building a table saw workstation can be quite a task, but it’s a lot easier if you know some tips and tricks. Here are some useful pointers:
- Make sure you have a clear work area with sufficient light.
- Always double-check your measurements before cutting the wood.
- Use the correct tools to make the job easier.
- Ensure a level surface for your workstation.
- Use the right type and size of wood screws and apply enough glue to ensure proper adhesion.
- Have a helper or two to assist you in the heavy lifting and holding the components in place.
- Take your time, and don’t rush the process.
- Ensure your workstation is stable and sturdy before attempting to use it.
- Sand and stain your workstation for a clean finish.
Now that you’ve completed your table saw workstation, it’s time to put it to good use. Happy woodworking!
Maintaining And Upgrading Your Table Saw Workstation
A table saw workstation is an essential tool for any woodworker. It enables you to make precise cuts, ensures your safety while handling the saw, and keeps your work area organized. However, like any other tool, a table saw workstation requires regular maintenance and occasional upgrades to keep it at its best.
Here are some tips on maintaining and upgrading your table saw workstation.
Regular Maintenance And Cleaning Practices For Your Workstation
To ensure your table saw workstation remains in tip-top condition, you need to perform regular maintenance and cleaning practices. Here are the key things to keep in mind:
- Keep it clean: Regularly clean your table saw workstation; dust and debris can affect the quality of your cuts and damage the saw over time.
- Inspect regularly: Inspect the saw regularly for damaged parts, worn-out blades, or loose tools. This helps prevent accidents and ensures your cuts remain precise.
- Lubricate: Regularly lubricate moving parts and adjust belts to minimize wear and tear.
- Check alignment: Check your saw’s alignment to ensure accurate and smooth cuts.
- Sharpen blades: Keep your blades sharp to reduce the risk of accidents and enhance your cuts’ quality.
Common Issues And How To Troubleshoot Them
Despite adhering to the above maintenance practices, table saw workstations may face some common issues. Here’s how to troubleshoot them:
- Blade issues: Dull blades can cause burns on your material and make your saw noisy. Sharpening the blades can fix the problem. Wobbling blades can also cause issues; check the arbor and flange to ensure they’re correctly aligned.
- Alignment issues: Misalignment can occur when your saw shifts during use or transportation. You can realign your saw using a dial indicator and miter gauge.
- Motor issues: Power issues or strange noise may indicate a problem with your motor. Check the voltage, wiring, and oil levels.
Creative Ways To Upgrade And Add To Your Table Saw Workstation
Upgrading your table saw workstation may revamp its look and enhance your cutting efficiency. Below are some creative ways to accomplish this:
- Add a dust collector: A dust collector helps keep your work area clean and reduces health hazards related to dust inhalation.
- Make a storage cabinet: A storage cabinet for your tools, jigs, and blades keeps your working area organized and provides easy access to your tools.
- Add a mobile base: A mobile base makes it easy to move your saw to different areas in your workshop.
- Install a router table: Adding a router table expands your saw’s functionality by enabling you to make more cuts and shapes.
Maintaining and upgrading your table saw workstation is crucial to keep it functioning correctly, ensure consistent quality cuts, and enhance your workshop’s organization. Use the tips provided above to keep your table saw workstation running smoothly and improve your work environment.
Frequently Asked Questions Of Table Saw Workstation Ideas
What Is A Table Saw Workstation?
A table saw workstation is a setup, used to enhance the accuracy and workspace around a table saw.
What Are Some Ideas For A Diy Table Saw Workstation?
Diy table saw workstation ideas include workbench with incorporated table saw, sawhorse-based station, or a folding workstation.
Why Do Woodworkers Need A Table Saw Workstation?
A table saw workstation provides a safer and more accurate way to work with a table saw, making woodworking easier, faster, and more reliable.
What Features Should I Consider When Designing A Table Saw Workstation?
Consider the size of the table saw, fence adjustability, dust collection system, mobility, compatibility with other tools, and storage options when building a table saw workstation.
How Do I Maintain My Table Saw Workstation?
Regular cleaning, checking for wear and tear, assessing parts and ensuring electrical safety are key to maintaining a functional table saw workstation.
Can I Use A Table Saw Workstation For Other Tools?
Yes. A universal workstation with adjustable features can be designed to accommodate other tools like routers, planers, or sanders.
Conclusion
After going through various table saw workstation ideas, it is evident that creating a customized table saw workstation can benefit any woodworker in many ways. An excellent workstation is safe to use, avoids clutter, and provides ample storage space. Above all, it enhances accuracy and efficiency during woodworking projects.
Whether you are a professional carpenter or a diy enthusiast, creating a customized table saw workstation is one of the most important project steps to take. You can always explore different ideas and designs, but it’s necessary to choose one that suits your preferences and budget.
Ensure you prioritize safety and durability when making a table saw workstation as it directly affects your overall productivity. Don’t hesitate to create your own ideal table saw workstation or tweak existing ideas to attune it to your requirements. Happy woodworking!