There is no definitive answer to this question as it depends on the desired outcome and the preferences of the user. However, a good starting point would be to sharpen the bowl gouge to an angle between 25 and 30 degrees.
There is a lot of debate among woodturners about what angle to sharpen their bowl gouges to. Some say that a sharp angle is best for cutting through the wood, while others argue that a more obtuse angle is better for smoother cuts. So which is it?
The answer, unfortunately, is that it depends. It really comes down to personal preference and the type of wood you’re working with. If you’re turning softwoods, then a sharper angle may be better.
But if you’re working with hardwoods, then a duller edge might be preferable.Ultimately, it’s up to you to experiment and see what works best for you. Try different angles and see how they affect your turning.
And don’t be afraid to change things up if you’re not happy with the results you’re getting.
Bowl Gouge Bevel Angle Profile — Best Woodturning Tool Video
Table of Contents
What Angle Do You Sharpen a Woodturning Tool?
There are a few factors to consider when sharpening a woodturning tool. The first is the type of tool – most commonly, you will be working with either a gouge or a skewer. The second is the material you’re working with – different woods require different angles.
And finally, personal preference plays a role in finding the perfect angle for your needs.For a gouge, the standard sharpening angle is 30 degrees. For a skewer, it’s slightly higher at 35 degrees.
But as always, it’s best to experiment until you find what works best for you and the project you’re working on.Different woods also require different angles – softer woods like pine or fir can be sharpened at a lower angle, while harder woods like oak or maple need a higher angle to prevent tearing. Again, experiment until you find what gives you the best results.
Finally, personal preference comes into play when finding the perfect angle for your woodturning tools. Some people prefer a sharper edge for more precise work, while others go for a duller edge that’s less likely to cause accidental cuts. Find what works best for you and stick with it!
What is a 40 40 Grind on a Bowl Gouge?
In woodturning, the 40/40 grind is a popular choice for bowl gouges. This grind leaves a very wide primary bevel (40 degrees) with a secondary bevel of 40 degrees.The main advantage of the 40/40 grind is that it is very forgiving.
If you are new to woodturning or if you are working with difficult woods, the extra width of the primary bevel can help to prevent catches.Another advantage of this grind is that it produces a very smooth finish. The wide primary bevel means that there is less chance of leaving marks in the wood as you turn.
The main disadvantage of the 40/40 grind is that it can be more difficult to sharpen than other types of grinds. Because there is so much metal to remove, it can take longer to get a sharp edge.If you are looking for a bowl gouge that is easy to use and produces great results, the 40/40 grind may be right for you!
What Angle Should a Gouge Chisel Be?
There are a few things to consider when choosing the angle of your gouge chisel. The size of the workpiece, the type of wood, and the desired effect are all important factors.The most common angle for a gouge chisel is 45 degrees.
This is a good all-purpose angle that will work well for most projects. If you’re working with a small piece of wood, you may want to use a smaller angle like 30 degrees. For larger pieces or tougher woods, you may need to use a larger angle like 60 degrees.
experiment with different angles to see what works best for your project. There’s no one perfect answer, so it’s important to find what works best for you and your workpiece.
Credit: www.rockler.com
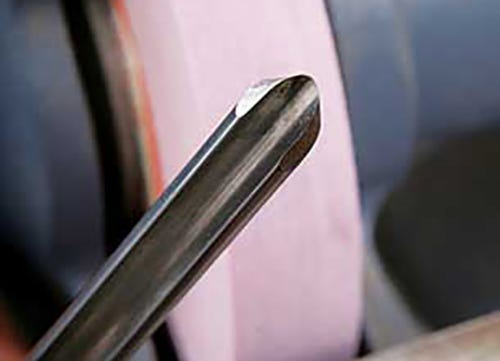
55 Degree Swept Back Bowl Gouge
A bowl gouge is a tool that is used to shape and smooth the inside of a bowl. The bowl gouge has a long, curved blade with a sharp point at the end. The blade is mounted on a handle so that it can be rotated.
The bowl gouge is pushed along the inside of the bowl to remove material and create a smooth, even surface.The term “swept back” refers to the angle of the blade in relation to the handle. A swept back blade is angled away from the handle, while a straight blade is parallel to the handle.
A 55 degree swept back blade is very common for bowl gouges as it provides good clearance when shaping bowls.
Bowl Gouge Sharpening Angles
If you’re a woodturner, then you know that a bowl gouge is one of the most important tools in your arsenal. And if you want to get the most out of your bowl gouge, then you need to make sure it’s properly sharpened. In this blog post, we’ll discuss bowl gouge sharpening angles, so you can get your tool performing at its best.
There are two main Sharpening Angles for a Bowl Gouge:1) The Primary Sharpening Angle – This is the angle that you’ll use to create the initial edge on your bowl gouge. For most woodturners, this angle falls between 20 and 30 degrees.
2) The Secondary Sharpening Angle – This is the angle that you’ll use to refine the edge on your bowl gouge. For most woodturners, this angle falls between 10 and 20 degrees.Now let’s talk about how to actually sharpen your bowl gouge at these angles.
If you’re using a handheld sharpener, like a Dremel or an abrasive stone, then it’s relatively simple – just hold the blade at the appropriate angle and sharpen away. However, if you’re using a bench grinder, things can get a little trickier.To properly sharpen your bowl gouge on a bench grinder, you’ll need to use either jigs or rests.
Jigs are purpose-built fixtures that allow you to hold your tool at the correct angle while sharpening (we recommend using jigs if possible). Rests are simply blocks of wood or other materials that can be used to support your tool while sharpening (rests are not as precise as jigs but they’re often easier to use).Once you have either jigs or rests set up on your bench grinder, simply position your blade at the correct angle and sharpen away.
Remember to frequently check your progress with a honing guide or microscope so you don’t oversharpen!We hope this blog post has been helpful in teaching you about bowl gouge sharpening angles. Ifyou have any questions feel free to leave us a comment below!
40/40 Bowl Gouge for Sale
If you’re looking for a great deal on a 40/40 bowl gouge, you’ve come to the right place! Here at our online store, we have a wide selection of these tools available for purchase. Whether you’re a professional woodworker or just starting out, we have the perfect option for you.
With our low prices and high quality products, there’s no reason not to shop with us!
How to Sharpen a Bowl Gouge by Hand
A bowl gouge is one of the most essential tools for a woodturner. It is used to create bowls, platters, and other hollow forms. A sharp bowl gouge is necessary for clean cuts and a smooth finish.
In this blog post, we will show you how to sharpen a bowl gouge by hand.The first step is to prepare your work area. You will need a sharpening stone, water, and oil.
We recommend using a diamond sharpening stone for the best results. If you do not have a diamond stone, you can use a standard whetstone or oilstone.Next, you will need to find the bevel angle that you need to sharpen your bowl gouge at.
The bevel angle depends on the size of the tool and what type of material you are cutting. For most bowl gouges, a 30-degree bevel angle works well. However, if you are working with hardwood or if your tool is very small, you may want to use a sharper angle such as 35 degrees.
Once you know the bevel angle that you need, it’s time to start sharpening! First wet your stone with water or oil (depending on which one you’re using). Then hold your bowl gouge at the correct bevel angle and start moving it back and forth across the stone in even strokes.
Remember to keep the strokes even and consistent – don’t press too hard or go too fast! After awhile, you should see a burr forming on the edge of your Gouge . This means that it’s time to flip it over and repeat the process on the other side.
After both sides have beensharpened , it’s time to remove any remaining burrs with a strop . A strop is simply another piece of leather or cloth that has been treated with either abrasive compound .
How to Measure the Angle of a Bowl Gouge
If you’re new to woodturning, or just want to learn how to use a bowl gouge properly, it’s important to know how to measure the angle of the tool. This will ensure that you’re using the right amount of pressure and getting the best results. Here’s how to do it:
1. First, make sure that the point of the bowl gouge is resting on a flat surface.2. Next, use a protractor or angle finder to measure the angle between the flute of the gouge and the flat surface.3. The angle you want to use will depend on what type of cuts you’re making and how deep you need to go.
For general roughing out, a 45-degree angle is usually best. For finer cuts and more delicate work, you may want to use a smaller angle like 30 degrees.4. Once you’ve found the perfect angle for your needs, mark it on the gouge with a permanent marker so you can easily replicate it in future sessions.
Shaping a Bowl Gouge
A bowl gouge is a very versatile tool that can be used to shape a variety of different projects. When using a bowl gouge, it is important to keep the following things in mind:1. The angle of the blade – The angle of the blade will determine how deep you can cut into the wood.
A steeper angle will allow for deeper cuts, while a shallower angle will only allow for shallow cuts.2. The bevel of the blade – The bevel of the blade determines how much material you can remove with each pass. A larger bevel will remove more material, while a smaller bevel will remove less material.
3. The size of the flute – The size of the flute determines how wide your cuts will be. A larger flute will make wider cuts, while a smaller flute will make narrower cuts.4. The speed of the lathe – The speed of the lathe should be matched to the hardness of the wood you are working with.
Softer woods can be cut at higher speeds, while harder woods should be cut at lower speeds.
Conclusion
This blog post covers the topic of what angle to sharpen a bowl gouge to. The author provides helpful tips and information on how to get the best results. By following the author’s advice, you can ensure that your bowl gouge is sharpened correctly and produce great results.