Sanding between polyurethane layers is often asked about by DIYers. Skipping this crucial step may save time, but it has major consequences. Without sanding, the surface won’t be flawless. The second coat will show any faults or dust from the first.
Not sanding polyurethane coatings might cause poor adhesion. Sanding roughens the surface for adhesion. Without roughness, layers may peel or flake, binding poorly. Taking the effort to sand your product will make it look better and last longer.

Have you pondered why some DIY furniture looks good and others doesn’t? Sanding polyurethane layers is essential. If you skip this, your furniture may look rough. We’ll explain why sanding between polyurethane coatings is important and how it can improve furniture appearance.
Checkout From Amazon
Understanding the Role of Sanding in Polyurethane Coats
Table of Contents
Smoothing Surface for Better Adhesion
Important to sand polyurethane layers. A smooth surface helps the next coat stick. A new layer may bubble or peel without sanding. Dust, brush marks, and uneven patches are removed during the sanding of polyurethane. Sanding ensures next-coat consistency.
Improving Adhesion and Appearance
Sanding promotes professional gloss and adherence. Dust and flaws can roughen polyurethane coats without adequate sanding between applications. Even after numerous coats, this may look bad.
- Ensures better adhesion
- Removes imperfections
- promotes a professional-looking finish
Potential Issues with Skipping Sanding Between Coats
Checkout From Amazon
Risk of Poor Adhesion
Without sanding between polyurethane coatings, layers may not stay. Over time, the coating may peel or flake. Like building a tower with loose blocks, it’ll come apart.
Trapping Dust and Debris
No sanding between polyurethane applications seals in dust and bumps. Like painting over a dirty wall, the irregularities stick under the paint and make it impossible to smooth. Skipping sanding might cause polyurethane to peel or bump.
Impact on Final Finish and Texture Without Sanding

Uneven Sheen and Texture
Without sanding between polyurethane layers, the finish may be uneven. It may have sparkly and dull areas. Without sanding, brush mistakes will be more noticeable. To ensure a smooth finish, sand between applications.
Diminished Durability and Longevity
The finish may wear out faster without sanding between polyurethane coatings. The last polyurethane layers can show blemishes and defects without sanding. The finish may become weaker and more susceptible to harm.
In summary, not sanding between polyurethane coatings can make the finish appear worse and last less, making it less durable for daily use.
Sanding Alternatives for a Smooth Polyurethane Finish
Using Fine Steel Wool
The finish may not stick without sanding the polyurethane layers. Smooth the surface using fine steel wool instead of sanding. The new coat sticks without messing up the old one. This makes each coat stick and smooth.
Buffing with Synthetic Abrasive Pad
Instead of sanding, use a specific pad to prepare the surface for polyurethane. This pad softly roughens the previous finish to help the fresh coat stick. Use the right pad to avoid damaging the finish.
Applying Chemical DE glossers
Without sanding, chemical DE glossers prepare surfaces for polyurethane. These products eliminate old finish shininess for new coatings. They help new layers adhere without changing the surface’s feel or look.
Checkout From Amazon
Choosing the Correct Grit for Polyurethane Sanding
Selecting the Right Grit
Use 220 or finer sandpaper between polyurethane layers. Smoother surfaces help subsequent layers stick. Use coarse 120 sandpaper to eliminate defects from raw wood before the first coat.
How to Sand Properly
Be careful when sanding polyurethane. Oversanding can damage and bump the surface. Lack of sanding will ruin layers and finishes. Check workload and stress often. Avoid belt sanding for too long to avoid unevenness.
Timing and Techniques for Applying Multiple Polyurethane Coats
Importance of Allowing Sufficient Drying Time
Following polyurethane application guidelines is crucial. Not letting one coat dry before applying another can cause issues. The new coat may stick unevenly. Dry, it may bubble or wrinkle. Use the product’s suggested between-coat intervals for smoothness.
Applying Thin Coats for Consistent Coverage
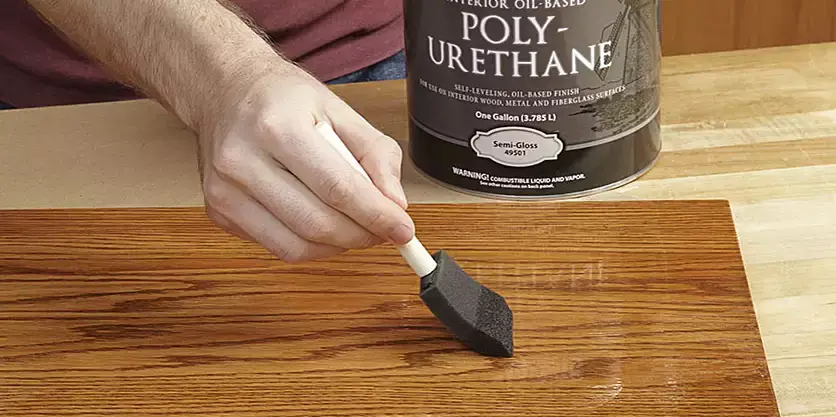
When you put on poly, do it in thin coats instead of trying to do it all at once. This helps stop drips and makes sure the layers stick together well. Use long, smooth strokes to make sure it covers evenly without streaks or patches.
Preparing Surfaces Before Polyurethane Application
Importance of Surface Preparation
Prepare surfaces before applying polyurethane. First, thoroughly clean them to remove dust, debris, and grease. Fill any holes with wood filler and sand smooth. Doing this ensures polyurethane sticks and finishes beautifully. Leaving this step may cause the polyurethane to stick poorly, resulting in lumps and holes.
Let’s talk about air and heat!
Make sure the temperature and airflow are suitable before applying polyurethane. If not, the finish may bubble or dry slowly. If you ignore this, the coatings may not hold together, dry slowly, or appear strange with mistakes.
Checkout From Amazon
Water-Based vs. Oil-Based Polyurethane Finishes

Water-Based vs. Oil-Based Polyurethane Finishes
Smooth wood polyurethane with interlayer sanding. Water-based polyurethane roughens wood grain without sanding but dries faster. Oil-based polyurethane dries slowly but looks hot. Not sanding between treatments makes surfaces uneven. Safety and cleaning are easier with water-based polyurethane.
Tips for Smoothening the Final Coat of Polyurethane
Using Fine-Grit Sandpaper or Abrasive Pads
Without sanding between polyurethane layers, the finish may be uneven. To correct this, lightly sand the last application with fine-grit sandpaper. This removes flaws and smooths the surface for the following layer.
Try abrasive pads instead of sandpaper for water-based polyurethane. These pads work with water to smooth your final coat more evenly.
Applying Multiple Thin Layers
Many thin polyurethane coats are better than one thick one. This lets each layer dry before adding another. Avoids harsh or uneven finishing. Thinner layers prevent bubbles and keep the finish smooth after drying.
Buffing with Polishing Compounds or Wax
To smooth your final polyurethane coat, polish with wax or polishing chemicals after drying. This stage fixes small issues and enhances your project.
For a beautiful, smooth finish, wipe off polishing chemicals or wax residue with a clean towel after buffing.

Final Remarks
Hi there! Sand between polyurethane applications for smooth, professional woodwork. It may save time, but it’s crucial for a good end. Get your sandpaper and sand between applications for a perfect finish. Happy sanding!
Frequently Asked Questions
What is the role of sanding in polyurethane coats?
Sanding between polyurethane layers removes dust, smooths flaws, and improves adherence. It creates a surface for the following layers to bind, giving a professional finish.
What are the potential issues with skipping sanding between coats?
Skipping sanding between applications can result in a rough surface, poor adherence, and a less sophisticated appearance. Dust can also clog the finish, diminishing its smoothness and clarity.
How does skipping sanding with a floor sander impact the final finish and texture?
The polyurethane finish may be rough or uneven without sufficient sanding between layers. Lack of smoothness might impact the coated surface’s appearance and feel.
Are there alternatives for achieving a smooth polyurethane finish without traditional sanding, scuffing?
Yes, using fine steel wool or abrasive pads as an alternative to traditional sandpaper can help achieve a smooth polyurethane finish. These options effectively prepare the surface for subsequent coats while minimizing dust production.
How do I choose the correct grit for polyurethane sanding?
Level and eliminate flaws with coarser grits like 180–220 for initial coatings. For smoother finishes, use 320–400 grits after several applications. Adapt to project needs.
