Baseboard is used to decorate the lower part of the walls of the house. This is where the walls and the floor meet. Using it will make your house look very fancy. Baseboards were previously made of wood, but now you can also buy ones made of PVC. Although the most common and easy to use border is made of wood. Many homeowners often wonder how to nail the baseboard with a hammer to achieve a professional finish.
For nailing baseboards with a hammer, a wooden baseboard is suitable. Otherwise, the hammer can damage the baseboard. Today we are talking about wooden baseboards. It is available in many designs and helps to create an attractive look for your interior walls. Here we will tell you all the tips and tricks that will help you get amazing results from your work.
Main problems:
People face big problems when trying to install baseboards. We found the following to be the main problems when it comes to installing baseboards:
- Can I install baseboards myself?
- What to look for in a baseboard
- How much did it cost to install it?
- What is the correct way to measure it?
- Why a hammer is good for this job
- What tools do you need?
How to paint it
Good news: If you’re wondering about these things too, you’ve come to the right place. We’ll walk you through all the steps, talk about the most important things, and give you extra tips and tricks to take your work to the next level. We’ll help you overcome your biggest problems. The answers are in the steps, which makes it easy to clarify any questions and understand what’s going on.
Steps to Install Baseboard:
Table of Contents
Dividing our entire installation work into three parts, namely Section A, Section B, and Section C, will make the job easier. Section A will list everything you need to do to prepare for installing the baseboard. Section B will list everything you need to do during the installation, and Section C will list everything you need to do after the installation.
Section A
Step 1: Get Ready for Work: Before moving on to the next step, there are a lot of things you need to know about this topic. We are giving you a general idea about this topic.
- What kind of material to use and how much it costs: There are different types of borders on the market. How much it costs depends on how it is designed and what it is made of. For your convenience, we will give you the names and prices of the products. The price of 8 feet of PVC baseboard trim is about $10, while the price of wooden baseboards of the same size and style is about $25 to $35. PVC cap and shoe molding costs about $6 for 4 feet, while wood cap and shoe molding of the same size and style costs about $10 or more. Currently, most homeowners spend between $676 and $1,758. You may have to save some money if you do it yourself.
- Which one is better for you: Often, it depends on your taste and income. Pine wood is the least expensive wood that you can use to decorate your walls. You can also use it for other types of home designs. It can also be painted or stained and does not absorb water. If you do not have any money problems, then you should go for oakwood. It is the most common and is known for making people look rich. Pine wood is not as hard as this wood and it lasts a long time.
- Now you are wondering if you can install baseboards yourself. Yes, that is right. If you follow these steps, you can set up the whole thing yourself. When you do not have the right instructions, any task becomes difficult. So, we will give you the steps one by one. Just do these tasks and enjoy your work.
Step 2. It is necessary to check the condition of the wall: After completing the first step, you need to check the wall. The wall must be dry before applying the border. Nails do not stick well to the embankment wall and the board is slowed down by them. If the embankment wall is broken, then fix them first.
Step 3. It is necessary to choose the right baseboard size: It comes in different sizes. To get the right baseboard size, you need to write down the length and height of the walls of the room. After that, try to match the height with these rules. This is the best way to figure out which size to get.
Measurement guidelines:
| No. | Wall height | Baseboard height |
| 1 | 8 Feet | 3-5 Inches |
| 2 | 9 Feet | 4-6 inches |
| 3 | 10 Feet | 5-7 inches |
| 4 | 12 Feet | 6-8 inches |
| 5 | 14 Feet | 7-9 inches |
If your wall is longer than this chart, you will need to follow the plan to get the correct size.
Step 4. Get the tools you need for the job: Having the right tools will get your job done quickly and well. Using the right tools at the right time will help you avoid many problems and complete your job without any mistakes. To do this, you need to know how to use your tools.
The list of tools:
| 1) Tape measure-25 foot 2) Compass 3) Miter saw 4) Coping Saw 5) Level- 4 foot 6) Circular saw | 7) Chalk line 8) Hammer and Nail Gun 9) Nailset and 1.5-inch nails 10) Wood Putty and Glue 11) Tape and sandpaper 12) Color and brush |
Some additional tools you may buy, such as biscuit joiner, Block plane, etc.
Section B
Step 5: Measure the wall and make a mark on it: First, find the long and short sides of the wall with a tape measure. Then, draw lines on the wall and floor with a pencil or chalk. Give a number for the edge and the wall. This means that adding another wall will not change the boundary.
Step 6: Make sure the floor is level: Place a 4-foot level at the junction between the floor and the wall and check that the floor is level. To do this, find the lowest point on the floor and use a ruler to measure the space between the boards. An old piece of baseboard can be used to fill this.
Step 7: Prepare the corners by cutting the edges of the boards: Now cut the edges with a circular saw. For the baseboards, you will need to cut them to fit the wall. You will need a miter saw to create the corners. Most of the time, the corners of the walls are 90 degrees. To do this, cut each piece at 45κ. We will need to cut the other side for the inside corner.
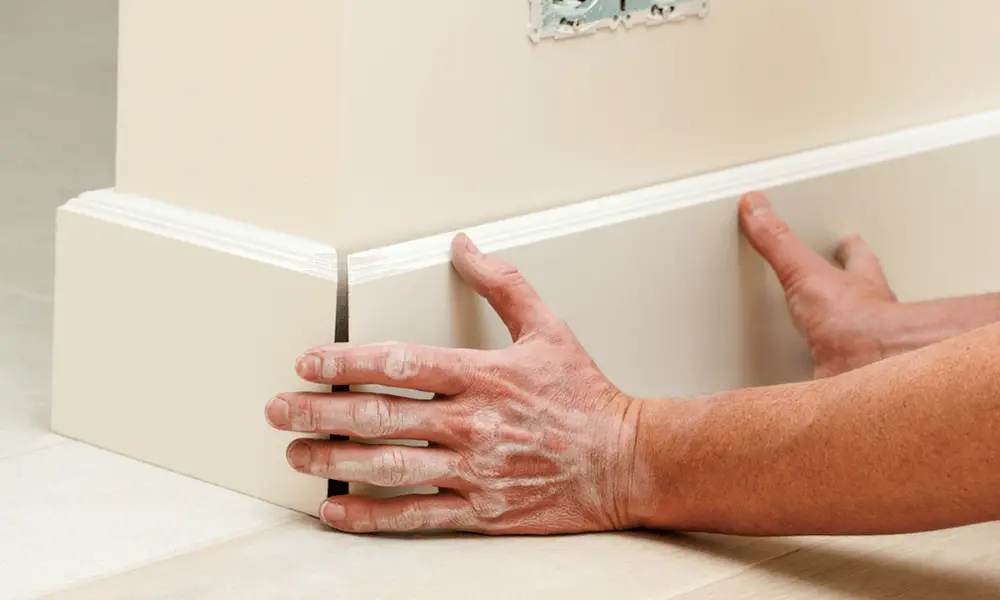
Step 8: Use a hammer to attach the border and molding: Use a nail gun or hammer to attach the right board and frames to the right wall. To attach the board, use 8d finish nails. You will need to know how to use a hammer to nail the board.
- First, decide where to put the nails. Then, nail the board and connect the corners together with a hammer or nail gun. Be sure to nail both sides of the board, not just the middle.
- Next, you need to do one more thing to get better results. Hit the nail head again with the nail set. The nail head will be below the top of the board.
Section C
Step 9: Fill in the nail heads: To hide the nail heads, use wood glue on the nail heads. This will give you a smooth look. You can use a few different types of wood glue to fill in the nail heads.
Step 10: Sand and glue everything together to make sure everything is in place: Now that the baseboards and frames are in place, it’s time to sand. Before sanding the paint, let the nail filler dry and level the surface with the baseboards so that no one can tell where the nails are. Next, apply the cap molding and shoe moldings with glue.
Step 12: Tape the walls and floor: Finally, clean the boards with a cloth and tape the walls and floor. This will make painting easier and will protect the walls and floor.
Step 13: Paint the baseboards, cap moldings, and shoe moldings: The last thing you need to do is choose your best color for the baseboards. Kneel on a good pad and carefully paint the baseboards and trim. For the best look, try applying two coats of paint.
How to install a baseboard Using A Hammer and Nails
Can you hammer in nails for a trim?
Yes, you can install trim with a brad nailer. A brad nailer is a machine that drives brads, which are small nails, into thin pieces of wood. It can be used for many things, such as installing panels, trim, or molding.
When you use a brad nailer, it’s easier to control how deep the nails go and where they go. This means you’re less likely to damage the surrounding area when trimming the nail. Also, brads are less likely to break when they push through the wood because they’re smaller than full-size nails.
At what angle do you miter baseboard corners?
The most common and easiest type of corner when installing baseboards is a mitered corner. To create a mitered corner, both pieces of baseboard need to be cut at a 45-degree angle.
After you’ve cut the 45-degree angle, you’ll need to fit the two pieces of baseboard together like a jigsaw puzzle. Check to make sure the bevels on each baseboard are pointing in the same direction. This is important for attaching them together. To attach to the wall, use wood glue and finish nails to make sure they fit together properly.
Should you glue the baseboard before nailing?
You should first glue the borders in place, then nail them in place. This will help hide the nail holes and make your baseboard look nice and professional.
When you nail the borders, the nails should always be at a 45-degree angle. This will help keep the baseboard on the wall and prevent it from loosening. Also, make sure you drive the nails all the way in so that they are flush with the baseboard.
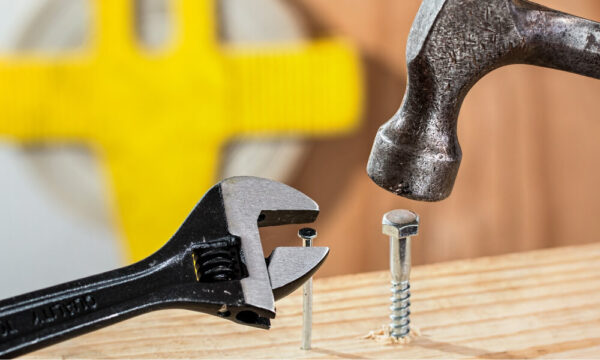
Choosing the Right Nails for Your Baseboard Project
When choosing nails for installing baseboards, you should consider the following:
- Nail Type: Finishing nails are best because they have a small head that is easy to hide and give the nail a smooth appearance.
- Length: Choose nails that are 1.5 to 2 inches long. This length ensures that it will hold securely in both floor and wall studs.
- Material: Choose galvanized or stainless steel nails for nails that won’t rust, especially in areas with a lot of moisture.
- Gauge: These nails are best for most baseboard jobs because they are strong and easy to use.
- Nail Size Match: Make sure the nail size is the same as the width of the baseboard; thicker boards may require longer or larger gauge nails.
- Installation Method: If you are going to use a nail gun, make sure it works with the type of nail you plan to use so that the job gets done smoothly.
By considering these factors, you can choose the best nails for installing baseboards that are strong and also look good.
In Conclusion:
People have been decorating their homes with borders for a long time. After doing this, the house will look different. For those who want to install baseboards themselves, we have listed all the steps. I hope these steps will help them do a good job in their work.

- WoodRiver Plane reviews | Best Wood Hand Planer In 2024 - 19/10/2024
- The Best Tung Oil: The Ultimate Guide in 2024 - 19/10/2024
- 12 Inch Wood Planer: Smooth Your Woodworking Projects Like a Pro - 01/10/2023